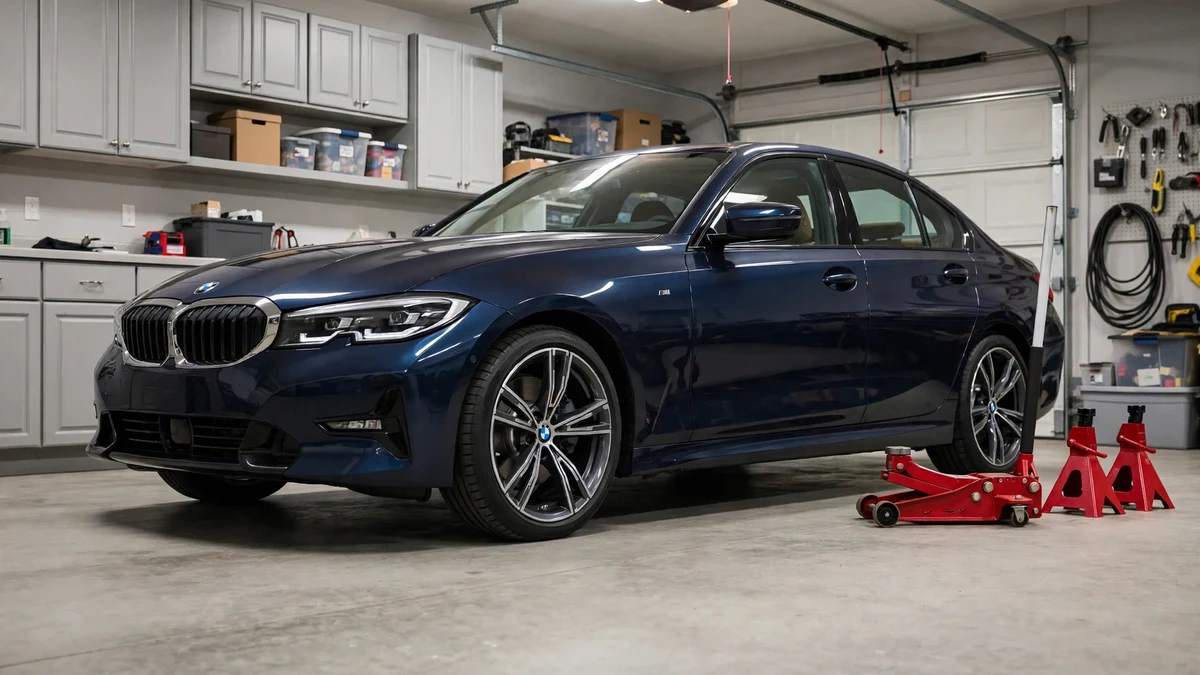
How to Jack Up a BMW 3 Series Safely (E90, F30, G20)
⚠ SAFETY FIRST — READ THIS
Never work under a car supported only by a floor jack. A jack lifts; jack stands hold. Always lower the car onto rated stands, chock the wheels that stay on the ground, work on flat level pavement, and give the car a firm shove-test before any part of you goes underneath. Every jack point below was verified per generation — but if you cannot positively identify a point on your car, stop and lift one corner at a time from the side pads instead of guessing.
Short answer
Learning how to jack up a BMW 3 Series safely comes down to three rules: lift from the center of the front subframe, lift the rear from the differential housing (never its cover plate), and set the car down onto jack stands at the four rectangular side pads. Use rubber pad adapters so you do not crush the plastic jack pads, chock the wheels on the ground, and torque the wheel bolts to 120 Nm (about 88–89 ft-lb) when the wheel goes back on. The tables and locator below give the exact point for every generation — E90, F30, and G20.
- Jack points by generation (table)
- What you need (tools checklist)
- Jack-point locator: pick your car
- Step-by-step safe procedure
- What the equipment costs
- Lug bolt torque spec
- Frequently asked questions
Most 3 Series jobs that get you under the car — an oil change, a brake pad swap, an exhaust inspection — start the same way: getting the car in the air without bending anything. BMW makes this easier than most brands, because every E90, F30, and G20 3 Series has two central jacking points that let you lift a whole axle at once, plus four rectangular side pads for the jack stands. The catch is that the central points are partly hidden behind undertrays and plastic, and the one piece of plastic that looks like a jack point (the oil-drain flap on the F30) absolutely is not. This guide walks through every point, generation by generation, with the verification notes that keep you out of trouble. It pairs naturally with our brake pad replacement guide and the 3 Series maintenance schedule, both of which assume you can get the car safely off the ground.
Jack points by generation: E90, F30, G20
The table below is the whole cheat sheet: the front lifts from the center of the front subframe, the rear lifts from the differential housing, and the jack stands live at the four rectangular side pads. What changes per generation is what you can see — the E90 wears its front point openly, while the F30 and G20 hide theirs behind undertrays.
| Generation | Front central jack point | Rear central jack point | Jack stand placement | Notes |
|---|---|---|---|---|
| E90 (2006–2013) | Front subframe crossmember — obvious reinforced metal square between the front wheels | Differential housing — saddle centered under the diff body, never on the rear cover plate | The four rectangular side pads (behind front wheels, ahead of rear wheels) | The easiest generation to jack; the front point is fully exposed |
| F30 (2012–2019) | Front subframe center, behind the plastic undertray — find the large circular pad molded into the undertray, a few inches toward the bumper from the oil-drain trap door | Differential housing — saddle centered under the diff body, never on the rear cover plate | The four rectangular side pads (behind front wheels, ahead of rear wheels) | Do NOT jack on the oil-drain trap door itself — it is a thin plastic flap and will cave in |
| G20 (2019–present) | Front crossmember/subframe center, behind the underbelly panel — slide the jack in centered between the front wheels and feel for the solid structural beam | Differential housing — saddle centered under the diff body; on M340i keep clear of the finned rear cover | The four rectangular side pads (behind front wheels, ahead of rear wheels) | Lowest front clearance of the three — a low-profile jack helps; xDrive models: same points apply |
Front point: what you are actually lifting from
On all three generations the front central point is a heavy steel beam that is part of the front subframe assembly — the structure the engine and front suspension bolt to. It sits roughly midway between the front wheels, just behind the front bumper line. On the E90 it is an exposed metal square you can see plainly once you are low enough to look. On the F30, BMW covered it with a felt-like plastic undertray; owners who have removed the tray confirm the indentation nearest the oil-drain door is the steel beam, and from underneath you can identify it by the large circular pad molded into the plastic. On the G20 the underbelly panel hides it almost completely, so the reliable method is to roll a low-profile jack in centered between the front wheels until the saddle meets solid steel — if it meets anything that gives, flexes, or sounds hollow, you are in the wrong spot.
Three things that are not front jack points: the oil pan (it will crack or dent), the oil-drain trap door on the F30 (thin plastic that will cave in and has nearly tipped cars off jacks), and any steering or suspension arm. When in doubt on the F30 or G20, use the safe fallback: lift one corner at a time from the rectangular side pads with a pad adapter, and set a stand under the adjacent pad. Slower, but zero risk of picking the wrong beam.
Rear point: the differential, with one caveat
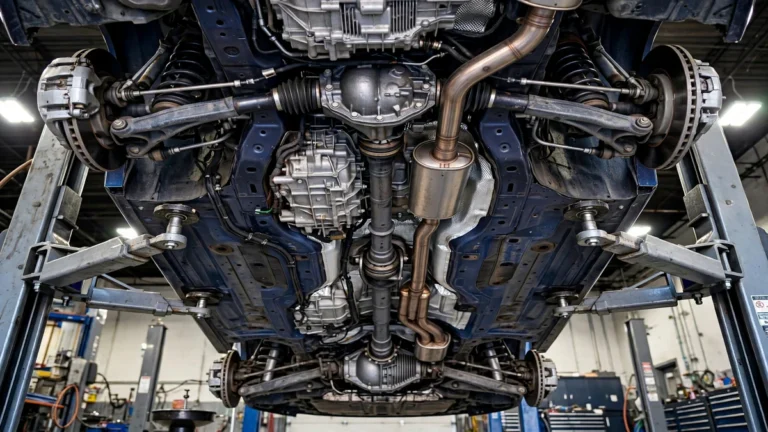
The rear central point on the E90, F30, and G20 is the rear differential housing — the cast unit the rear axles emerge from. Position the jack saddle directly beneath the body of the differential, squarely in the middle. The critical caveat: do not load the rear cover plate — the bolted-on plate at the back of the diff. It is not structural; jacking on it can crack the cover or break its seal and start a leak. On the G20 M340i the cover carries cooling fins, which makes the wrong spot look even more like a target — aim in front of the fins, under the main casting.
A word on the differential debate: some owners of much older BMWs avoid jacking on any differential out of habit. For the E90, F30, and G20, the differential housing is the established rear central lifting point. Use a rubber puck on the saddle, keep it centered on the casting, and you are lifting from one of the strongest components under the car.
The four side pads and the pinch-weld adapters
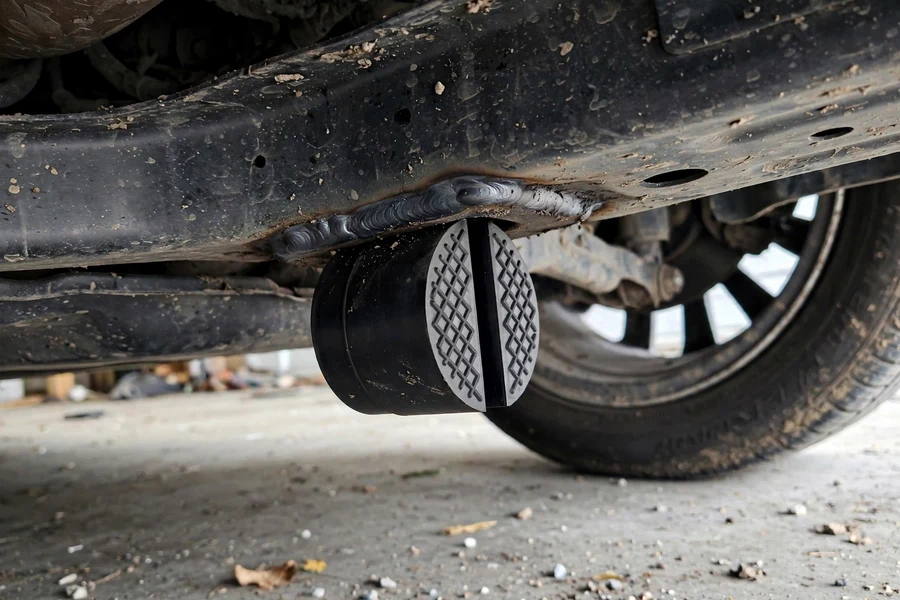
Along each rocker panel, just behind the front wheel and just ahead of the rear wheel, sits a rectangular pad — hard plastic or rubber on most cars. These are BMW’s designated side jacking points, and they are where your jack stands go. The catch: a bare metal saddle will chew the plastic pads up. The fix is the pad adapter — a rubber or dense polyurethane puck, usually with a slot or raised peg, that seats into the rectangular recess and spreads the load. Keep a set of four; they cost little and turn the side pads into a proper lifting interface. A hockey puck or hardwood block works in a pinch, but the molded adapters seat positively, which matters as the car rises.
Note that these are rectangular pads, not the exposed pinch welds you see on many Japanese and American cars. Do not jack on the bare pinch weld seam elsewhere along the rocker — it will fold. Use the pads.
What you need before you start
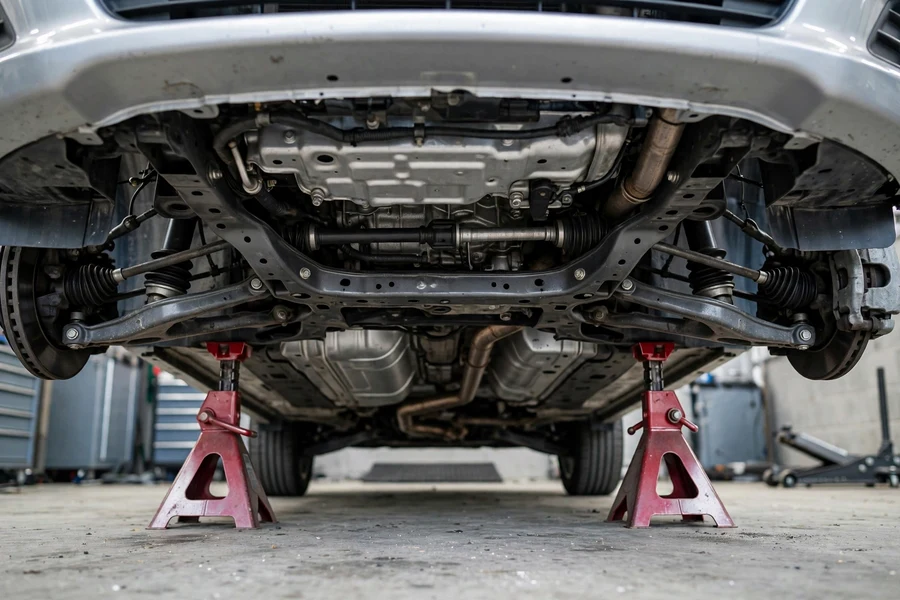
Jacking a 3 Series is not a skill problem — it is an equipment problem. The right gear removes nearly all the risk: here is the complete checklist and the minimum quality bar that matters.
| Tool | Why you need it | Minimum spec |
|---|---|---|
| Floor jack | Lifting the car onto the stands | 2-ton minimum (3-ton preferred); low-profile saddle for F30/G20 front clearance |
| Jack stands (pair) | Actually holding the car — the jack never does this job | 3-ton rated pair, with a locking pawl or pin; never improvised supports |
| Pad adapters | Protecting the four rectangular side jack pads | Rubber or polyurethane BMW-style adapters with slot or peg; set of four |
| Wheel chocks | Stopping the car rolling on its remaining wheels | Two solid rubber chocks, one for each side of a grounded wheel |
| Torque wrench | Reinstalling wheels to the correct 120 Nm | 1/2-inch drive, range covering at least 60–150 Nm; click-type is fine |
| Lug wrench / breaker bar + 17 mm socket | Breaking wheel bolts loose before lifting | 17 mm is the standard 3 Series wheel-bolt socket size |
| Rubber jack puck | Keeping the saddle from slipping on the subframe and diff | Flat, dense rubber disc sized to your jack saddle |
A note on jack stands, because this is where people rationalize: bricks, cinder blocks, wood cribbing, and stacked lumber are not jack stands. Cinder blocks in particular fail explosively under point loads. A proper rated pair costs less than a single tank of premium and lasts decades — there is no version of this job where improvised supports are acceptable. The same goes for the jack itself: the little scissor jack some BMWs carry (many 3 Series with run-flats do not carry one at all) is a roadside-emergency tool, not a maintenance tool. It lifts one corner just far enough to change a wheel, and you should still keep yourself out from under the car while it is up.
Jack-point locator: pick your car and end
Select your generation and which end of the car you are lifting. The locator returns the exact jack point, where the stands go, and the one warning that matters most for that combination.
Find your jack point
Jack point:
Jack stands:
Watch out:
Step-by-step: jacking up your 3 Series the safe way
Difficulty: easy — but safety-critical. The mechanical skill involved is minimal; the discipline is everything. Rushing any single step below is how cars end up on their rockers or, worse, on people. Budget 20–30 unhurried minutes your first time.
Step 1 — Preparation
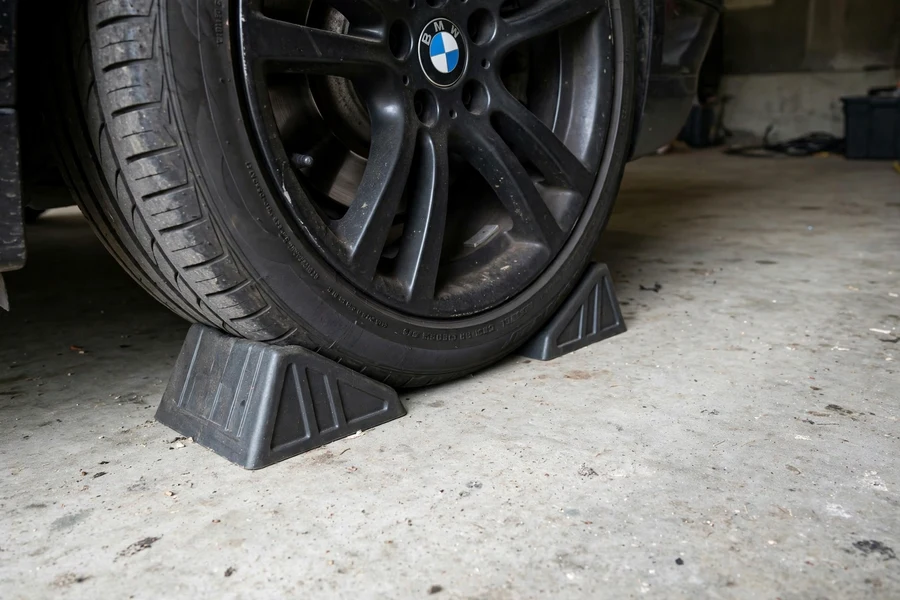
Park on flat, level, solid pavement — a garage floor or driveway, never grass, gravel, or a slope. Hot asphalt is a real hazard in summer: jack wheels can sink and dig in, which is how a car walks off a saddle. Put the transmission in Park (automatic) or in gear (manual), engage the parking brake firmly, and switch the engine off. Chock both sides of one wheel that will stay on the ground — lifting the front, chock a rear wheel; lifting the rear, chock a front wheel. Stage your jack, stands, adapters, and torque wrench within reach so you never hunt for gear mid-lift. If you are removing wheels, break the bolts loose now, while the tire is on the ground: half a turn each with the breaker bar, in a star pattern.
Step 2 — Lifting the front
Fit a rubber puck on the jack saddle. Roll the jack in from the front, centered between the front wheels, and raise the saddle to meet the front subframe beam — the point you identified in the locator above. On the E90 you will see the metal square; on the F30 aim for the circular pad on the undertray; on the G20 feel for the solid beam behind the panel. Pause with the saddle just touching and confirm: it should meet broad, flat, immovable steel. If the contact feels narrow, angled, or plasticky, lower off and reposition. Pump slowly and watch the car, not the jack — you are looking for the whole front end rising evenly with no creaking, shifting, or sideways creep of the jack. Lift just high enough to slide the stands under the front side pads with the adapters in place — extra height adds nothing but instability.
Low-clearance note: the G20’s front lip and the M Sport bumpers on any generation can be too low for a standard jack to reach the center beam. If the saddle will not clear the bumper, drive the front wheels onto short ramps or stacked 2×8 boards first — that buys the couple of inches a low-profile jack needs. Never yank the bumper upward or jack on it.
Step 3 — Lifting the rear
The rear is the simpler end. With the front back on the ground (or already on stands), chock the front wheels, roll the jack in from behind the car, and center the saddle — with a rubber puck — under the body of the differential housing. Double-check you are clear of the bolted rear cover plate and, on the M340i, clear of the cooling fins. Lift slowly and evenly until the rear side pads are high enough for the stands. The same discipline applies: watch the car rise, not the jack handle, and stop at the minimum height that gets the stands in.
If you need all four corners in the air — for a full underbody inspection or a four-wheel brake job like the one in our brake pad guide — the order matters. Lift the rear first and set the rear stands, then lift the front and set the front stands. Lifting the rear first keeps the steering-axle weight planted longest and leaves the parking-brake wheels grounded during the first lift. With all four stands set, lower the jack completely and give the car a firm lateral shove at each corner before anything else happens.
Step 4 — Placing the jack stands
This is the step the entire procedure exists for. Seat a pad adapter into each rectangular side pad, position a stand squarely under it, and raise the stand to meet the pad — then lower the jack slowly so the car’s weight transfers onto the stands, not the jack. The stand’s saddle should contact the pad through the adapter with the car’s weight fully on it; the locking pawl or pin must be fully engaged, and both stands on an axle should be at the same height setting. Once the weight is on the stands, leave the jack in place under the central point as a redundant backup, lightly loaded — it costs nothing and buys you a second chance.
Where stands must never go: under suspension control arms (they pivot and can slip), under the floor pan or fuel tank (it will dent), under the differential itself (a lifting point, not a stand point), or at different heights side to side. And the rule that bears repeating because it is the one that kills: never put any part of your body under a car that is supported only by a jack. Stands, shove-tested, every time, no exceptions for “just a quick look.”
Step 5 — Lowering the car
Lowering is the lift in reverse, with the same patience. Remove tools, rags, and your hands from under the car. Raise the jack just enough to take the weight off the stands, remove the stands and adapters, then lower the jack slowly and smoothly — a fast drop slams the suspension and can shift the car. Once the tires are fully on the ground, remove the chocks last, and only then consider the car safe to sit in or start.
Step 6 — Removing and reinstalling a wheel
With the car on stands and the bolts already broken loose, spin them out by hand and lift the wheel straight off the hub. BMW uses wheel bolts rather than studs and nuts, so there is nothing holding the wheel once the last bolt is out — support its weight as it comes free. Before reinstalling, wipe the hub mating face and the wheel’s center bore clean; corrosion here is what welds wheels to hubs. Hang the wheel on the hub, thread all five bolts in by hand until snug — cross-threading a bolt by gunning it in is an expensive mistake — then lower the car until the tire just kisses the ground so it cannot spin.
Now torque in a star (crisscross) pattern in two passes: first to roughly half the final spec to seat the wheel evenly, then to the full 120 Nm (about 88–89 ft-lb). The two-pass star pattern is what keeps the wheel sitting flat against the hub; torquing around in a circle can leave it cocked. After the car is fully on the ground, re-check each bolt once more at full torque. As a final habit, re-check the torque after 50–100 miles of driving — bolts can settle as the wheel seats. If you removed a wheel with a TPMS sensor, remember the system may need a reset drive; our TPMS reset guide covers the procedure for every generation.
What the equipment costs
You do not need professional-grade gear, but you do need real gear. Typical price bands for serviceable home-garage equipment — ranges only, since prices move.
| Equipment | Typical cost band | Notes |
|---|---|---|
| Floor jack (2–3 ton, low-profile) | $100–$250 | Low-profile matters for F30/G20 front clearance; 3-ton gives a comfort margin |
| Jack stands (rated pair) | $40–$120 | 3-ton pair with locking pawl or pin; the single most important purchase here |
| Pad adapters (set of four) | $10–$25 | Rubber or polyurethane BMW-style; protects all four side pads |
| Torque wrench (1/2-in drive) | $40–$100 | Click-type covering at least 60–150 Nm; unwind it to zero after use |
| Wheel chocks (pair) | $15–$40 | Solid rubber; sized for passenger-car tires |
All in, a complete safe setup lands roughly between $200 and $500 — about the price of a single dealer visit, and it pays for itself the first time you do your own oil change or brake job. The stands and chocks are buy-once items; the torque wrench lasts decades if you store it unwound.
Lug bolt torque spec
BMW’s wheel-bolt torque is consistent across the 3 Series generations. The table below gives the verified figure — use it, not the folk wisdom of “tighten until it feels right,” which is how warped rotors and snapped bolts happen.
| Application | Torque spec | Source / confidence |
|---|---|---|
| Wheel bolts, BMW 3 Series (E90 / F30 / G20), standard wheels | 120 Nm ≈ 88–89 ft-lb | BMW technical data (TIS): 120 Nm ± 10 Nm — verified, high confidence |
Two details worth knowing: the ±10 Nm tolerance means anything from 110 to 130 Nm is within BMW’s engineering band, but 120 Nm dead-center is the number to set on your wrench. And this spec assumes clean, dry threads — never oil or anti-seize wheel bolts unless a BMW service procedure specifically calls for it, because lubrication changes the clamping force a given torque produces.
Frequently asked questions
Can I jack up my BMW 3 Series on the differential?
Yes — for the E90, F30, and G20, the rear differential housing is the established rear central jacking point. Center the jack saddle, with a rubber puck, directly under the body of the differential, and keep it off the bolted rear cover plate (and off the cooling fins on the M340i’s cover). The cover is not structural. And remember the diff is a lifting point, not a stand point — the car rests on the side pads once it is up.
Do I really need the BMW jack pad adapters?
Strongly recommended. The four side jacking pads are hard plastic, and a bare steel jack or stand saddle chews them up over time — damaged pads then seat poorly, which is its own safety issue. A set of rubber or polyurethane adapters with a slot or peg seats positively into the rectangular recess and costs less than a pizza. A hockey puck or hardwood block works as a field expedient, but the molded adapters are the right tool.
Where do the jack stands go on a 3 Series?
Under the four rectangular side jack pads — just behind the front wheels and just ahead of the rear wheels — with pad adapters in place. That is the factory-designated stand location on every generation. Do not place stands under suspension arms, the floor pan, the fuel tank, or the differential. Set both stands on an axle at the same height, lower the car fully onto them, engage the locks, and shove-test the car before going underneath.
What is the lug bolt torque for a BMW 3 Series?
120 Nm (about 88–89 ft-lb), per BMW technical data (120 Nm ± 10 Nm), for E90, F30, and G20 with standard wheels. Tighten in a star pattern in two passes — roughly half torque first, then full — and re-check after 50–100 miles of driving. Use clean, dry threads; do not lubricate wheel bolts.
Can I work under the car if it is only on a floor jack?
No. Never. A floor jack is a lifting device, not a support device — its hydraulics can fail suddenly and without warning, and the car can also shift off the saddle. Every minute spent under the car must be on rated jack stands, locks engaged, wheels chocked, on level pavement, with the jack left in place as a backup. This is the single most important rule in this entire guide.
Once you can get the car in the air confidently, a whole layer of 3 Series ownership opens up — from the routine items in the maintenance schedule to bigger jobs like the brake pad replacement walkthrough. Take your time the first few lifts; the procedure gets quick, but the checklist should never get casual.