BMW O2 Sensor Codes P0030-P0167: What They Mean
Short answer: BMW 3 Series O2 sensor replacement starts with decoding the fault code, not buying parts. An inline-six 3 Series has four sensors — bank 1 and bank 2, each pre-cat (fuel trim) and post-cat (cat monitoring) — while four-cylinder cars have two. Heater codes like P0030 or P0056 name the exact sensor to replace; a single sensor costs roughly $60–$120 DIY and $250–$600 at a shop, and the real difficulty is almost always a seized sensor, not the electrical work.
A bad oxygen sensor is one of the most common reasons a BMW 3 Series lights its check engine light, wastes fuel, and fails an emissions test — and one of the most misdiagnosed. Owners replace the wrong sensor, replace all four when one failed, or throw a sensor at a code caused by wiring or an exhaust leak. This guide covers diagnosis to done: what each sensor does, where it sits, which sensor each fault code names, the seized-sensor reality, honest OEM vs aftermarket advice, cost bands, and the post-repair drive cycle.
What your BMW 3 Series O2 sensors actually do
Your 3 Series carries at least two oxygen (lambda) sensors threaded into the exhaust stream, with two completely different jobs. The upstream sensors — sensor 1, before the catalytic converter — measure leftover oxygen in the exhaust and feed it back to the engine computer several times per second. The computer uses it to trim fuel injection and hold the ideal air-fuel ratio (lambda = 1), where the catalytic converter works best. Without a working upstream sensor, the car falls back to a fixed “open loop” fuel map: it runs, but richer, rougher, and thirstier.
The downstream sensors — sensor 2, mounted after the catalytic converter — do almost nothing for fueling. They act as referee, comparing oxygen levels before and after the cat and reporting whether the converter is still converting; when the two signals look too similar, the car sets P0420 or P0430. That is why a downstream code rarely changes how the car drives, while an upstream code often does. Bosch, which developed the lambda sensor, describes exactly this split: upstream as the control sensor for the mixture, downstream as the diagnostic sensor for the catalyst.
One more thing to know before you touch a wrench: every one of these sensors has a built-in heater element. A lambda sensor only reads accurately when very hot, and the heater gets it there within seconds of a cold start so the car can enter closed-loop fueling quickly. A failed heater is one of the most common O2 sensor failures on a BMW — which is why the P0030/P0036/P0050/P0056 family of codes exists — and the heater cannot be repaired. The code means that sensor assembly needs replacing.
How many sensors your 3 Series has — and where they sit
Sensor count follows cylinder count. Every inline-six BMW 3 Series from the OBD-II era onward runs four oxygen sensors: one pre-cat and one post-cat for each bank of three cylinders. Four-cylinder cars (N20/N26, B46/B48) run two sensors — bank 1 only, upstream and downstream. On six-cylinder cars, bank 1 serves cylinders 1–3 at the front of the engine and bank 2 serves cylinders 4–6 toward the firewall. There is no left bank and right bank on an inline engine — the most common point of confusion for first-timers.
| Engine family | Example 3 Series | Sensors | Layout |
|---|---|---|---|
| M52 / M54 / M56 | E46 325i, 330i (1999–2006) | 4 | Bank 1 + bank 2, pre-cat and post-cat |
| N52 / N54 / N55 | E90/E92 328i, 335i (2006–2013) | 4 | Bank 1 + bank 2, pre-cat and post-cat |
| N20 / N26 (4-cyl) | F30 328i (2012–2016) | 2 | Bank 1 only: one pre-cat, one post-cat |
| B58 (6-cyl) / B46, B48 (4-cyl) | F30 340i, G20 330i, G20 M340i | 4 on sixes, 2 on fours | Same bank logic; verify by code |
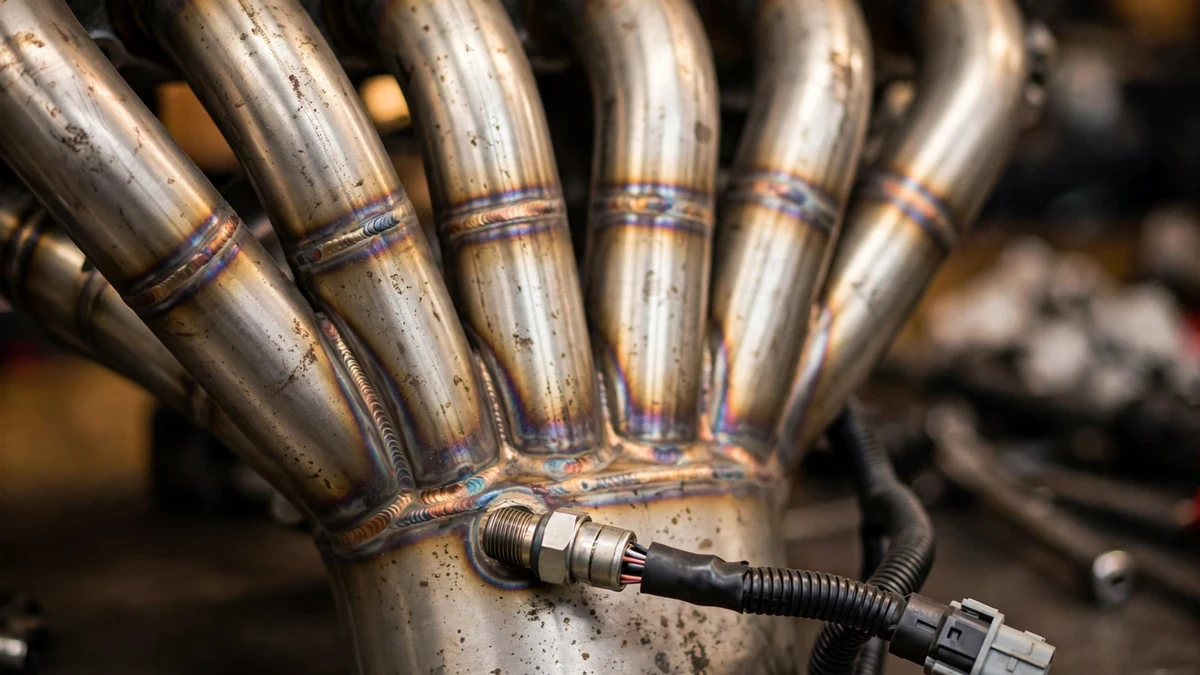
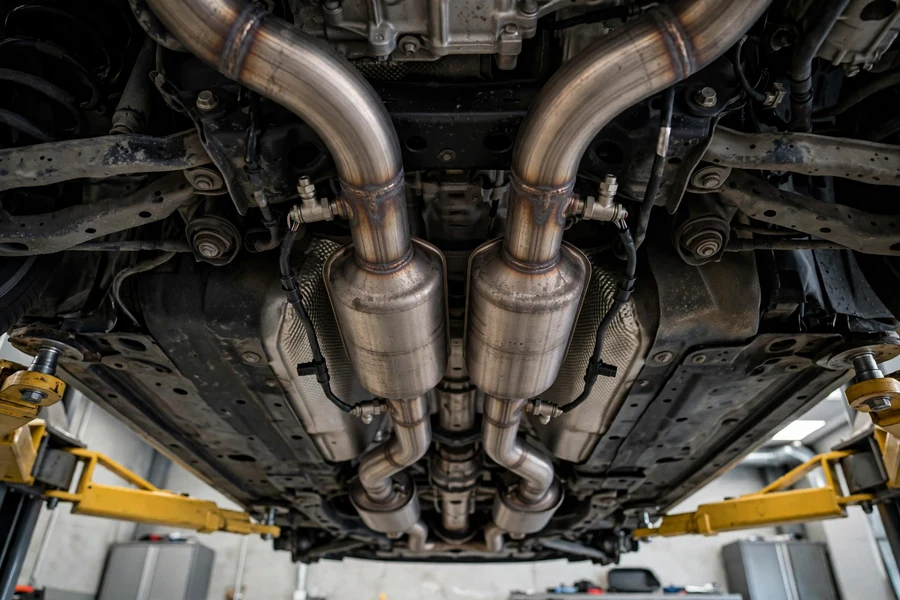
On most six-cylinder 3 Series, the two pre-cat sensors screw into the exhaust manifolds or downpipes and are reachable from above, on the passenger side of the engine bay — often under the narrow engine cover where their connectors live. The two post-cat sensors live underneath the car, threaded into the mid-pipe after each catalytic converter. Four-cylinder cars put both sensors in a single exhaust path, so bank 2 codes never occur on them; if a scan tool shows one on a four-cylinder 328i, suspect the tool’s interpretation first.
Bank 1, bank 2, sensor 1, sensor 2 — decoded
Fault codes name sensors in a rigid format: bank is which group of cylinders, sensor is which side of the catalytic converter. Sensor 1 is always upstream; sensor 2 always downstream. Bank 1 always contains cylinder 1 — the front-most cylinder on every BMW inline-six:
| Code position | Physical location | Job |
|---|---|---|
| Bank 1, sensor 1 | Front exhaust manifold, cylinders 1–3, before the cat | Fuel trim for cylinders 1–3 |
| Bank 1, sensor 2 | Underbody mid-pipe after the bank 1 cat | Monitors bank 1 cat efficiency |
| Bank 2, sensor 1 | Rear exhaust manifold, cylinders 4–6, before the cat | Fuel trim for cylinders 4–6 |
| Bank 2, sensor 2 | Underbody mid-pipe after the bank 2 cat | Monitors bank 2 cat efficiency |
One practical warning from the owner community: on many six-cylinder BMWs, the bank 1 and bank 2 sensors are not interchangeable — harness lengths and sometimes connectors differ. Order by VIN or by exact bank/sensor position, not by a generic “fits 3 Series” listing. The wrong cable length means the connector will not reach, a frustrating discovery with the car already on jack stands.
Symptoms of a failing O2 sensor
Oxygen sensors die slowly. The element gets contaminated or the response gets lazy long before outright failure, so many owners notice fuel economy slipping for months before any code appears. Upstream failures change how the car runs; downstream failures mostly just light the check engine light.
| Symptom | More likely | Why it happens |
|---|---|---|
| Check engine light, no driveability change | Downstream (sensor 2) or heater failure | Heater and cat-monitoring faults rarely affect fueling |
| Noticeably worse fuel economy | Upstream (sensor 1) | Drifting readings make the ECU add fuel to be safe |
| Rough idle or slight hesitation | Upstream (sensor 1) | Slow sensor response confuses fuel trim corrections |
| Rotten-egg (sulfur) smell from exhaust | Upstream (sensor 1) | Chronic rich running overloads the converter |
| Failed emissions / smog test | Either | Any O2 fault is an automatic failure |
| Code returns immediately after a cold start | Heater element failure | The heater circuit is tested within seconds of startup |
| Sluggish performance, black exhaust tips | Upstream (sensor 1) | A “lazy” sensor keeps the mixture rich under load |
Two honest caveats. A lazy upstream sensor can degrade fuel economy by a double-digit percentage without ever setting a code, because its readings stay inside the range the computer accepts. And these symptoms overlap with vacuum leaks, failing ignition coils, and VANOS issues — do not buy a sensor on symptoms alone; confirm with a scan tool. Our guide to the most common check engine light causes on the 3 Series is a good cross-check before you commit to parts.
Fault codes: which sensor the code is pointing at
Generic OBD-II codes for oxygen sensors follow a strict pattern: heater circuit codes come in one family, signal circuit codes in another, and the last digits name the bank and sensor. The mappings below are the standard definitions used by every scan tool. BMW also stores its own shadow codes (in the 2Cxx family) that a BMW-capable scanner can translate, but the P-codes are the universal reference.
| Heater code | Target sensor | Physical location |
|---|---|---|
| P0030 | Bank 1, sensor 1 | Front manifold, pre-cat |
| P0036 | Bank 1, sensor 2 | Mid-pipe, post-cat, front bank |
| P0050 | Bank 2, sensor 1 | Rear manifold, pre-cat |
| P0056 | Bank 2, sensor 2 | Mid-pipe, post-cat, rear bank |
| Signal code range | Target sensor | What each code means |
|---|---|---|
| P0130 – P0135 | Bank 1, sensor 1 | Circuit fault, low voltage, high voltage, slow response, no activity, heater fault |
| P0136 – P0141 | Bank 1, sensor 2 | Same six faults, downstream |
| P0150 – P0155 | Bank 2, sensor 1 | Same six faults, rear bank upstream |
| P0156 – P0161 | Bank 2, sensor 2 | Same six faults, rear bank downstream |
| P0162 – P0167 | Bank 2, sensor 3 | Does not apply to BMW inline-sixes — there is no third sensor per bank |
| P0420 / P0430 | Catalyst, bank 1 / bank 2 | Converter efficiency below threshold — often the cat itself, not the sensor |
Read the pattern: in each group of six, the fault type repeats in the same order — circuit malfunction, low voltage, high voltage, slow response, no activity, then heater circuit. So P0133 is a slow-responding upstream sensor on bank 1. Heater codes (P0030, P0036, P0050, P0056) are the clearest “replace the sensor” codes: the heater is tested electrically at every cold start, so a repeat heater code almost always means the element inside that specific sensor has failed. Signal codes are less certain — damaged wiring, a loose connector, or an exhaust leak near the sensor can set them too.
P0420/P0430 need a word of caution. They are catalyst efficiency codes, detected by the downstream sensor, but they usually indict the catalytic converter rather than the sensor reporting on it — replacing the downstream sensor rarely fixes them. Rule out misfires first: a new converter behind an engine that still misfires is money burned twice. Our drivetrain malfunction guide covers that check.
Which sensor is it? Code and symptom picker
Select your fault code or your main symptom — the picker names the sensor, where it lives, and how hard the swap is.
O2 sensor locator — pick a code or a symptom.
Your result will appear here.
Diagnose before you buy: a code is not a diagnosis
An oxygen sensor code tells you which sensor is unhappy, not why. Work through these checks before ordering parts — every one is cheaper than a sensor you did not need:
- Inspect the wiring and connector. O2 harnesses run close to hot exhaust parts. Melted insulation, chafed wires, or a contaminated connector will set heater and circuit codes that look exactly like a dead sensor. On many N52/N54 cars the pre-cat connectors hide under the narrow engine cover — pop it off and look.
- Check the fuse. Heater circuits are fused. A blown fuse sets heater codes on multiple sensors at once — P0030 and P0050 together points at the fuse and shared wiring, not two simultaneous sensor deaths.
- Look for exhaust leaks. A leak at the manifold or before the upstream sensor lets outside air into the exhaust, which reads as lean and can set low-voltage or slow-response codes on a perfectly good sensor.
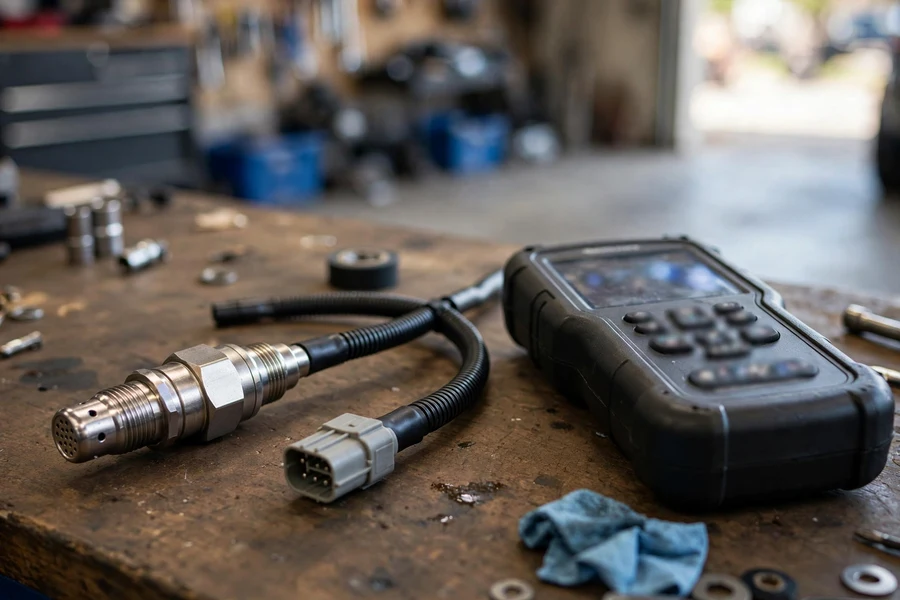
- Watch live data. A BMW-capable OBD2 scanner shows upstream sensor response in real time. A healthy upstream sensor switches rapidly; a lazy one drifts or flatlines — the best test for a sensor that has degraded without setting a hard code.
- Do not chase P0171/P0174 with O2 sensors. Lean codes on both banks usually mean unmetered air — intake leaks, crankcase ventilation issues — not bad sensors. Replacing O2 sensors for lean codes is one of the most common wasted repairs on these cars.
If the wiring is intact, the fuse is good, there are no leaks, and live data shows a flat or lazy sensor — or you have a repeat heater code — buy the part. Replace only the sensor the code names; forum lore says to replace all four at once, but the sensors are independent. The one reasonable exception is doing both upstream sensors as a pair on a very high-mileage car, since the labor overlaps.
The seized-sensor reality: what the job is actually like
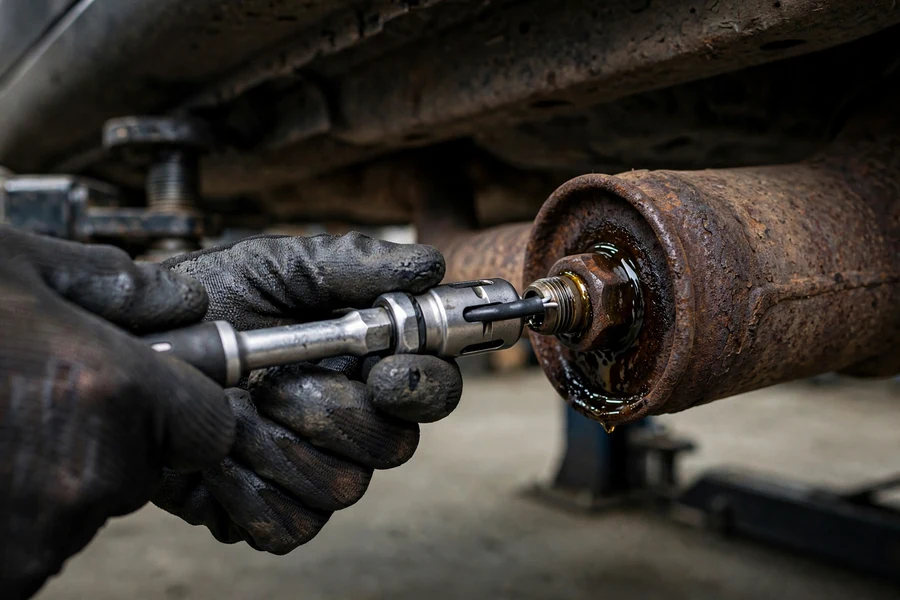
Here is the honest truth: the electrical part of this job is trivial — one connector, one threaded fitting. The mechanical part can be miserable. These sensors live in the hottest, most corrosive part of the car, and an original sensor with 100,000+ miles on it is often effectively welded into its bung by rust and heat cycling. Plan for the worst, hope for the easy one.
Penetrating oil first, always. Soak the base of the sensor where it meets the exhaust with a proper penetrating oil (not WD-40) the night before if you can, and again an hour before the job. Spray the joint, not the sensor body, and keep it off the sensor tip.
Warm the exhaust — carefully. Metal expands when hot, and many techs break O2 sensors loose with the exhaust warm from a few minutes of idling. Never attempt this after a highway run: the catalytic converter stays dangerously hot long after the engine stops. Gloves and long sleeves are non-negotiable.
Use the right tool. A slotted 22mm oxygen sensor socket lets the wiring pigtail pass through while you turn the hex — a regular deep socket will not fit over the connector, and an open-end wrench rounds the hex on a stubborn sensor. If the slotted socket starts to flex, switch to a 22mm crowfoot on a breaker bar, and work the sensor back and forth in small movements. Patience saves threads.
Know when to admit defeat. Stop and call an exhaust shop if the hex rounds off, the sensor snaps leaving its shell in the bung, the bung itself starts turning, or threads come out with the sensor. A shop can weld in a new bung or replace the pipe section for far less than the cost of the damage you will do by forcing it.
OEM vs aftermarket: what to actually buy
BMW does not manufacture oxygen sensors. The sensors in your 3 Series were made by a supplier — overwhelmingly Bosch or NTK/NGK — and sold to BMW, which is why the dealer part and the aftermarket part often come off the same production line with different boxes and very different prices. A Bosch or NTK sensor with the correct factory connector for your exact bank and position is functionally the same component the car was built with.
Buy the sensor with the correct plug already attached. Universal splice-in sensors are cheaper, but the splice is a new failure point in a harsh environment — and on wideband upstream sensors, the wiring characteristics matter. A proper direct-fit Bosch or NTK sensor is typically well under $150, so the small saving is not worth doing the job twice. The owner-community consensus is blunt on ultra-cheap unbranded sensors: they fail early and can throw heater codes from new.
One more buying rule: match the sensor type. Most modern BMW six-cylinder engines use wideband upstream sensors and conventional switching downstream sensors (widely reported by the owner community for the N52/N54/N55 family), and the two are not interchangeable. If a listing does not specify the position — bank 1 or 2, sensor 1 or 2 — keep looking. Ordering by VIN eliminates the guesswork.
Cost bands: DIY vs independent shop vs dealer
O2 sensor pricing is refreshingly simple: the part dominates the bill and the labor is usually under an hour per sensor. These bands reflect community-reported pricing for a single direct-fit Bosch/NTK sensor; your car, your city, and how seized the old sensor is will move the needle.
Step-by-step: replacing the sensor
Difficulty: moderate. The procedure is simple; the variable is corrosion. Budget 30 minutes for an easy one and half a day for a stubborn one — and don’t start the evening before you need the car. You will need a 22mm slotted O2 sensor socket (or crowfoot), a ratchet with extension, a breaker bar, penetrating oil, gloves, and a jack with stands for downstream sensors.
- Confirm the target. Scan the car, write down the exact code, and match it to the table above. On a six-cylinder, double-check bank 1 vs bank 2 — cylinders 1–3 (front) vs 4–6 (rear) — before ordering.
- Key off, engine cool enough to work near. Disconnecting the battery is not required, but the key must be off. If you are using the warm-exhaust technique, idle the engine only a few minutes.
- Soak the threads. Spray penetrating oil at the sensor-to-pipe joint, not the tip. Give it at least 15 minutes; overnight is better.
- Disconnect the electrical connector first. Trace the sensor’s wire to its plug — on pre-cat sensors often under the engine cover — release the locking tab, and separate it. Never pull on the wires.
- Break it loose. Fit the slotted 22mm socket over the sensor with the pigtail through the slot, add the breaker bar, and work it back and forth — a quarter-turn out, an eighth back in. Keep the socket square on the hex; a tilted socket rounds it.
- Compare old and new. Hold the new sensor next to the old one: same thread, same hex, same connector, cable long enough to reach. Catch a wrong part now, not after it is threaded in.
- Install the new sensor. Most new Bosch/NTK sensors arrive with anti-seize already applied to the threads — if yours does, do not add more, and keep any compound off the sensor tip. Thread it in by hand first to avoid cross-threading, then snug it firmly with the socket. Route the wiring exactly as the old one ran, clipped away from hot exhaust parts.
- Reconnect and clear. Plug in the connector until the lock clicks, clear the codes with your scanner, and confirm the code does not return on a test drive.
After the replacement: clearing codes and the drive cycle
A new sensor does not erase the old code by itself. Clear the stored faults with your scanner after the repair — the check engine light should go out immediately if the fault is genuinely fixed. If the code returns on the next drive, the diagnosis was wrong: recheck wiring, connectors, and fuses before suspecting the new part.
Next comes the drive cycle. Your 3 Series runs self-tests called readiness monitors — including the O2 heater and catalyst monitors — that only complete under specific driving conditions. Until they do, an emissions test shows “not ready” and fails you. As generic OBD-II guidance: cold engine, idle a couple of minutes, 15–20 minutes of mixed city driving, then 5–10 minutes of steady 50–60 mph cruising with a few gentle coast-downs. Most BMWs set their monitors within one or two such trips; a monitor that stubbornly will not set usually means an exhaust leak or a still-marginal sensor.
Finally, give the repair a week of normal driving before declaring victory. Fuel trim adaptations take some miles to relearn after an upstream sensor replacement, so fuel economy may take a tank or two to settle. Our BMW 3 Series complete guide covers the maintenance schedule this repair slots into — oxygen sensors are a wear item, and the next one will fail on its own schedule.
Frequently asked questions
How many O2 sensors does a BMW 3 Series have?
Four-cylinder models (N20/N26, B46/B48) have two sensors — upstream and downstream on bank 1. Every inline-six (M52/M54, N52/N54/N55, B58) has four: bank 1 and bank 2, each pre-cat and post-cat. Bank 1 is cylinders 1–3 at the front; bank 2 is cylinders 4–6 toward the firewall.
Can I drive with a bad O2 sensor?
Short term, yes. A failed downstream sensor barely changes how the car drives, and a failed upstream sensor just drops the car into a default fuel map. But do not ignore it: a bad upstream sensor wastes fuel, can overheat and destroy the catalytic converter — a far more expensive repair — and guarantees an emissions test failure.
Should I replace all four O2 sensors at once?
No. Replace the sensor the fault code names — the four sensors are independent, and replacing healthy ones buys nothing. The one common exception is doing both upstream sensors as a pair on a very high-mileage car, since the second upstream unit is likely near the end of its life and the diagnostic labor overlaps.
Are Bosch or NTK sensors as good as the BMW-branded part?
Yes — Bosch and NTK/NGK are the original-equipment suppliers for BMW oxygen sensors, so their direct-fit parts are functionally the same component the car was built with, at a much lower price. Buy the version with the correct factory connector for your exact bank and position, and avoid universal splice-in or ultra-cheap unbranded sensors, which the owner community reports failing early.
Why did my O2 sensor code come back after replacement?
The usual suspects: a wiring or connector problem that was never the sensor, a blown heater-circuit fuse, an exhaust leak near the sensor skewing its readings, or the wrong sensor for the position (bank 1 vs bank 2 cable lengths differ on many engines). Re-verify the code, inspect the harness and fuse, and check for leaks before suspecting the new part.