How to Replace BMW Brake Pads (Front & Rear DIY)
Short answer
bmw brake pad replacement diy is one of the most approachable jobs on the 3 Series: plan on roughly 1–2 hours per axle with basic hand tools. On the E90 and F30, front and rear pistons push straight back; on the G20, the rear electronic parking brake must be retracted first with a scan tool’s service mode or the manual actuator method. Always fit a new wear sensor once the pad warning has tripped, torque the wheel bolts to spec, pump the pedal before driving, and bed the pads in properly. Brief cost bands are below; detailed pricing lives in the BMW 3 Series brake pad replacement cost guide.
- Can you really do this yourself?
- Tools, parts, and torque specs
- Which brakes do you need?
- Front brake pads: step-by-step
- Rear brake pads: step-by-step
- G20 electronic parking brake service mode
- Replacing the pad wear sensor
- Resetting the brake service reminder
- Bedding in new pads
- When pads alone aren’t enough
- Common mistakes to avoid
- Frequently asked questions
BMW dealers charge several hundred dollars per axle for a pad swap that is, mechanically, one of the simplest jobs on the car: unbolt the caliper, swap the pads, push the piston back, reassemble. The 3 Series has used the same basic floating-caliper layout across the E90 (2006–2013), F30 (2012–2019), and G20 (2019–present) generations, so the procedure below applies to all three with one major exception — the G20’s electronic parking brake, which needs its own retraction step on the rear axle. Everything else is hand tools and patience.
This guide assumes you can already get the car safely in the air. If that step is new to you, read the jack-up and jack-stand guide first, because everything below depends on it. Brakes are safety-critical: if any step feels wrong or a fastener will not torque correctly, stop and have a professional finish the job.
Can you really do this yourself?
Honest difficulty: beginner-intermediate. Front pads on any generation and rear pads on the E90 and F30 are a 2 out of 5 — the caliper comes off with two bolts, the piston pushes back with a clamp, and there is nothing to adjust. Rear pads on the G20 are a 3 out of 5 because the electronic parking brake adds a retraction step that must be done before you touch the piston. If you have changed oil and rotated tires, you have the skills; the only new discipline is cleanliness and torque.
Budget 1–2 hours per axle the first time. No lift, air tools, or software are needed on the E90 and F30. On the G20 you need a scan tool with an EPB service function or the manual actuator method described below — forcing the piston without retracting the spindle first can destroy the actuator.
- DIY if: pads are worn evenly, rotors are above minimum thickness, the only warning is the pad-wear indicator, and you own a torque wrench.
- Use a shop if: the pedal feels spongy, a piston is seized or leaking, brake lines look corroded, or there is an active DSC/ABS fault.
Tools, parts, and torque specs
Gather everything before the wheel comes off — pad swaps stall most often on one missing item, usually the piston tool or the wear sensor. Buy pads for your exact generation and brake package: standard and M Sport brakes use different pad shapes, and front and rear sets differ.
| Tool | What it’s for |
|---|---|
| Floor jack + two jack stands | Supporting the car — never work under a car held by the jack alone |
| Torque wrench (covering 25–150 Nm) | Wheel bolts and caliper hardware — correct torque is non-negotiable |
| 17 mm socket (thin-wall if you have aftermarket wheels) | Wheel bolts on all three generations |
| Brake piston spreader or large C-clamp | Pushing the piston back for the thicker new pads |
| 7 mm Allen (hex) socket | Caliper guide-pin bolts on most E90/F30 front calipers — verify on your car |
| Torx bit set | Various caliper and (on G20) EPB actuator fasteners; sizes differ by caliper |
| Flat-blade screwdriver or trim tool | Releasing the wear-sensor connector and retaining clips |
| Brake cleaner, wire brush, nitrile gloves | Cleaning the caliper bracket and pad slides |
| Syringe or turkey baster + rags | Removing excess fluid from the reservoir before pushing pistons back |
| Part / consumable | Notes |
|---|---|
| Brake pad axle set | One set covers one axle (4 pads). Match generation and brake package exactly. |
| Pad wear sensor | One per axle on most 3 Series. Never reuse a sensor that has triggered — the warning will not reset. |
| High-temperature brake grease | Thin film on pad ears and caliper slide points only — never on the friction surface or rotor. |
| Brake cleaner | For the caliper bracket and hub face; go easy on rubber boots. |
| Rotors (as needed) | Only if they fail the checks in the rotor replacement guide. |
| Caliper hardware kit (optional) | New anti-rattle clips and shims if yours are corroded or missing. |
Torque is where DIY brake jobs most often go wrong — and it cannot be done by feel. Wheel-bolt values are below; caliper hardware torque varies by caliper design, so look up the BMW repair data for your exact chassis rather than trusting a generic number.
| Fastener | Torque | Source / notes |
|---|---|---|
| Wheel bolts — E90 (M12 thread) | 120 Nm ± 10 (approx. 89 ft-lb) | BMW TIS 36 10 1AZ. Tighten crosswise; re-check after a short drive. |
| Wheel bolts — F30 / G20 (M14 thread) | 140 Nm (approx. 103 ft-lb) | Owner’s-manual figure. Confirm in your manual — it is the binding document. |
| Caliper guide-pin bolts | Varies by caliper | Look up BMW repair data for your chassis; do not substitute a forum number. |
| Caliper carrier / bracket bolts | Varies by caliper | High-load fasteners — get the real spec for your chassis. |
| EPB actuator bolts (G20 rear) | Varies | Small fasteners on the actuator body; look them up before removal. |
The distinction matters: the E90 uses M12 bolts at 120 Nm ± 10 per BMW TIS, while the F30 and G20 use M14 bolts at 140 Nm. When in doubt, your owner’s manual overrides everything on this page.
Which brakes do you need?
Not every symptom means the same shopping list: a lit warning makes a new sensor mandatory, grinding usually condemns the rotors, and a pulsing pedal points at the rotors rather than the pads. Pick your axle and symptom below and the picker builds the parts list.
Which brakes do you need?
Guidance for standard (non-M) brakes on the E90, F30, and G20. Always confirm pad shape and sensor count against your VIN before ordering.
Front brake pads: step-by-step
The front axle is the same job on all three generations. Work one side at a time so the other stays assembled as a reference, and keep the reservoir area clean — pushed-back pistons force fluid upward.
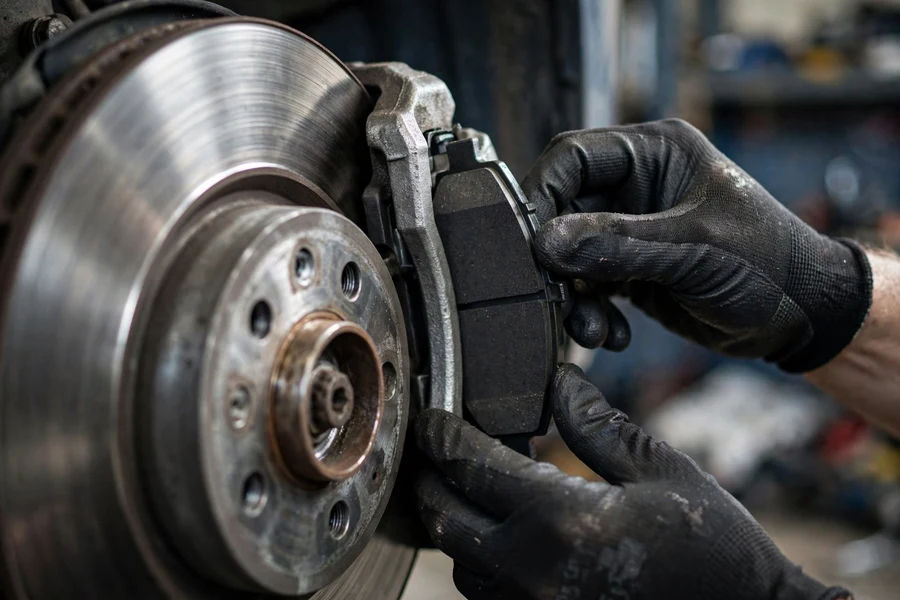
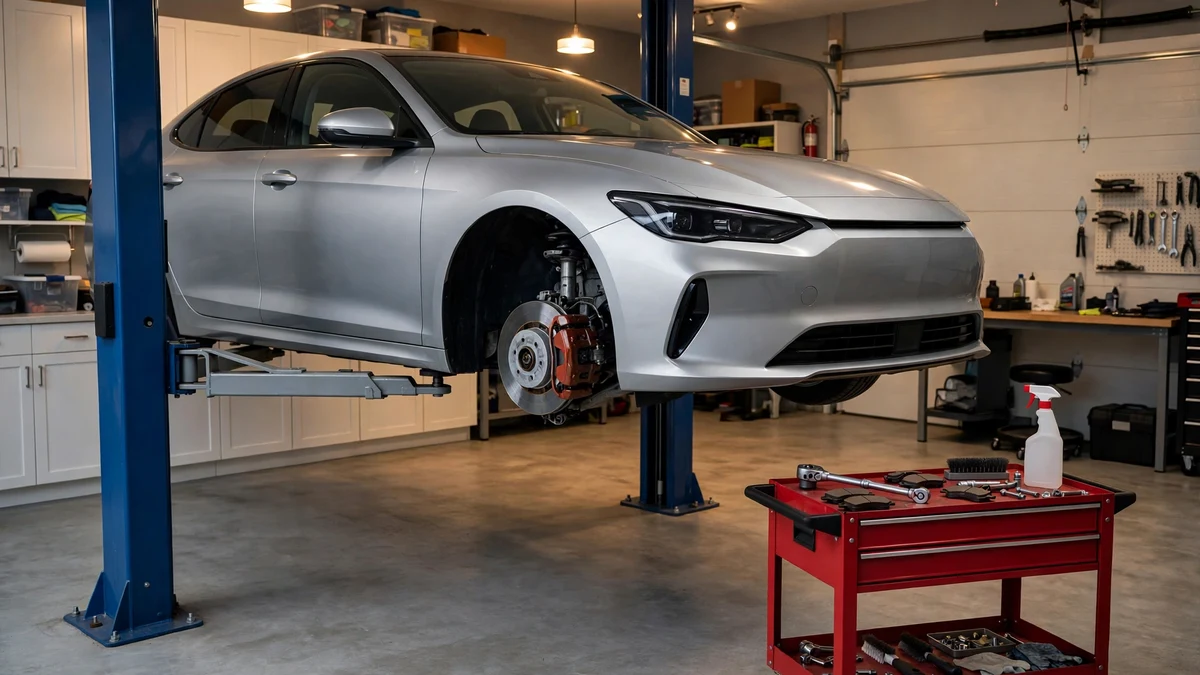
- Lift and secure the car. Break the wheel bolts loose a half-turn on the ground, then raise the front onto jack stands at the proper jack points and remove the wheel.
- Check the brake fluid reservoir. If fluid sits at the MAX line, siphon some out — pushing the pistons back displaces fluid upward, and an overfilled reservoir will spill corrosive fluid onto paint. Lay rags around it as insurance.
- Unplug the wear sensor (front: usually the left side) — follow its wire from the pad to the connector, release the clip, and unplug it without yanking.
- Unbolt the caliper. Undo the two guide-pin bolts on the back of the caliper, slide it off the bracket, and hang it from the strut with a bungee cord or wire — never let it hang by the brake hose.
- Pull the old pads, noting exactly how the pads, anti-rattle clips, and shims sit — the new ones go back the same way. Slide the wear sensor out of its pad.
- Push the piston back. Lay the old pad across the piston face and drive the piston squarely into the bore with the spreader or C-clamp, watching the reservoir level. If it will not move under steady, even pressure, stop — the caliper may be seized and needs a professional, not more force.
- Clean the bracket. Wire-brush the pad slides until bare and smooth, then wipe with brake cleaner — corrosion here is the top cause of uneven wear and dragging pads.
- Fit the new pads. Grease the pad ears and metal-to-metal contact points with a thin film of high-temp brake grease — never the friction face — and slide the pads into the bracket.
- Seat the new wear sensor in the pad slot and route its wire exactly along the old path through every retainer.
- Refit the caliper and torque the guide-pin bolts to the BMW spec for your chassis. Pump the pedal several times before moving the car — it will sink nearly to the floor on the first press as the pistons reseat, which is normal.
- Refit the wheel. Hand-start every bolt to avoid cross-threading, snug them in a star pattern, lower the car, then torque to spec in the same pattern (E90: 120 Nm ± 10; F30/G20: 140 Nm — confirm in your manual).
- Bed the pads in using the procedure below, then re-check the wheel bolt torque after a short drive.
Rear brake pads: step-by-step
The rear is nearly identical to the front except the parking brake acts on this axle — and on the G20 the pistons sit behind an electronic actuator that must be retracted first. On the E90 and F30, with their cable handbrake, rear pistons push straight back like the fronts.
- Release the parking brake fully before starting. Secure the car another way — chock the front wheels and leave the transmission in Park or in gear. Never let the parking brake hold the car while you service the brakes it acts on.
- On the G20: retract the electronic parking brake first using one of the methods in the next section. Do not skip this — the piston will not move until the actuator spindle is wound back, and forcing it can destroy the actuator.
- On the E90 and F30, work exactly as the front: unplug the sensor (rear: usually the right side), unbolt the caliper, hang it off the hose, and push the piston straight back with the spreader.
- Clean, grease, and reassemble as described for the front: wire-brush the bracket slides, grease the pad ears only, fit the new sensor, torque the caliper bolts to spec.
- On the G20, exit service mode (or refit the actuator after the manual method), then cycle the parking brake on and off once with the car running so it recalibrates to the new pads.
- Pump the pedal, refit the wheels, torque to spec, bed in. Same finish as the front axle.
G20 electronic parking brake service mode
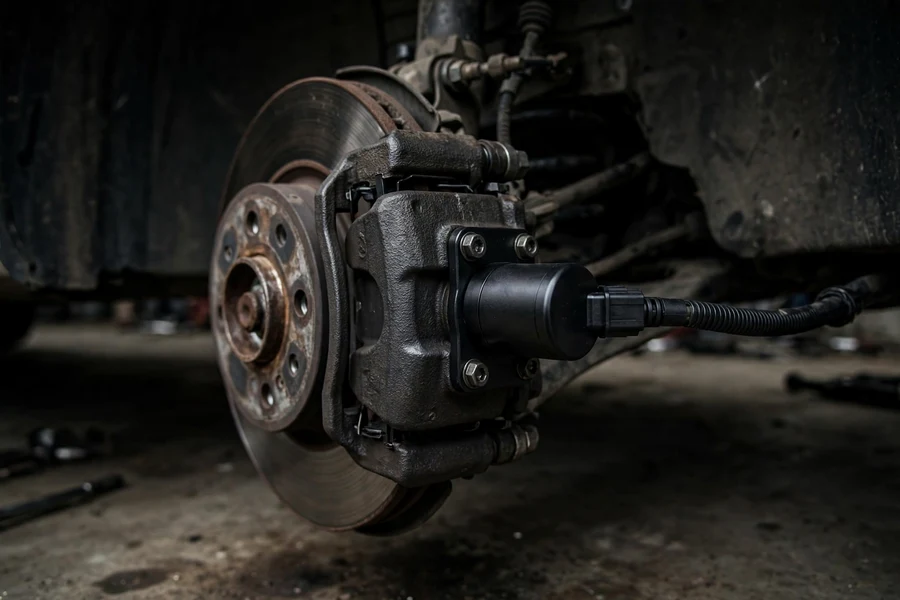
The G20 replaced the cable handbrake with an electromechanical parking brake: a small motor on the back of each rear caliper drives a spindle that pushes the piston out. That spindle must be wound fully back before thicker new pads will fit. Two proven ways:
Method 1 — scan tool service mode (recommended). With the ignition on and the parking brake released, use a scan tool’s EPB maintenance function to command the actuators to service position — you will hear both motors wind back. Do the pad swap, then command the tool to exit service mode. Only then set the parking brake and press the pedal so the system learns the new pad thickness. If the tool fails to enter or exit the mode, retry until you get a clean confirmation; a failed exit is the most common source of post-job parking-brake faults.
Method 2 — manual actuator retraction (no scan tool). Switch the ignition off, wait at least 30 seconds, then unplug the actuator connector. Unbolt the actuator from the caliper (typically T30 Torx) and pull it straight off; behind it sits the spindle head — turn it by hand with a Torx bit until fully retracted, then push the piston back normally. Refit the actuator, check its sealing ring, reconnect the plug, and cycle the parking brake once with the car running. BMW’s own repair documentation describes this emergency-release procedure — it is a sanctioned fallback, not a hack — but keep the actuator clean and dry while off, and confirm bolt sizes for your caliper first.
Whichever method you use: never force a G20 rear piston back against an engaged actuator. If the piston resists the spreader with the parking brake retracted, recheck the retraction instead of pushing harder.
Replacing the pad wear sensor
Most 3 Series have one wear sensor per axle — commonly left front and right rear, but confirm the positions on your car before ordering. The sensor is a wire loop in a plastic tip seated in the pad; when the pad wears to the sensor, the rotor grinds through the loop, breaking the circuit and lighting the pad warning.
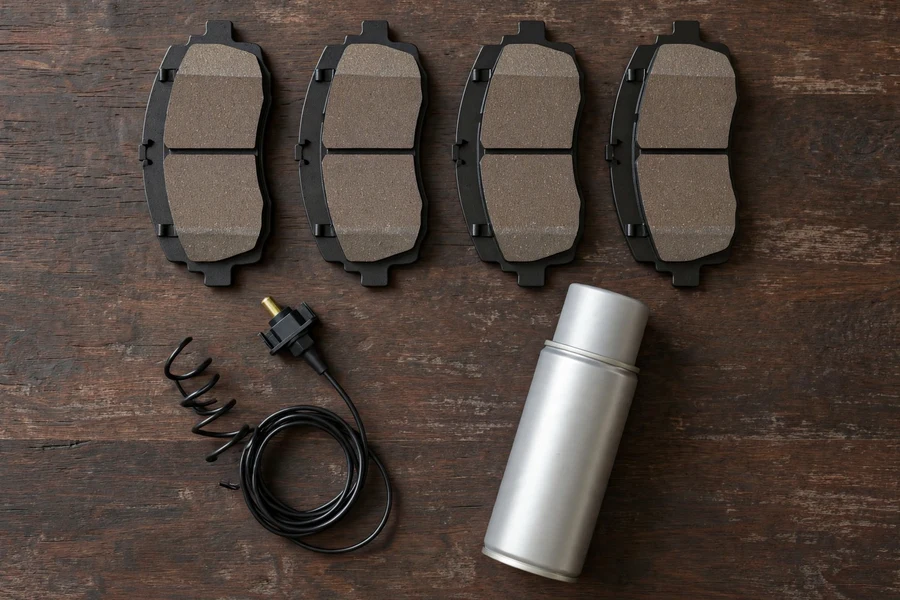
That is why a triggered sensor must be replaced, never reused: the loop is physically destroyed, and the warning cannot reset while a broken sensor is plugged in. An untripped sensor (no warning, tip intact and clear of the rotor) can technically transfer to the new pads, but sensors are cheap and a marginal one trips soon after — replacing it with every pad change is the sensible default.
Unplug the connector (release the locking clip first — the plastic gets brittle with heat), unclip the wire from its retainers, and slide the tip out of the old pad. Seat the new tip fully in the new pad’s slot, route the wire along the old path through every retainer, and click the connector home until it locks. A dangling sensor wire chafes through on the wheel or suspension and triggers a false warning.
Resetting the brake service reminder
New pads and a new sensor are only half the job — the car’s Condition Based Service (CBS) counter still thinks the old pads are fitted until you reset it. With the ignition on and the engine off, open the instrument-cluster service menu (via the BC stalk button or the trip-reset button, depending on generation), scroll to the front or rear brake-pad service item, and hold to reset. The exact button sequence varies by generation, so follow your owner’s manual if the menu does not appear as expected.
If the reset refuses with a “reset unsuccessful” message, the cause is almost always one of three things: the sensor was not replaced (a tripped sensor blocks the reset), the parking brake is still engaged, or your foot is on the brake pedal. Fix the underlying condition and try again — forcing repeated resets will not help.
Bedding in new pads: the burnish procedure
New pads need a thin, even transfer layer of friction material on the rotor before they perform fully — bedding (burnishing) creates it. Skip it and you risk glazing, noise, and uneven deposits that feel like “warped rotors.” Follow your pad maker’s procedure first; the generic sequence below matches most street-pad recommendations.
- Warm up: drive normally for a few minutes with light braking.
- Moderate stops: from ~35 mph, brake firmly (not violently) to ~5 mph without fully stopping. Repeat 5–6 times.
- Harder stops: from ~50 mph to ~5 mph, again without fully stopping. Repeat 2–3 times.
- Cool down: cruise 5–10 minutes using the brakes as little as possible. Do not sit stationary with hot pads clamped on the rotors — it imprints material in one spot.
- Take it easy afterwards. Avoid hard or panic stops for the next couple of hundred miles while the transfer layer fully stabilizes.
Two details matter most: never fully stop during the sequences (a stationary hot pad leaves an uneven deposit), and do it somewhere safe and empty — never in traffic. Some fully-cured ceramic pads need no special procedure beyond normal driving; if your pad maker says so, believe them.
When pads alone aren’t enough
Pads are the wear item, but they are only half the friction pair. Replace — or at least measure — the rotors when any of these are true: a visible lip or scoring on the friction face, vibration under braking, grinding that went metal-on-metal, or thickness at or below the minimum stamped on the rotor hat (usually marked “MIN TH”). A micrometer check takes a minute and settles every argument about whether the rotors can stay.
As a rule of thumb: if the rotor faces are smooth, true, and comfortably above minimum thickness, pads alone are fine. If they are scored, lipped, pulsating, or marginal on thickness, do pads and rotors together — new pads on worn rotors bed in poorly and often come back noisy. The full measurement procedure, minimum-thickness guidance, and the “warped rotor” myth are covered in the BMW 3 Series brake rotor replacement guide.
Common mistakes to avoid
- Reusing a triggered wear sensor — the loop is broken and the warning cannot reset until a new one is fitted.
- Forcing a G20 rear piston against the EPB actuator. Retract the parking brake first — by scan tool or the manual method — or you will destroy the actuator.
- Letting the caliper hang by the hose — always support it from the strut.
- Ignoring the fluid reservoir — pushed-back pistons can spill corrosive fluid over paint.
- Grease on the friction surface — it belongs on pad ears and slides only; contaminated pads are ruined.
- Skipping the pedal pump — the first press sinks nearly to the floor. Pump it stationary, not rolling.
- Torquing wheel bolts by feel. Use the spec — 120 Nm ± 10 for M12 (E90), 140 Nm for M14 (F30/G20) — in a crosswise pattern, and re-check after a short drive.
- Doing only one side. Brakes are always serviced per axle: both sides, same parts, same day.
- Bedding in traffic — the sequences need empty road, and constant full stops ruin the transfer layer.
What the DIY actually saves
Briefly, since pricing is covered in depth elsewhere: expect roughly $120–$260 in parts per axle for OE-quality pads plus a sensor on standard brakes, against roughly $250–$450 per axle at an independent shop and $450–$800+ at a dealer. Your savings are the labor — and the knowledge that the torque wrench was actually used. For generation-by-generation bands, M Sport pricing, and what drives quotes up or down, see the BMW 3 Series brake pad replacement cost guide.
Frequently asked questions
Do I need a scan tool to change rear brake pads on a BMW 3 Series?
Only on the G20 (2019–present) with its electronic parking brake: use a scan tool’s EPB service function, or unbolt the actuator and wind the spindle back by hand. The E90 and F30 use a cable handbrake, so their rear pistons push straight back with a clamp.
Can I reuse a brake pad wear sensor?
Not if it has triggered — the loop is physically worn through and the CBS reset will fail until a new sensor is fitted. An untripped sensor can be reused, but replacement is cheap and the sensible default.
Do I have to replace the rotors with the pads?
Not automatically. Measure thickness against the MIN TH stamping on the rotor hat and inspect for scoring, lips, and pulsation. Smooth rotors comfortably above minimum can stay; scored, lipped, thin, or pulsating ones should be replaced with the pads — see the rotor replacement guide for the measurements.
Why does my brake pedal go to the floor after a pad change?
Pushed-back pistons leave slack in the system. Pump the pedal several times with the car stationary before driving — it firms up as the pistons reseat. If it stays soft or spongy after pumping, do not drive until the cause is diagnosed.
How do I reset the brake pad warning light after replacing pads?
Use the instrument-cluster service menu (ignition on, engine off) to reset the front or rear brake-pad CBS item; the sequence varies by generation, so check your manual. The reset fails if the sensor was not replaced, the parking brake is engaged, or your foot is on the pedal.
Methodology note: this guide is built from BMW technical documentation conventions, manufacturer-published bed-in procedures, and documented owner procedures for the E90, F30, and G20. Torque figures are given only where verified (wheel bolts: BMW TIS 36 10 1AZ for M12, owner’s-manual figure for M14); caliper hardware torque varies by caliper design and should be looked up for your exact chassis. No part numbers are listed because pad shapes vary by brake package — match parts to your VIN.