BMW E90 RTAB Replacement: Fix Rear-End Wander for Good
Short answer
BMW E90 RTAB replacement fixes one of the most common causes of rear-end wander on the 2006–2011 3 Series: worn rear trailing arm bushings. The classic symptoms are a loose, wandering rear at highway speed, a bump-steer shimmy over broken pavement, clunking from the back, and uneven inner-edge rear tire wear. Diagnosis is a flashlight inspection plus a pry-bar test. Your three replacement options are stock-style rubber, the solid-rubber E92 M3 bushings (the street favorite), or polyurethane (longest life, most NVH). Budget a full afternoon with a rental press tool, and get a four-wheel alignment afterward — replacing RTABs changes rear toe.
If your E90 has developed a mind of its own at the back — darting over lane changes, shuddering sideways across potholes, eating the inside edges of its rear tires — the rear trailing arm bushings are the prime suspect. On the E90 this is practically a wear item: the stock RTABs are voided rubber tuned for comfort, and once they soften, the rear toe angle starts moving around under load. The good news is that replacement is one of the highest value-per-dollar handling fixes on this chassis, the special tool can be rented instead of bought, and the E92 M3’s solid-rubber bushings bolt right in as an upgrade. This guide covers what RTABs do, how to confirm yours are shot, all three replacement options honestly compared, the tool situation, the full procedure, and real-world cost bands.
What RTABs actually do
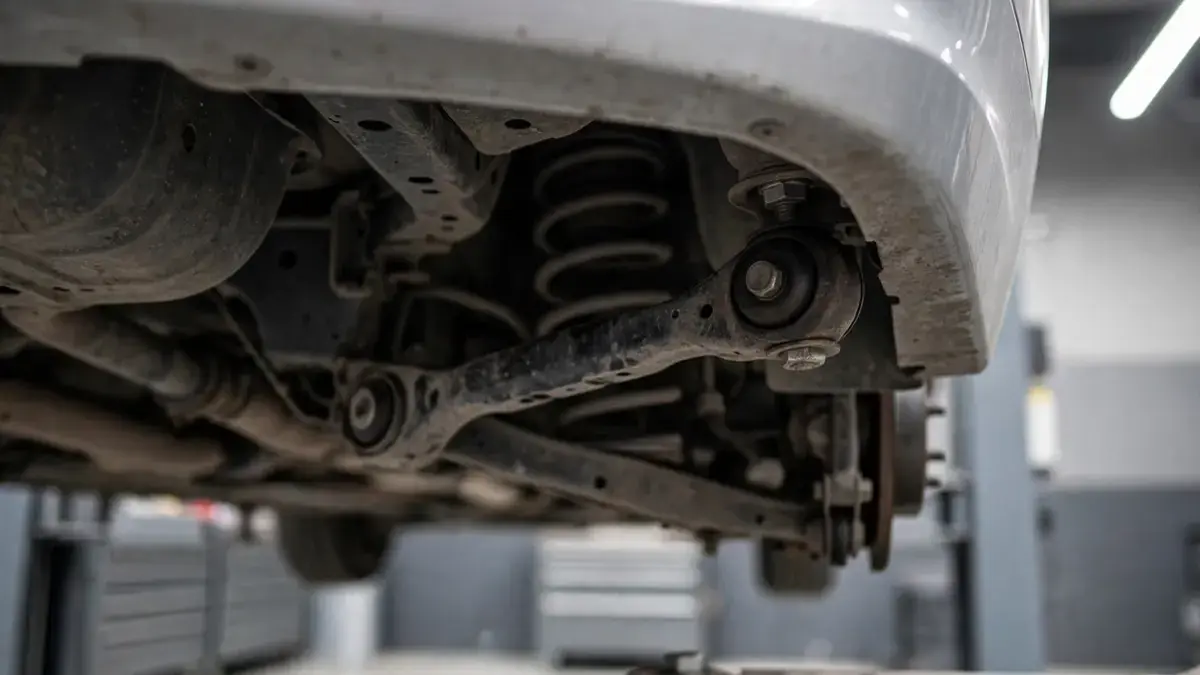
The E90 3 Series rides on a multi-link rear suspension: five arms per side position the rear wheel with far more precision than the old semi-trailing-arm designs. The trailing arm is the long link running fore-and-aft from the wheel carrier forward to the body, and its job is holding rear toe angle — the difference between a car that tracks straight and one that steers itself. The trailing arm’s forward pivot is the rear trailing arm bushing (RTAB): a rubber-to-metal bushing that locates the arm firmly enough to keep toe stable, while flexing just enough to absorb road harshness and vibration (NVH) before it reaches the cabin.
BMW’s stock E90 RTAB is a voided rubber bushing — the rubber is molded with deliberate gaps (voids) that make it softer in one direction for ride comfort. That comfort tuning is also its weakness. Every corner, bump, and hard launch flexes the bushing; heat, oil contamination, and simple age harden and crack the rubber. As the bushing softens, the trailing arm moves a few millimeters fore and aft under load, and the rear toe angle follows it. The result is the signature symptom: the rear end feels like it has its own steering input, especially mid-corner and over bumps.
This is not an E90-only phenomenon — the E36 and E46 made the RTAB famous as a wear item — but on the E90 the rubber is softer and the chassis is heavier, so owners commonly report needing them between 80,000 and 120,000 miles (owner-reported consensus on E90Post and Bimmerforums; spirited driving shortens that). One practical consequence for anyone still shopping for an E90: RTAB condition is a legitimate pre-purchase inspection item, alongside the checks in our used BMW 3 Series buying guide. And because the front control arm bushings live a similarly hard life, many owners refresh both ends of the car in the same ownership period.
Failure symptoms
Worn RTABs announce themselves in the way the rear of the car behaves, not with a warning light — there is no RTAB sensor. The symptoms below are listed from most to least diagnostic. One symptom on its own is ambiguous; two or three together at 80k+ miles is a strong case.
| Symptom | What it feels like | How RTAB-specific |
|---|---|---|
| Rear-end wander at speed | The car needs constant small steering corrections on the highway; it feels like the rear is steering slightly on its own. | Very — this is the signature complaint. |
| Bump-steer shimmy | Hitting a pothole or expansion joint sideways shoves the rear of the car sideways; the rear “skips” over broken pavement. | Very — worn RTABs let toe change mid-bump. |
| Clunking from the rear | A dull clunk or knock from the back of the car over bumps and driveways. | Moderate — also check shock mounts and subframe bushings. |
| Inner-edge rear tire wear | Rear tires worn heavily on the inside edge while the outside looks fine. | Moderate — worn RTABs let the arm sag, adding negative camber. |
| Alignment won’t hold | A fresh alignment feels good for weeks, then the rear feels off again. | High — alignment sets static toe; moving bushings undo it dynamically. |
| Vague turn-in / loose tail in rain | The rear feels disconnected on turn-in; wet-weather confidence drops. | Moderate — could also be tires or shocks. |
The wear pattern to note: RTABs almost always fail asymmetrically — one side goes first, often the side that has absorbed more pothole hits. That asymmetry is exactly why the car feels like it has rear-wheel steering; one trailing arm moves under load while the other still holds. If you are chasing a clunk rather than wander, rule out the other usual rear-end suspects first: rear wheel bearings make a droning noise that changes with speed, and blown rear shock mounts clunk sharply over small bumps without the steering-feel component.
How to diagnose worn RTABs
Diagnosis is a two-stage process: look, then pry. Neither stage needs special tools beyond a flashlight, a jack, and a pry bar — and the whole check takes about twenty minutes with the car raised safely on jack stands.
The visual check
With the rear wheels off and the trailing arms visible, shine a flashlight on the RTAB where the front of each trailing arm meets its mounting bracket. A healthy bushing shows intact rubber with maybe faint surface lines. A worn one shows any of the following: cracking or dry-rotted rubber, chunks missing, rubber separating from the inner metal sleeve, or the inner sleeve visibly shifted off-center in the rubber. Be thorough: the worst damage often hides on the top of the bushing, so look from multiple angles.
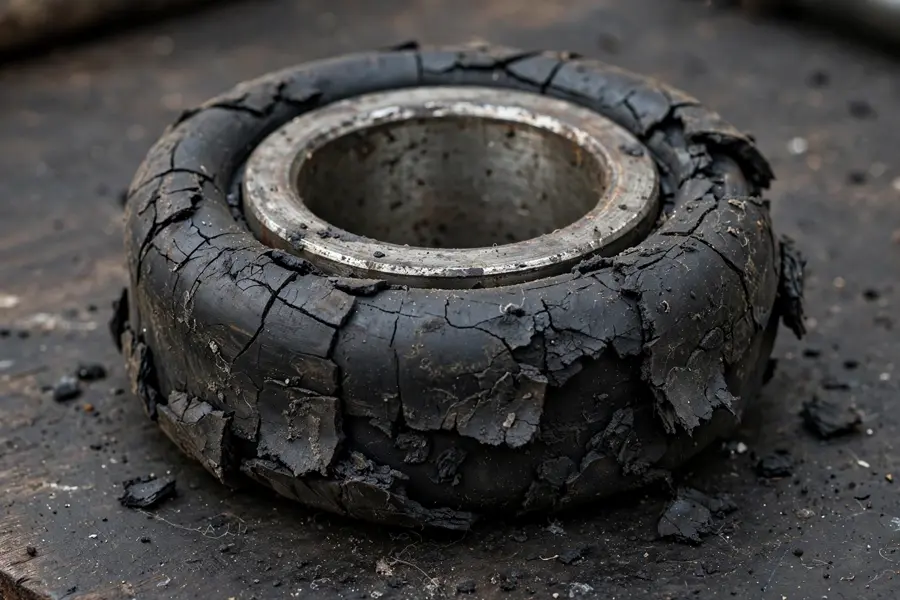
One caution from experience across the E90 community: moderate-looking bushings can still be bad. Rubber hardens with age even when the cracks look minor, and a bushing can look passable while the inner sleeve has separated from the rubber under load — a failure you can only confirm by pulling on it. That is what the pry test is for.
The pry-bar test
With the car’s rear raised and the suspension hanging (wheels off), wedge a pry bar or large screwdriver between the trailing arm and a solid reference point near the bushing, then lever the arm forward and back along the car’s axis — the direction the RTAB is supposed to resist. On a good bushing you will feel firm, small resistance: a couple of millimeters of rubber flex and then it stops. On a failed bushing you will see the arm move visibly and easily — often 5–10 mm or more of fore-aft play, sometimes with the inner sleeve visibly rocking inside the rubber. Compare left to right: a large difference between sides confirms the diagnosis.
Also check the trailing arm itself while you are there. On an E90 the aluminum arm rarely bends, but inspect for impact damage or corrosion around the bushing bore — a damaged bore will not hold a new bushing properly and the arm would need replacement instead. If the rubber is torn badly enough that the inner sleeve hangs loose, stop driving the car until the repair is done: rear toe is no longer controlled and the handling is unpredictable.
Replacement options compared
There are three credible RTAB choices for the E90, and the right one depends on how you use the car and how much noise you tolerate. The comparison below is drawn from years of owner experience reported on E90Post and Bimmerforums — all three are proven solutions with different trade-offs.
| Stock-style rubber | E92 M3 rubber | Polyurethane | |
|---|---|---|---|
| Construction | Voided rubber (soft gaps for comfort), same concept as factory | Solid rubber, no voids — the bushing BMW fitted to the E92 M3 | Cast polyurethane, typically two-piece for easier install |
| NVH | Stock quiet — baseline | Barely louder than stock; most drivers notice nothing on the road | Noticeably firmer; more road texture and impact noise reach the cabin |
| Handling | Restores factory feel | Sharper, more planted rear — the favorite street upgrade | Sharpest; rear toe stays put under hard cornering |
| Durability | Similar life to factory (owner-reported 80k–120k miles) | Longer than stock in street use (solid rubber, no voids to tear) | Longest — poly doesn’t crack or dry-rot like rubber |
| Cost (pair, parts) | Roughly $60–$140 (owner-reported, varies by brand) | Roughly $140–$220 (owner-reported) | Roughly $100–$200 (owner-reported) |
| Install notes | Press-in, same as factory | Press-in, same tool; confirm fitment for your model year before ordering | Often two-piece — can install without a press; grease per instructions to avoid squeaks |
| Best for | Owners who want the car exactly as BMW built it | Daily drivers and canyon cars wanting sharper feel without NVH penalty | Track cars and owners who never want to do this job again |
The honest pros and cons, without the sales pitch:
- Stock rubber is the safe default. It restores the car to how it drove new, and it is the cheapest option. Its only real downside is that you will repeat this job in another 80k–120k miles.
- E92 M3 bushings are the consensus street choice. They bolt into non-M E90s with the same press tool, they keep near-stock NVH, and the solid rubber resists the tearing that kills voided bushings. The one caveat: confirm fitment with the supplier for your exact model and year before ordering, since aftermarket listings vary.
- Polyurethane gives the sharpest rear end and essentially never wears out, but you pay in NVH — expect more transmitted road texture and sharper impacts. Owners also report that poly RTABs can squeak if installed without the supplied grease, so follow the manufacturer’s lubrication instructions exactly.
A fourth option you will see discussed is RTAB limiter shims — thin inserts that fit around a stock-style bushing to limit its deformation. They are a companion to fresh rubber, not a fix for dead rubber: they make sense only alongside new bushings, and most daily drivers are better served by the M3 bushings instead.
Which bushing should you buy? Use the picker
Answer three questions and get a straight recommendation — including what to avoid for your combination.
RTAB Bushing Picker
Quick check: are your RTABs shot?
Six yes-or-no questions. Be honest — this scores the same symptoms a shop listens for.
RTAB Symptom Quiz
The special tool situation
The RTAB is a press fit — the new bushing must be pushed into the trailing arm bore with real force, and the old one pulled out. There is no getting around needing a press of some kind, but you have four legitimate paths, and three of them cost very little.
| Option | Typical cost | Difficulty | Honest assessment |
|---|---|---|---|
| Rental press kit | Deposit + return shipping (owner-reported: roughly the cost of a tank of gas each way) | Easy | The best option for most DIYers. BMW specialty vendors rent the correct E90 RTAB tool kit; it presses the bushing out and the new one in with the arm still on the car. |
| Buy the tool kit | Roughly $80–$150 (owner-reported, varies) | Easy | Makes sense if you're doing multiple cars or plan to keep the E90 long-term. Pays for itself on the second use. |
| Remove the arm, use a shop press | Free if a friend has a press; machine shops charge a small fee per bushing | Moderate | More disassembly (the arm comes out), but any 12-ton hydraulic press does the job in seconds. A good fallback if no rental kit is available. |
| Drill-and-saw method | Free (drill bits + hacksaw blade you own) | Hard / risky | Drill out the rubber to free the inner sleeve, then carefully saw through the outer steel shell and collapse it inward. It works — E36/E46 owners have done it for decades — but one slip scores the arm's bore and the new bushing will never seat properly. Last resort only. |
Whichever path you choose, mark the old bushing's clocking before removal — a paint mark across the bushing face and the arm. BMW RTABs install in a specific orientation relative to the arm, and installing the new one rotated defeats the tuning. A photo from your phone costs nothing and removes all doubt.
Step-by-step replacement
Difficulty: 6 out of 10. This is a mechanical job, not a diagnostic one — if you can safely raise the car, remove wheels, and follow torque specs, you can do this. Budget a full afternoon for both sides the first time (about 2–3 hours per side), plus the alignment trip afterward. Safety first: the car must be on jack stands on solid ground, wheels chocked, parking brake set. Never work under a car supported only by a jack.
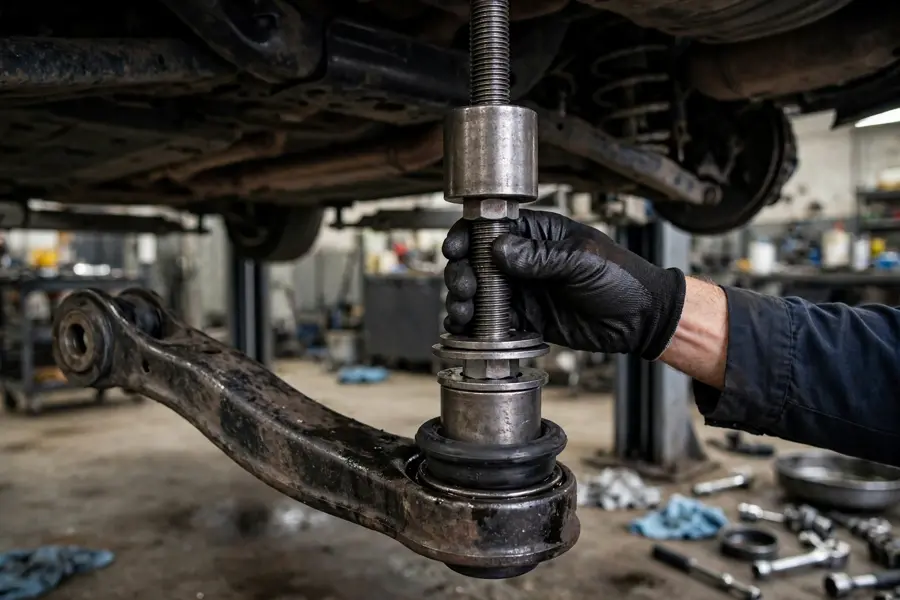
- Loosen the rear lug bolts while the car is on the ground, then raise the rear and support it on jack stands at the factory jacking points. Remove both rear wheels.
- Support the trailing arm with a floor jack under the wheel carrier area — you will be unbolting the RTAB bracket, and the arm must not drop suddenly.
- Disconnect what blocks access. On most E90s the RTAB bracket is reachable without touching the brakes, but you may need to unbolt the ABS sensor wire bracket or a brake-line clip for clearance. Never open a brake line — just move clips and brackets aside.
- Mark the bushing clocking with paint or a scribe line across the bushing and the arm, and take a reference photo.
- Unbolt the RTAB bracket from the body. The bracket holds the bushing's outer sleeve captive; once unbolted, the arm can be lowered slightly on the jack to expose the bushing.
- Press the old bushing out using the rental tool (threaded rod, cups, and washers) per the kit's instructions. The bushing pushes out toward the outside of the arm. Keep the threads greased — it makes the job dramatically easier.
- Clean and inspect the bore. Remove all rubber residue and corrosion from the arm's bushing bore with a wire brush and brake cleaner. Check for scoring or damage, especially if a previous bushing was removed with a saw.
- Press the new bushing in, clocked to your reference mark, pushing it in from the correct side per the tool instructions. Poly two-piece designs typically install by hand — follow the manufacturer's orientation and lubrication guidance exactly.
- Reinstall the bracket and reconnect any clips or sensor brackets you moved. Lower the jack so the arm is at roughly normal ride height before final tightening of the bracket bolts — tightening suspension bushings at full droop preloads them and shortens their life.
- Torque everything to BMW TIS specification. This is not optional on suspension hardware: use a calibrated torque wrench and the values from BMW's technical information system (your Bentley manual or a BMW-specific shop reference carries them).
- Reinstall the wheels, lower the car, and torque the lug bolts in a star pattern to spec.
- Drive straight to an alignment shop. Do not postpone it — see the next section.
The single most common DIY mistake is skipping the alignment, followed by tightening the bracket with the suspension at full droop. Get those two right and the job is straightforward.
Why an alignment is mandatory
Replacing RTABs changes rear toe — that is the entire point of the repair. Even if you marked everything perfectly, the new bushings position the trailing arms differently than the worn ones did, so the alignment you had before is now wrong. Driving on it wears the inside edges of your rear tires quickly and undoes the precise handling you just paid for.
Book a four-wheel alignment (not just the rear) at a shop with BMW experience. The E90's rear toe and camber are adjustable; a generic shop can set them to factory spec, but a BMW specialist will also know the common "street performance" alignment settings owners ask for — slightly more aggressive than factory — if that interests you. Expect to pay roughly $120–$200 (shop-reported typical range). One honest note: if your rear tires are already heavily worn on the inside edge from the bad bushings, replace or rotate them before the alignment — aligning to worn tires is guesswork.
What it costs
Cost bands below are owner-reported ranges gathered from E90Post and Bimmerforums job threads — they vary by region and by which bushing you choose, but the spread between the three paths is consistent. All figures are per-axle (both sides), since you should always replace RTABs in pairs.
| Path | Parts | Labor / tool | Alignment | Typical total |
|---|---|---|---|---|
| DIY (rental tool) | $60–$220 (stock → M3/poly) | Tool rental deposit + return shipping, roughly $40–$80 | $120–$200 | $220–$500 |
| Independent BMW shop | $80–$250 | 2–3 hours shop labor | Included or $120–$200 | $400–$700 |
| Dealer | OEM parts at list price | Dealer labor rate | $150–$250 | $800–$1,200+ |
Figure 1: Typical all-in cost by path (both sides + alignment, owner-reported ranges)
The DIY path is the value standout: even with the alignment included, you typically spend less than half of an independent shop quote, and the rental tool means you don't buy a press you will use once. The one cost DIYers forget is their own time on a seized bushing — a high-mileage car in the rust belt can turn a 3-hour job into a day. Penetrating oil the night before is the cheapest insurance there is. If you are weighing this job against other maintenance, our 3 Series maintenance schedule shows where RTABs sit in the bigger picture of E90 upkeep costs.
A note on F30 and G20: the F30 (2012–2018) and G20 (2019+) use a similar trailing-arm-bushing concept in their rear suspensions, but the parts, tooling, and torque values differ from the E90 — do not assume E90 bushings or the E90 rental tool transfer. This guide is E90-specific (2006–2011), which is also the chassis where RTAB wear is most widely documented. See our E90 vs F30 comparison for how the generations differ more broadly.

FAQ
How do I know my E90 RTABs are bad?
The classic signs are rear-end wander at highway speed, a sideways shimmy over bumps, clunking from the rear, and inner-edge rear tire wear — especially on cars over 80,000 miles. Confirm with a flashlight inspection for cracked or separated rubber, plus a pry-bar test for fore-aft play at the bushing. Two or more symptoms together is a strong diagnosis.
Can I keep driving with worn RTABs?
For a while, cautiously — but it gets worse, not better. Worn RTABs let rear toe move under load, which makes the car unpredictable in corners and in the rain, and it accelerates inner-edge tire wear. If the rubber has torn badly enough that the inner sleeve hangs loose, the car should not be driven until repaired: rear toe is effectively uncontrolled.
How much does BMW E90 RTAB replacement cost?
Owner-reported ranges: roughly $220–$500 DIY with a rental press tool (including the mandatory alignment), $400–$700 at an independent BMW shop, and $800–$1,200+ at a dealer. Always replace both sides together, and budget the four-wheel alignment into every path.
Are polyurethane RTABs worth it for a daily driver?
Usually not. Poly gives the sharpest handling and lasts the longest, but it transmits noticeably more road texture and impact noise into the cabin, and it can squeak if not greased properly. For a daily driver, the solid-rubber E92 M3 bushings are the consensus pick: sharper than stock with near-stock quietness.
Do I need an alignment after replacing RTABs?
Yes — a four-wheel alignment is mandatory, not optional. New bushings change rear toe, so your old alignment is wrong the moment the job is done. Driving without it wears rear tires quickly and wastes the handling improvement you just paid for.