How to Replace Your BMW 3 Series Battery (Trunk DIY)
Short answer: BMW 3 Series battery replacement is a straightforward DIY: the battery lives in the trunk, you remove the trim, disconnect the negative terminal first, unbolt the hold-down, lift out the old battery, and reverse the order with the new one. Match the group size and chemistry of the original — most 3 Series take an AGM battery (H6/H7/H8 class) — reconnect the vent tube, protect the sensor on the negative terminal, and then register the new battery to the car, which is a mandatory final step on E90 models and newer.
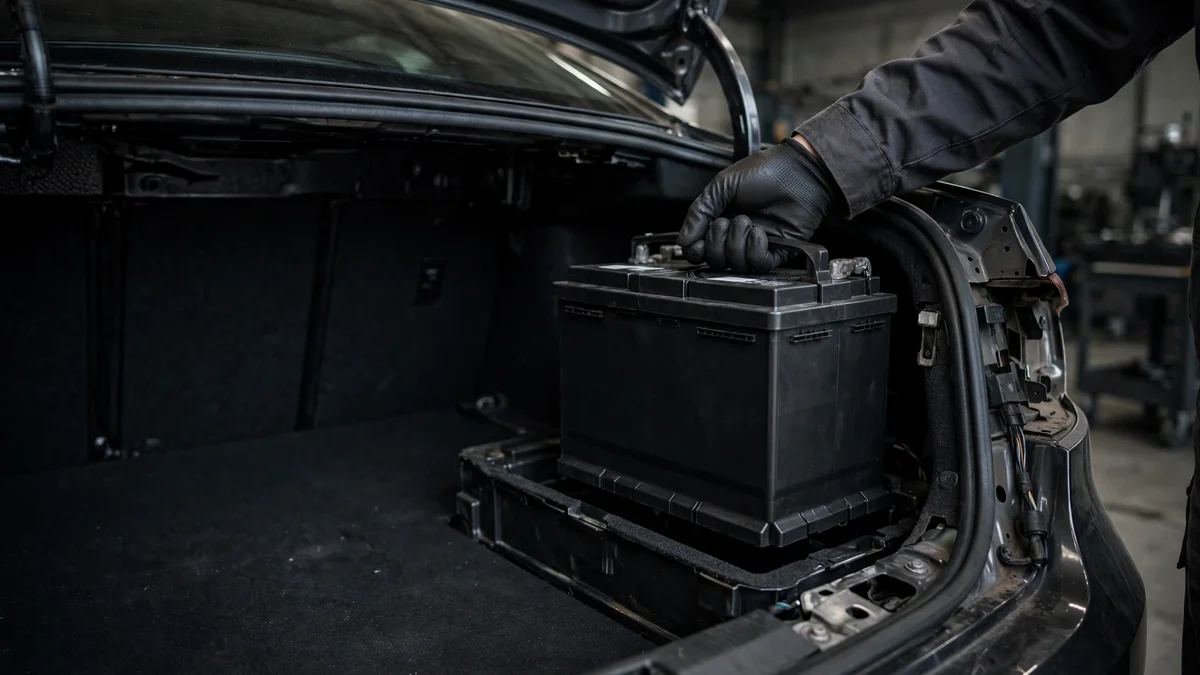
Open the hood of a BMW 3 Series and you will not find the battery. On every modern generation it lives in the trunk, and that one design decision shapes the whole job: the battery you buy must vent its gases to the outside, the negative cable carries a sensitive sensor module, and the positive terminal may include a pyrotechnic safety device. Get those details right and the physical swap is one of the easiest maintenance jobs on the car — roughly 30 to 45 minutes with basic hand tools. This guide walks through the complete physical replacement, generation by generation, and ends where the job actually finishes: battery registration.
Where the battery hides: trunk location by generation
BMW moved the 12-volt battery out of the engine bay for good reasons — heat is the enemy of battery life, and the trunk placement improves weight distribution. The exact hiding spot changes slightly by generation, so find your row before you start pulling trim.
| Generation | Years | Battery location | How to reach it |
|---|---|---|---|
| E36 | 1992–1998 | Right side of the trunk | Pull back the right-side trim panel |
| E46 | 1999–2005 | Right side of the trunk | Remove the right-side trim panel and battery cover |
| E90 / E91 / E92 / E93 | 2006–2013 | Right side of the trunk | Remove the right-side trim panel and the plastic battery cover |
| F30 / F31 | 2012–2018 | Right side of the trunk | Remove the right-side trim panel and battery cover |
| G20 | 2019–present | Under the trunk floor | Empty the trunk, lift the floor cover — no trim tools needed |
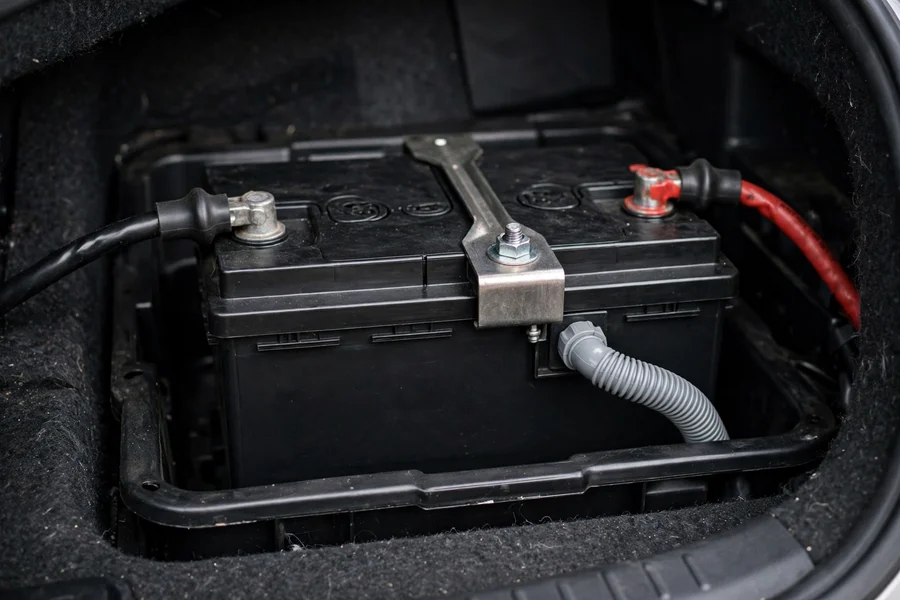
On E36, E46, E90, and F30 cars the layout is familiar: peel back the carpeted trim on the right side of the trunk and the battery sits in a molded well with a metal hold-down bracket across the top. The G20 moved it to the middle, under the trunk floor, which is arguably easier — lift the floor and there it is. On 48-volt mild-hybrid G20 models (like the M340i), there is an additional small lithium battery under the hood; the DIY 12-volt swap in this guide concerns only the main AGM battery in the trunk.
Which battery your 3 Series needs: group size and chemistry
The single most important rule of this job: match what the car already has. The existing battery carries a label with its group size (48, 49, or 94R), its H-class (H6, H7, H8), its capacity in amp-hours, and its chemistry (AGM or flooded). Photograph that label before you shop. Sizes vary by generation and by how heavily equipped the car is, but the pattern below covers the overwhelming majority of cars on the road. When in doubt, the label on the battery currently in your trunk outranks any table.
| Generation | Common group size (H-class) | Typical capacity | Chemistry | Vent tube | Registration |
|---|---|---|---|---|---|
| E36 (1992–1998) | Group 48 (H6) or 49 (H7) | 70–80 Ah | Flooded standard; AGM fits the same tray | Yes | Not required (pre-dates the system) |
| E46 (1999–2005) | Group 48 (H6); some take 80 Ah | 70–80 Ah | Match the existing label; late cars with the battery sensor should stay AGM | Yes | Not required on most |
| E90 generation (2006–2013) | H7 (80 Ah) or H8 (90 Ah) | 80–90 Ah | AGM on the vast majority | Yes | Required |
| F30 generation (2012–2018) | H7 (80 Ah) or H8 (90 Ah) | 80–90 Ah | AGM | Yes | Required |
| G20 (2019–present) | H7/H8 class (12 V main battery) | ~80 Ah | AGM | Yes | Required |
The European H-classes and American group numbers describe the same physical boxes: H6 is Group 48, H7 is Group 49, H8 is the larger 95R-class case. The trunk tray on a 3 Series is molded to accept the larger sizes, which is why you sometimes see a Group 48 battery in a tray that could also take a Group 49 — the hold-down plate often has multiple bolt positions. Going smaller than the original is never recommended: the charging system was calibrated for the original capacity, and a smaller battery ages faster under the same electrical load.
AGM vs flooded: why most 3 Series need AGM
Absorbent Glass Mat (AGM) batteries hold their electrolyte in fiberglass mats instead of free liquid. They tolerate deep discharge cycles, recover from the stop-start system hammering them at every traffic light, and charge at the slightly higher voltages BMW’s charging strategy uses on AGM-equipped cars. Nearly every E90, F30, and G20 left the factory with an AGM battery. Fitting a cheaper flooded battery where an AGM belongs is a false economy: the charging profile is wrong for it, it dies early, and it can trigger charging-related warning messages. The only generation where flooded batteries were standard is the E36, and even there an AGM that fits the tray is a fine — and longer-lived — substitute.
| AGM | Flooded (conventional) | |
|---|---|---|
| Where it belongs | E90, F30, G20 (and most late E46) | E36 factory fitment; early E46 |
| Deep-discharge tolerance | High — survives repeated partial discharge | Low — each deep discharge costs life |
| Typical lifespan in a 3 Series | 4–6 years | 3–5 years |
| Relative price | Higher (roughly 1.5–2× flooded) | Lower |
| Stop-start compatible | Yes | No — stop-start cars require AGM |
| Vent tube still needed? | Yes — AGM still vents hydrogen | Yes |
One myth worth killing: AGM batteries do not eliminate hydrogen venting. They vent less under normal use, but every trunk-mounted battery — AGM or flooded — must have its vent tube connected so gases escape outside the car. Skip the vent tube and you are letting hydrogen accumulate in an enclosed trunk, which is exactly the scenario the safety section below warns against.
Battery size finder: match the right battery to your 3 Series
Pick your generation below for the size, chemistry, vent, and registration notes that apply to your car. This reflects the most common factory fitments; always confirm against the label on the battery currently in your trunk before buying.
Battery size finder
What the job costs: DIY vs letting someone else do it
The battery itself is the cost. A correct-spec AGM in the H6/H7/H8 class typically runs $180–$320 at auto parts stores, depending on capacity and brand — cite actual shelf prices in plain text rather than any store link, since we don’t link retailers. What varies is who does the labor and who handles the registration step. The physical swap is simple enough that labor is minimal everywhere, so the DIY saving is real but modest; the bigger reason to DIY is doing it on your own schedule, since a dead battery rarely fails at a convenient time.
Honest bands, based on typical U.S. pricing: doing it yourself costs roughly $180–$320 (the battery, plus tools you likely own). Having a parts store install it while you buy the battery runs roughly $260–$420 all-in. An independent BMW shop typically charges $320–$480 including the battery and registration. A dealer usually lands at $450–$650 with an original BMW battery and full registration. Registration itself, when itemized separately, is typically a fraction of an hour of labor — which is why the dealer and shop numbers aren’t dramatically higher than the parts-store route.
Battery replacement cost estimator
The DIY swap: step by step
Difficulty: easy. One wrench-size job, no jacking, no fluids. The only things that can genuinely go wrong are connecting the battery backward, forgetting the vent tube, or damaging the sensor on the negative terminal — this procedure is written to keep all three from happening.
Tools and supplies
- 10 mm wrench or socket (terminal clamp nuts)
- 13 mm socket or wrench (hold-down bracket bolt on most generations)
- Extension bar — the hold-down bolt sits deep in the tray
- Terminal brush or sandpaper (clean the cable clamps)
- Nitrile gloves and eye protection
- The new battery — correct group size and AGM where required
- Optional: a memory saver plugged into the OBD-II port, if you want to keep clock and radio presets (it does not skip the registration requirement)
Step 1 — Park safely and open the trunk
Ignition off, key out or fob away from the car, parking brake on. Work in a ventilated space — a garage with the door open, not a sealed room — because batteries release small amounts of hydrogen during normal operation. Remove the trim panel or lift the trunk floor to expose the battery, and photograph the existing setup: cable routing, the vent tube connection, and the hold-down bracket. That photo is your reassembly map.
Step 2 — Disconnect the negative terminal first
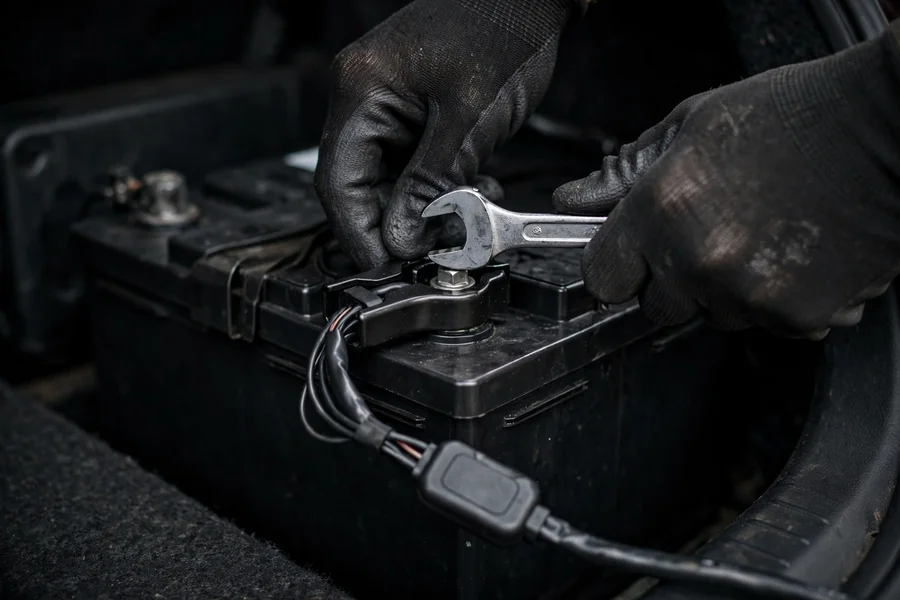
This is the non-negotiable order. The Intelligent Battery Sensor (IBS) — the small electronic module bolted to the negative terminal that measures current, voltage, and temperature for the car’s charging strategy — lives on the ground cable. Loosen the 10 mm clamp nut on the negative terminal and lift the cable straight off the post. Do not lever the clamp off using the IBS module as a pivot, do not yank the ground cable, and do not twist the sensor — BMW’s own servicing guidance treats this part as sensitive to mechanical stress, and a cracked IBS means charging faults and warning lights that no battery swap will fix. Tuck the negative cable aside so it cannot spring back onto the post.
Step 3 — Disconnect the positive terminal
Loosen the positive clamp the same way. Note the smaller wires attached to the positive clamp area — on many models these feed the battery safety terminal and the sensor’s voltage measurement. They come off with the clamp as an assembly; don’t unplug individual small wires unless you know exactly what they are. Cover the positive clamp with a rag so it can’t touch anything metal while you work.
Step 4 — Detach the vent tube
The vent tube is the small hose pushed onto a vent port on the side of the battery, routing down through the trunk floor to the outside. Pull it gently off the battery’s vent elbow. Set it where it can’t fall behind the tray. Reconnecting this tube to the new battery is mandatory — it is the single most commonly skipped step, and it’s the one that keeps hydrogen out of your trunk.
Step 5 — Remove the hold-down bracket and lift out the battery
Unbolt the hold-down bracket (usually a single bolt at the base of the battery, often 13 mm, reached with an extension). Note which of the tray’s bolt positions the bracket used — larger trays have more than one, and the position must match the new battery’s footprint. Lift the battery straight up and out. These batteries weigh 45–65 pounds, so lift with your legs and keep it level; tipping a flooded battery spills acid, and even AGM batteries are unwieldy at arm’s length inside a trunk. This is a good moment to inspect the tray for corrosion or standing water.
Step 6 — Set the new battery in and secure it
Lower the new battery into the tray, oriented the same way as the old one — terminals toward the cables, vent port on the same side as the vent tube. If your replacement battery has vent ports on both ends (many do), the vent tube connects to the port on the cable side and the unused port stays capped with the plug the battery ships with. Bolt the hold-down bracket back into the correct position and snug it firmly: the battery must not shift when you push it, but overtightening can crack the case. A battery that can slide is a battery that will eventually chafe through its vent tube or arc a terminal.
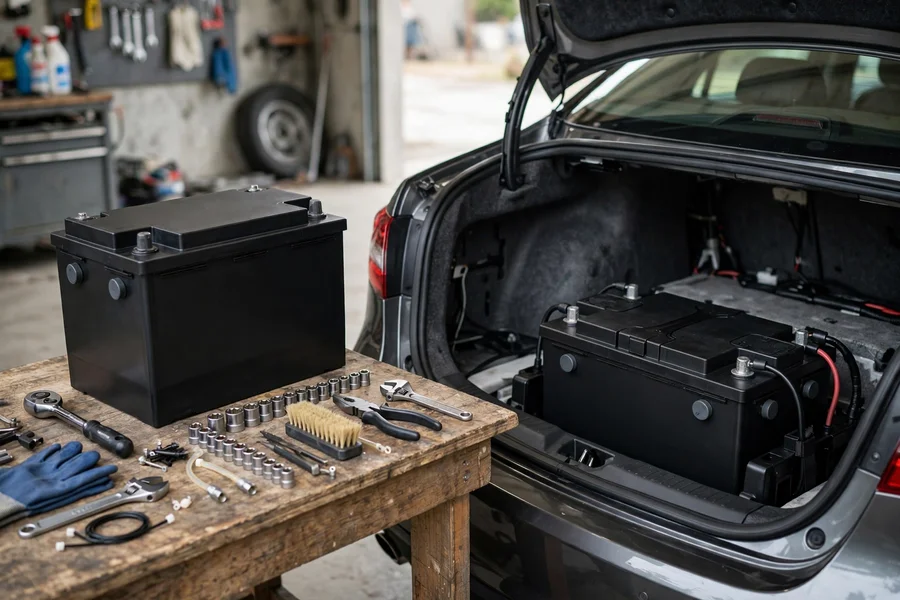
Step 7 — Reconnect the terminals: positive first, negative last
Installation is the reverse of removal, and the order matters just as much. Connect the positive clamp first and tighten it snugly — the clamp should not rotate on the post. Then reconnect the negative cable onto its post, seating the IBS assembly straight down without forcing or twisting it, and tighten the clamp nut. Clean both posts and clamp interiors with the terminal brush before connecting; a shiny contact surface prevents the slow voltage drops that trigger increased battery discharge warnings down the road.
Step 8 — Reconnect the vent tube and verify
Push the vent tube firmly onto the new battery’s vent port and confirm the other end still passes through the trunk floor to the outside. Then do the final check before closing anything up: both terminals tight and unable to twist by hand, hold-down bracket secure, vent tube connected, no tools left in the tray, trim and covers reinstalled. Start the car. Expect some warning lights on the first start — they usually clear after a short drive as systems recalibrate, which is covered in the next section.
What resets when you disconnect the battery
Disconnecting the battery clears volatile memory across the car’s modules. Most of it restores itself, but a few things need your attention after the swap:
- Clock and date — reset through iDrive or the instrument cluster menu; on older cars, the radio presets may also be gone.
- One-touch windows — the auto up/down function usually stops working until you reinitialize each window: hold the switch in the up position for a few seconds after the window fully closes. The procedure is the same one used after window regulator replacement.
- Sunroof — may need its initialization cycle (hold the tilt button) before one-touch works again.
- Steering angle and stability control — the DSC light may stay on after the first start; drive straight for a short distance and turn the wheel lock to lock once, and it recalibrates itself.
- Adaptations and learned values — transmission shift points and idle adaptations reset to factory defaults and relearn over the next few drives; slightly different behavior for the first day is normal.
- Fault codes — a battery disconnect clears some stored codes, which is why a pre-existing problem can seem “fixed” for a few days before its warning returns. If a warning reappears, diagnose it rather than disconnecting the battery again.
None of this is damage — it’s the car waking up with a blank short-term memory. If you used a memory saver during the swap, most of the above is preserved, but the battery registration requirement below is not affected either way.
Safety: hydrogen, sparks, and acid
A 12-volt car battery is not high voltage, but it stores enormous current and produces hydrogen gas. Treat it with the respect that combination deserves. Lead-acid batteries — including AGM — release hydrogen and oxygen during charging and normal operation; in an enclosed space like a trunk, those gases can accumulate to ignitable concentrations, which is the entire reason for the vent tube (Texas Department of Insurance vehicle battery safety fact sheet). No smoking, no open flames, no grinding or welding near the battery, and don’t create sparks by bridging the terminals with a tool.
- Negative off first, negative on last. With the negative cable disconnected first, an accidental wrench touch between the positive terminal and the body can’t complete a circuit. Reverse the order and you hand a wrench a direct short across the battery.
- Keep the battery upright. Even sealed AGM batteries can leak if cracked or tipped hard; flooded batteries spill sulfuric acid, which burns skin and eyes and eats paint. Gloves and eye protection are cheap insurance.
- Never install a battery with a cracked or bulging case. A damaged battery goes back to the store, not into your trunk.
- Mind the pyrotechnic safety terminal. On the positive cable of many models sits the battery safety terminal — a small explosive charge that disconnects the battery in a severe crash. Handle the positive clamp as an assembly, never strike it, and don’t try to disassemble it.
- Ventilate. Work with the garage door open or outdoors. Hydrogen is odorless and rises, so an open trunk in a closed garage is still a poor idea.
The mandatory final step: register the new battery
The physical swap is only half the job on an E90 or newer 3 Series. Your car’s power management system tracked the old battery’s age and declining capacity, and it charges accordingly — an aging battery gets a more aggressive charging strategy. Without registration, the car keeps charging the brand-new battery as if it were the worn-out one, which overcharges it and can cut its life dramatically. Registration tells the car a fresh battery is installed so it resets to the correct charging strategy. If you changed the capacity or chemistry (for example, upgrading from 80 Ah to 90 Ah), the car also needs to be coded with the new values.
The job isn’t done until you register. Our dedicated guide covers exactly how: BMW battery registration — the complete guide. It walks through the tools that can do it (from phone apps to full diagnostic software), the difference between registering the same spec and coding a changed spec, and what goes wrong when registration is skipped. Budget for it in your plan: whether you register it yourself in the driveway or have a shop do it, it happens the same day as the swap.
If your new battery keeps dying suspiciously fast even after a correct install and registration, the battery may not be the problem — a parasitic drain or a failing alternator can kill a fresh battery in weeks. Our battery keeps dying diagnostic guide walks through the drain hunt, and if charging voltage looks wrong, check the alternator failure symptoms guide before condemning the new battery. The broader context for all of this lives in the complete BMW 3 Series guide.
Frequently asked questions
How long does a BMW 3 Series battery last?
Typically 4–6 years for an AGM battery and 3–5 for a flooded one, though heat, short-trip driving, and lots of parked electronics use shorten that. Because the battery lives in the trunk away from engine heat, BMW batteries often outlast under-hood batteries in other brands. If your battery is dying repeatedly well before that age, see the battery keeps dying guide — a drain or charging fault is the likelier culprit.
Do I really need an AGM battery, or will a regular flooded battery work?
On E90, F30, and G20 models, use AGM — the charging system is calibrated for AGM voltages and the stop-start system demands AGM’s deep-cycle tolerance. A flooded battery will physically fit and start the car, but it charges incorrectly, dies early, and can trigger warnings. Only the E36 came standard with flooded batteries, and even there an AGM in the same group size is a legitimate upgrade. Always match the chemistry printed on the original battery’s label.
What happens if I forget to reconnect the vent tube?
Hydrogen gas from normal battery operation vents into your enclosed trunk instead of outside the car. Hydrogen is odorless and ignites easily, so this is a genuine safety issue, not a technicality — it applies to AGM batteries too, which still vent. The fix takes ten seconds: push the tube onto the battery’s vent port and confirm the other end passes through the trunk floor. If your replacement battery has two vent ports, connect the tube to one and leave the factory cap on the other.
Why did my windows lose one-touch auto up/down after the swap?
Disconnecting the battery clears the window modules’ learned end positions, so the car disables one-touch operation as a pinch-protection precaution. Reinitialize each window by holding its switch in the up position for a few seconds after the glass fully closes, then test auto up/down. The same initialization procedure is described in our window regulator replacement guide. The sunroof may need a similar reset before its one-touch function returns.
Can I replace the battery without registering it?
Physically, yes — the car will start and drive. But on E90 models and newer, skipping registration is a costly mistake: the power management system keeps applying the old battery’s aggressive aged-battery charging strategy to your new battery, overcharging it and shortening its life, and it can throw charging-related faults. Registration takes minutes with the right tool. Read the full procedure in our battery registration guide — the job isn’t done until this step is complete.