BMW 3 Series Radiator Replacement in 14 Steps
Short answer: BMW 3 Series radiator replacement is one of the most approachable cooling-system DIYs: drain the coolant, remove the electric fan and shroud, disconnect the hoses (and ATF cooler lines on automatics), unclip the radiator, and lift it out. The documented failure: cracking in the plastic end tanks and hose necks — most often, per owner reports, between roughly 80,000 and 120,000 miles on E90 cars. Budget 2–4 hours: $250–$550 in parts as a DIY, $700–$1,200 at an independent shop, or $1,100–$2,000 at a dealer — and never skip the mandatory coolant bleed afterward.
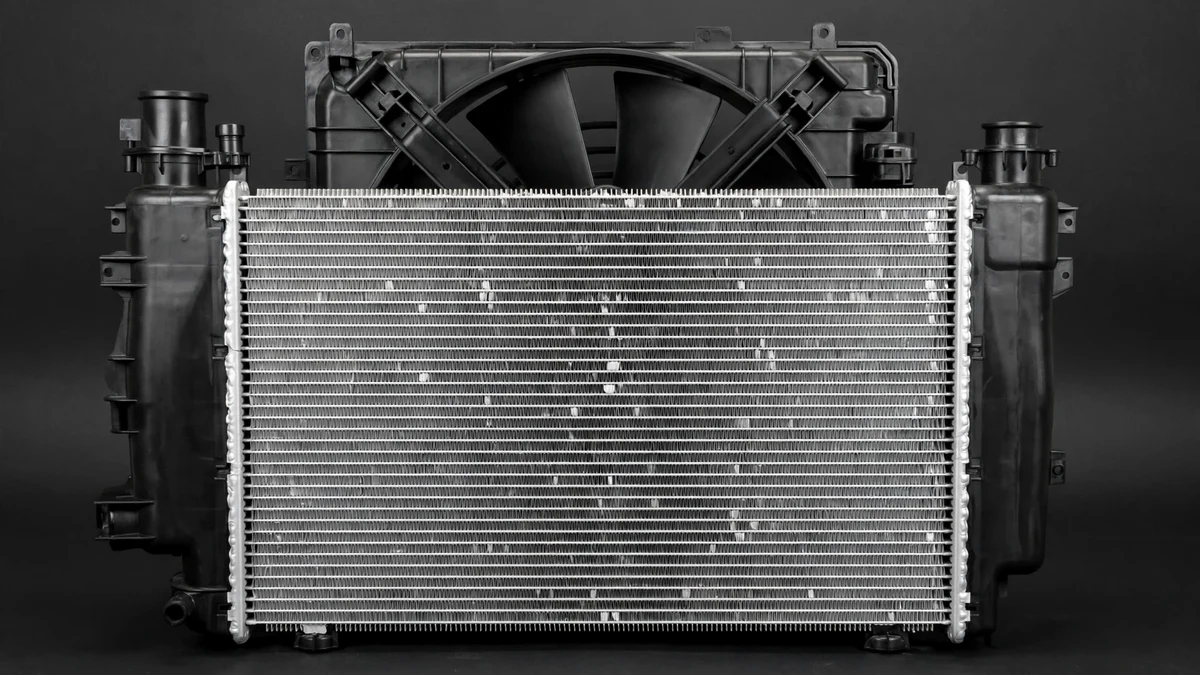
A radiator is about as simple as car parts get: an aluminum core of thin cooling tubes and fins, with black plastic tanks crimped onto each side. On the 3 Series that simplicity is also the failure point — heat cycles make the plastic brittle, and cracks start where owners keep finding them: the tight-radius corners of the end tanks and the hose necks, where a heavy, vibrating hose levers against the plastic. The good news: replacement is genuinely straightforward — no bumper removal, no timing work, no special software. What decides whether your Saturday goes well is diagnosis first, the right coolant, and the bleed afterward.
One boundary: if you have not confirmed the radiator is the leak source, read the diagnosis section before ordering parts. If the diagnosis is done, this article covers the full procedure — drain, fan and shroud, hoses, the automatic-transmission ATF caution, fitment, refill, and the mandatory bleed. For the bleed, our BMW 3 Series coolant bleeding procedure guide is the mandatory next step after any cooling work.
In this guide
- How 3 Series radiators fail (and how to tell)
- Diagnosis: pressure test and UV dye — with honest DIY limits
- Radiator fitment by generation and engine
- Parts and tools checklist
- Interactive: radiator cost estimator
- Step-by-step: replacing the radiator
- The automatic-transmission caution
- While you’re in there
- OEM vs. aftermarket: quality notes
- DIY vs. independent shop vs. dealer costs
- Radiator replacement FAQ
How 3 Series radiators fail (and how to tell)
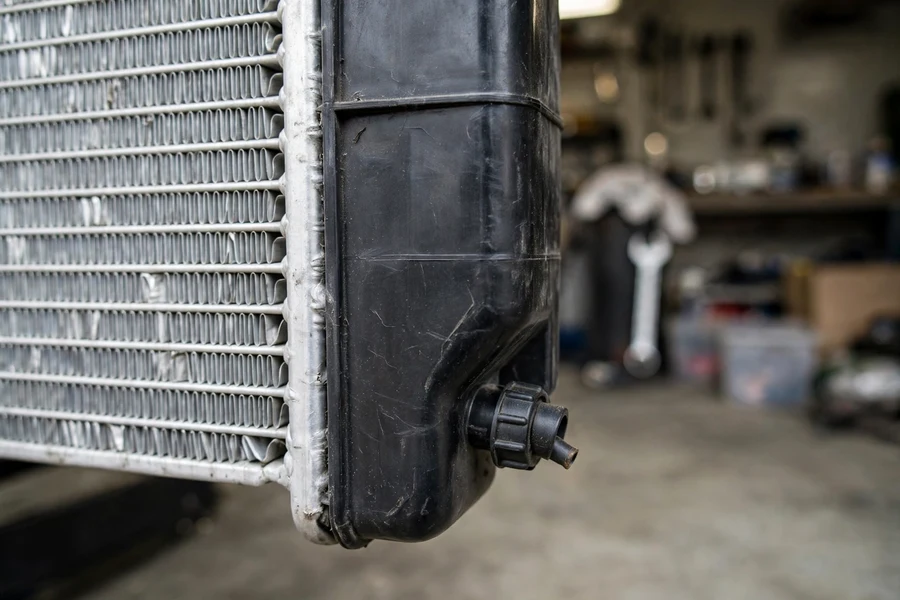
Every E90, F30, and G20 radiator shares the same construction: an aluminum core with plastic end tanks crimped on. The aluminum effectively never fails — the plastic ages, gets brittle, and cracks, usually at the tight-radius corners where the core tubes enter the tanks, at the upper hose neck, or along the crimp seam. Owners have documented the same crack locations for two decades. The failure usually starts as a hairline seep that evaporates on the hot plastic, leaving a white or crusty residue — then one heat cycle too many turns the seep into a stream. The classic early symptom, documented in the Pelican Parts E90 DIY guide: temperature climbs under sustained highway load, then falls back to normal at idle.
| Symptom | What it suggests | What to check first |
|---|---|---|
| Sweet smell after parking, white crust on end tanks | Early seepage evaporating on hot plastic | Flashlight check of tank corners and crimp seam, engine cold |
| Temperature climbs on the highway, normal at idle | Reduced cooling capacity | Check level, then pressure-test |
| Drip from the front corners, low-coolant warning | Active end-tank or hose-neck crack | Trace the wet trail upward — coolant runs downhill |
| Steam from the front, sudden temperature spike | Hose neck or tank has let go | Stop driving; tow-truck territory |
| Coolant loss with no visible puddle | Seep evaporating before it drips, or a leak elsewhere | Pressure test — never throw parts at an invisible leak |
| Pinkish or milky residue in the coolant (automatics) | Internal ATF cooler breach | Stop driving — this can kill the transmission |
One trap worth naming: coolant runs downhill and the fan blows it around, so the wet spot is rarely the leak’s origin — always trace trails upward to their highest point. Our low coolant warning guide covers the full leak-hunting sequence, and the 3 Series overheating guide sorts radiator failure from the other causes of a climbing gauge.
Diagnosis: pressure test and UV dye — with honest DIY limits
Cooling systems have a dozen leak points, and the radiator is only one of them. The definitive DIY test is a cooling-system pressure test; the honest second opinion is UV dye.
The pressure test. With the engine stone cold, a pressure-test kit replaces the expansion-tank cap and pumps the system to roughly 15–20 psi (match the rating on your cap, marked 140 or 200 kPa on G20 cars). Kits with the BMW adapter are free loaner tools at most auto parts stores. On a cracked end tank you will often hear the hiss before you see the drip. Let it sit pressurized for an hour or two — a slow creep down with no visible leak suggests evaporating seepage, while a fast drop to zero with nothing visible points at internal leakage: a shop conversation, not a radiator order.
UV dye. A small bottle of coolant-compatible UV dye goes into the expansion tank, then you drive normally for a few days so it circulates and seeps out wherever coolant escapes. In a dark garage with a UV flashlight, the leak glows bright yellow-green — unmistakable even behind the fan shroud. Best method for slow seeps that leave crust but never a puddle.
The honest limits. A cold pressure test can miss a crack that only opens at full operating temperature — if the cold test is clean but coolant keeps disappearing, repeat it warm (gloves and eye protection) or go straight to dye. Dye needs a few hundred miles of driving, and BMW’s official line discourages adding anything to the coolant that is not coolant, so treat it as a diagnostic step — never confuse it with stop-leak products, which clog the passages you are trying to save. Pressure dropping to zero with no visible leak anywhere suggests a head-gasket breach: get a proper diagnosis before buying parts.
| Test result | What it means | Next step |
|---|---|---|
| Pressure holds, no visible leak | No significant leak when cold | Repeat warm, or run UV dye for a week; check tank and hoses too |
| Pressure drops, hiss or drip at the radiator | End-tank or hose-neck crack confirmed | Replace the radiator; inspect hoses and tank while open |
| Pressure drops fast, no visible leak | Internal leak — coolant going somewhere unseen | Professional diagnosis; possible head gasket or cooler breach |
| Dye glows at tank corners or crimp seam | Seepage confirmed at the crack | Replace the radiator — seeps become streams |
| Dye glows at a hose clamp, not the radiator | The radiator is innocent | Replace the hose or clamp instead |
Radiator fitment by generation and engine
Radiators are not interchangeable across the three generations — core width, hose neck positions, mounting tabs, and ATF cooler plumbing all differ — so confirm your chassis and engine code (or your VIN at the parts counter) before ordering. The plastic end-tank failure is documented most heavily on the E90, the oldest fleet, but F30 and G20 cars use the same construction.
| Chassis | Engines | Coolant spec | Fitment notes |
|---|---|---|---|
| E90 (2006–2013) | N52, N54, N55 | Blue G48 | Highest documented end-tank failure rate; automatics route ATF cooler lines to the radiator area |
| F30 (2012–2016) | N20, N26, N55 | Blue G48 | Fan removal is the fiddliest step — shroud grommets stick; silicone spray helps |
| F30 (2016–2018) | B46, B58 | Blue G48 to July 31, 2018; green HT-12 from Aug 1, 2018 | Check the door-jamb build date; never mix blue and green |
| G20 (2019+) | B46, B48, B58 | Green HT-12 | Pressure-test to the cap rating (140 or 200 kPa) |
Refill spec: blue G48 or green HT-12 per the table, mixed 50/50 with distilled water only — full details in our BMW 3 Series coolant type guide.
Parts and tools checklist
Gather everything before the car goes in the air. The job stalls most often on broken retaining clips (buy spares — they crack if you look at them funny), the wrong coolant, or a split hose discovered mid-job with the parts stores closed.
| Part | Notes |
|---|---|
| Radiator (correct chassis and engine) | Confirm manual vs. automatic — ATF cooler plumbing differs. See brand notes |
| Upper and lower radiator hoses | Replace if original or older than ~8 years |
| Hose clamps | New clamps with new hoses |
| Radiator retaining clips | Brittle plastic — keep spares on hand |
| Engine coolant (correct spec) | Blue G48 or green HT-12 per the fitment table; 50/50 with distilled water |
| Distilled water | For mixing concentrate and bleed top-ups |
| ATF cooler line O-rings (automatics) | Replace whenever ATF lines are disconnected |
| Tool | Why you need it |
|---|---|
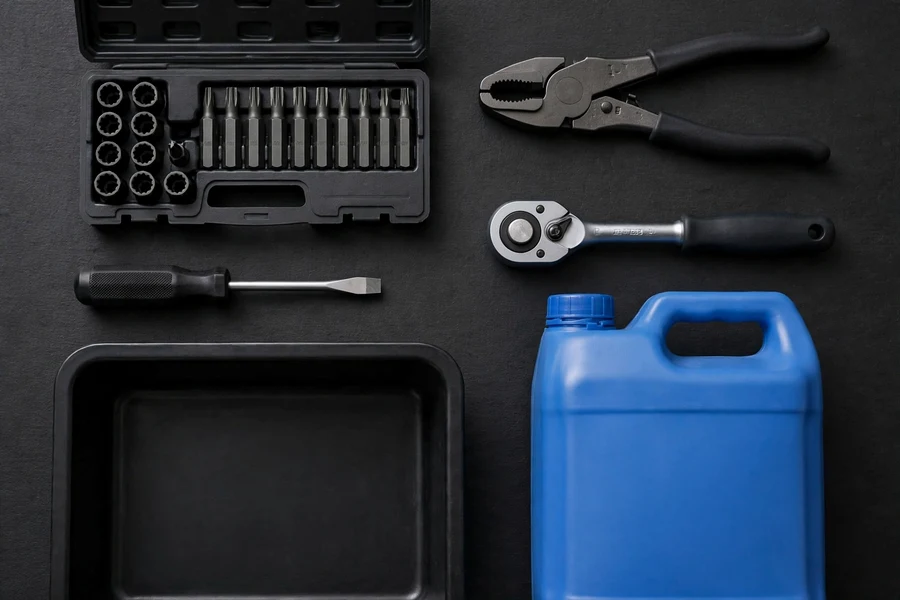
| Socket set, ratchet, extensions | Shroud bolts, undertray fasteners, clamps |
| T25 Torx bit | BMW undertray and trim fasteners |
| Flathead screwdriver | Clips, hose-clip persuasion, connector locks |
| Hose clamp pliers or flex-shaft driver | Reaches clamps buried behind the radiator |
| Large drain pan (3+ gallons) | The system holds ~2–2.5 gallons; coolant is toxic to pets — catch it all |
| Floor jack and jack stands (or ramps) | Drain plug and lower hose are reached from below; see our safe jacking points guide |
| Silicone spray | Frees the fan shroud’s stuck rubber grommets — the owner-reported trick |
| Flashlight or headlamp | Trace leak trails to their highest point |
| Spill-free coolant funnel | Keeps air out during refill; makes the bleed far less messy |
Interactive: radiator cost estimator
Pick your car and repair route below for a realistic cost band. All figures are typical owner- and specialist-reported ranges, not quotes — labor rates vary sharply by region.
Radiator cost estimator. Select your car and repair route for a realistic cost band.
Your cost band and parts notes will appear here.
Step-by-step: replacing the radiator
This is the procedure for the E90 and F30, which cover the large majority of 3 Series radiator DIYs; the G20 follows the same shape with model-specific trim differences. Work on a cold engine, on level ground, with the car properly supported. Coolant is sweet-tasting and toxic to animals — keep pets away and catch every drop. Difficulty: 3 out of 5 wrenches, 2–4 hours for a first-timer.
- Confirm the engine is cold. Never open a pressurized cooling system. Squeeze the upper hose — if it is firm or warm, wait.
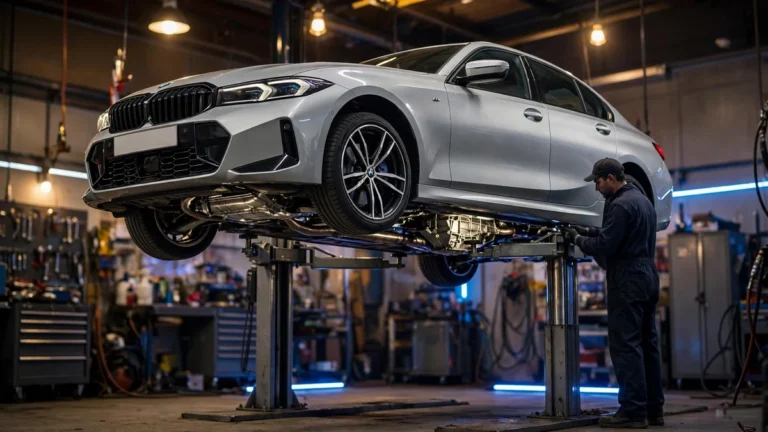
- Raise and support the front of the car. The drain plug and lower hose are reached from below. Follow our safe jacking points guide, remove the front undertray, and position a drain pan under the radiator.
- Drain the system. Open the expansion-tank cap to let air in, then open the radiator drain plug at the lower corner — a small plastic screw that is famously fragile, so turn it gently. If it snaps, disconnecting the lower hose drains the system.
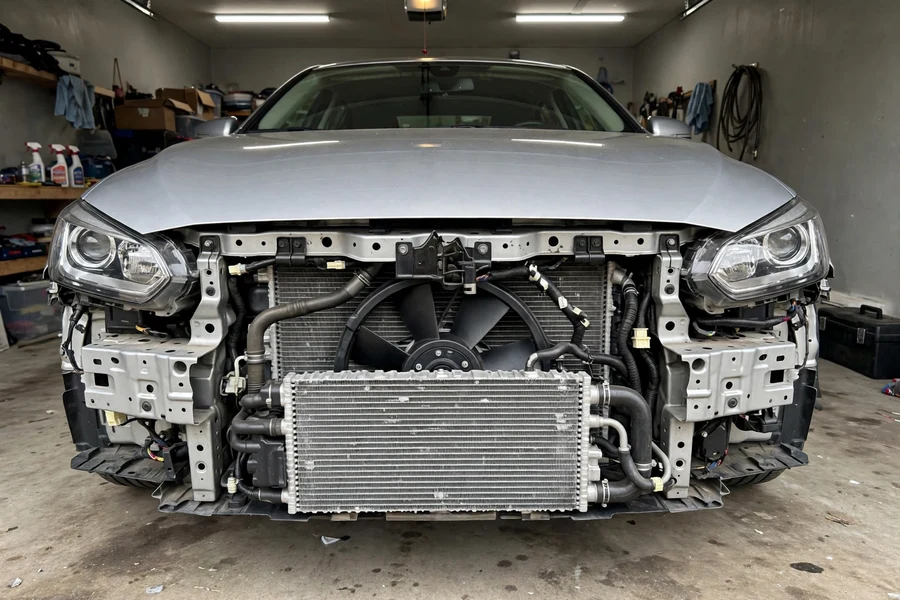
- Remove the electric cooling fan and shroud. Unplug the fan harness (noting where it and any sensor connectors clip to the radiator), remove the shroud bolts, and lift the assembly up and out. This is the step owners call the hardest: the shroud sits in rubber grommets that stick with age — silicone spray turns a fight into a wiggle.
- Disconnect the coolant hoses. Upper hose at the radiator neck, lower hose at the lower tank, and the small expansion-tank hose across the top of the fan area on some models. Old hose ends fuse to the necks — twist, don’t yank; anything swollen, cracked, or rock-hard goes in the trash.
- Disconnect the ATF cooler lines (automatics). Have a second catch pan ready. The ATF lines disconnect at the radiator side tank or at an auxiliary cooler clipped to it — see the ATF caution section. Cap the open lines immediately, fit new O-rings on reassembly, and never crank or start the engine with the lines open.
- Release the retaining clips and mounts. Pry the brittle top clips off the radiator (this is why you bought spares), disconnect any remaining sensor connectors, and note the two rubber mounts it sits on.
- Lift the radiator up and out. With everything disconnected it lifts straight up. Compare old and new side by side: neck positions, mounting tabs, sensor bungs, and ATF fittings must match — if anything differs, you have the wrong radiator.
- Transfer parts and install the new radiator. Move over any sensors, the drain plug and its O-ring if not supplied, and the mounts. Lower the new radiator in, seat it on its mounts, refit the retaining clips.
- Reconnect everything in reverse. ATF lines with new O-rings first (automatics), then hoses with new clamps, then the expansion-tank hose, then the fan and shroud — confirm the shroud seats fully into its grommets — then all connectors. The most common post-job leak is a hose that was never fully seated.
- Close the drain and refill. Close the drain plug snug, not gorilla-tight — plastic threading into plastic. Refill with the correct coolant mixed 50/50 with distilled water, pouring slowly.
- Run the mandatory bleed. Trapped air causes overheating that mimics a failed repair. The full routine is in our coolant bleeding procedure guide — follow it before the first real drive.
- Leak-check and monitor. After the bleed, run the engine to full temperature with the undertray still off and inspect every connection with a flashlight. Recheck the level after the first few drives, and watch the gauge for the first week.
The automatic-transmission caution
If your 3 Series has an automatic, the radiator job touches the transmission — the one part of an otherwise simple DIY that can turn expensive. On many E90 automatics, ATF cooler lines run to the radiator’s side tank or an auxiliary cooler clipped to it, so you will lose some ATF. On F30 and G20 cars with the ZF 8-speed, the ATF heat exchanger is more commonly at the transmission and fed by engine coolant — but verify your car’s plumbing first, because configurations vary. Have a second catch pan ready, plug open lines immediately, and fit new O-rings on reassembly — a weeping ATF line after a radiator job is almost always a reused O-ring.
The cardinal rule, confirmed by painful owner experience: never crank or start the engine with the ATF cooler lines disconnected — the transmission pump will blast quarts of ATF across your garage floor in seconds. After reassembly, the ATF level needs checking: BMW automatics have no dipstick — the level is set through the fill plug with the engine running at a low, specified fluid temperature, covered in our ZF 8HP transmission fluid change guide. If you lost more than a dribble, have a specialist verify the level.
One warning sign deserves its own paragraph: ATF in the coolant, or coolant in the ATF. Pinkish, milky, strawberry-milkshake fluid in the expansion tank means the internal ATF cooler has breached and the fluids are mixing — and coolant in ATF destroys transmission friction materials quickly. This stops being a radiator DIY: replace the radiator, then service the transmission fluid and filter immediately, and do not drive the car in the meantime.
While you’re in there
The cooling system is already drained and the fan is already out, so this is the cheapest labor these parts will ever cost. Inspect everything; replace what the evidence condemns.
| Item | Verdict | Why |
|---|---|---|
| Expansion tank | Replace if original or over ~8–10 years old | The other documented plastic-tank failure — see our expansion tank failure guide |
| Upper and lower hoses | Replace if original or showing swelling, cracking, hardness | A new radiator with tired hoses just moves the next leak downstream |
| Thermostat | Replace on evidence, not automatically | If original at high mileage the labor overlaps; see our water pump failure guide for judgment |
| Water pump | Replace on evidence, not automatically | The electric pump has its own codes and symptoms — diagnose it separately |
| Expansion-tank cap | Cheap; replace if the seal looks tired | A weak cap lowers the boiling point and can mimic a leak |
The thin hose from the radiator to the expansion tank across the top of the fan area is a known E90 weak point — it rots and splits, and costs pennies next to the radiator.
OEM vs. aftermarket: quality notes
A radiator is not a part where brand snobbery pays, but it is not one where the cheapest option wins either — it stands between your engine and overheating. The owner-community landscape:
Genuine BMW radiators are the safe, expensive choice — exact fitment, factory-spec construction, roughly double the price of a quality aftermarket unit. For a keeper car, the premium buys certainty.
OE suppliers. Behr (now Mahle) historically supplied radiators to BMW. One caveat, labeled as community-reported: owner reports on aftermarket Behr radiators are mixed, with some owners steering clear after premature failures — the OE supplier’s aftermarket line and the part BMW installs are not always the same thing.
Nissens is the aftermarket name that comes up most positively in community discussions — widely used, good fitment, long track record in European cooling parts. The default pick for genuine-adjacent quality without the dealer price.
CSF sits at the budget end of the reputable options — community-reported prices around $70–$120 for E90 fitment — and owners who run them generally report they cool fine. CSF also makes all-aluminum radiators that eliminate the plastic tanks entirely; the honest counterpoint is that all-aluminum units are not indestructible either, and some need minor fitment massaging.
Whatever brand you choose, two checks apply to all of them. First, confirm the exact fitment for manual vs. automatic and your engine — ATF fittings, neck positions, and sensor bungs differ, and a radiator that “almost fits” does not fit. Second, inspect the crimp seam and tank molding on arrival; sloppy crimps and flash on the necks are the visible tells of a unit that will not age gracefully. And skip the stop-leak aisle: sealant in a cracked plastic tank buys weeks at best and clogs heater cores at worst.
DIY vs. independent shop vs. dealer costs
Radiator replacement has one of the friendliest dealer-to-DIY price spreads on a 3 Series: a moderately priced part and only 2–4 hours of labor. The bands below are owner- and specialist-reported typical ranges, not quotes — labor rates and dealer parts markups vary sharply by region.
| Route | Parts | Labor | Typical total |
|---|---|---|---|
| DIY (quality aftermarket radiator) | $250–$550 incl. hoses, coolant, clips, ATF O-rings | Your Saturday (2–4 hours) | $250–$550 |
| DIY (genuine BMW radiator) | $450–$800 incl. hoses, coolant, clips | Your Saturday (2–4 hours) | $450–$800 |
| Independent BMW specialist | $300–$700 incl. shop markup | $300–$700 (2–4 hrs) | $700–$1,200 |
| Dealer | $400–$900 genuine at list | $400–$900 (2–4 hrs) | $1,100–$2,000 |
Two things inflate these bands in practice: the “while you’re in there” list (a shop that finds a brittle expansion tank and tired hoses will correctly recommend them), and the ATF situation on automatics (setting the fluid level is extra shop time). And one consumer-protection note from owner reports: a 3 Series radiator job does not require removing the front bumper, headlights, or evacuating the air conditioning. If a quote lists bumper and headlight removal, get a second quote — owners have documented shops padding exactly this job with thousands in unnecessary labor.
Radiator replacement FAQ
Can I drive with a cracked radiator end tank?
Only as a calculated short-distance risk — and usually the calculation says tow it. A hairline seep might get you to a nearby shop if the gauge stays dead normal and you carry spare coolant — but end-tank cracks propagate. If the gauge climbs at all, pull over — an overheated engine turns a $500 DIY into a head-gasket bill in minutes.
Does replacing the radiator require removing the front bumper?
No. On the E90, F30, and G20 the radiator lifts up and out after the electric fan and shroud are removed — no bumper, headlight, or condenser removal, and no A/C evacuation. Owners have documented shops quoting bumper and headlight removal as required labor; such a quote deserves a second opinion.
Should I replace the expansion tank and hoses with the radiator?
The expansion tank: yes, if original or over about 8–10 years old — the cooling system’s other documented plastic failure, and the labor is already free. Details: our BMW expansion tank failure guide. The hoses: yes if swollen, cracked, hard, or fused to the necks. Thermostat and water pump: on evidence, not automatically.
How much coolant do I need for a radiator replacement?
The system holds roughly 2–2.5 gallons total, so one gallon of concentrate mixed 50/50 with distilled water covers the refill and top-ups. Buy the correct spec — blue G48 or green HT-12 per the fitment table — and never mix the two. Full details: our BMW 3 Series coolant type guide.
Do I really need to bleed the cooling system after replacing the radiator?
Yes — mandatory, not optional. Any opened cooling system traps air, and air pockets cause exactly the overheating you just fixed the radiator to cure, and can starve the water pump. Follow our coolant bleeding procedure guide before the first real drive, then recheck the level after a few drives as the last air works out.
Radiator replaced, system bled, no leaks after a week of drives — the cooling system is set for years. Many owners use the moment for a fresh look at the rest of the system via our 3 Series overheating guide; for the bigger picture, the complete BMW 3 Series guide is the hub this article hangs off.