BMW Guibo Replacement Costs $400–$800 Unless You DIY
Short answer: BMW guibo replacement fixes the clunk on takeoff and every on/off-throttle transition: the rubber flex disc coupling the transmission to the driveshaft has torn, and the driveline is slapping through its own slack. DIY cost is typically $90–$160 in parts and new hardware; independent shops commonly charge $400–$800 (owner-reported). It is a 3–5 hour under-car job on an E90, F30, or G20 — mark the driveshaft’s orientation before removal and replace the single-use self-locking nuts. Vibration under load at speed with an intact disc? Suspect the center support bearing instead.
A clunk the instant you touch the throttle, repeating every time you lift off and re-apply power, sends 3 Series owners down a long list of suspects: engine mounts, transmission mounts, differential bushings. Most are expensive and most are wrong. The culprit is often a $60 rubber doughnut between the transmission output flange and the driveshaft — the flex disc, universally called the guibo. It is a wear item, it fails predictably, and the diagnosis is a five-minute flashlight inspection once you know where to look.
This guide covers the whole job honestly: what the guibo is and why BMW uses rubber instead of a U-joint here, the symptoms and the lookalikes, a diagnostic picker that separates the guibo from the center bearing and rear CV joint, the full DIY including the orientation-marking step shops sometimes skip, honest torque and hardware notes, “while you’re in there” work, and real cost bands. If your symptom is a warning light rather than a noise, start with the drivetrain malfunction guide — a guibo never trips one.
What the guibo actually is
The guibo (flex disc) is a cord-reinforced rubber coupling that bolts the transmission output flange to the front of the driveshaft on RWD 3 Series cars —
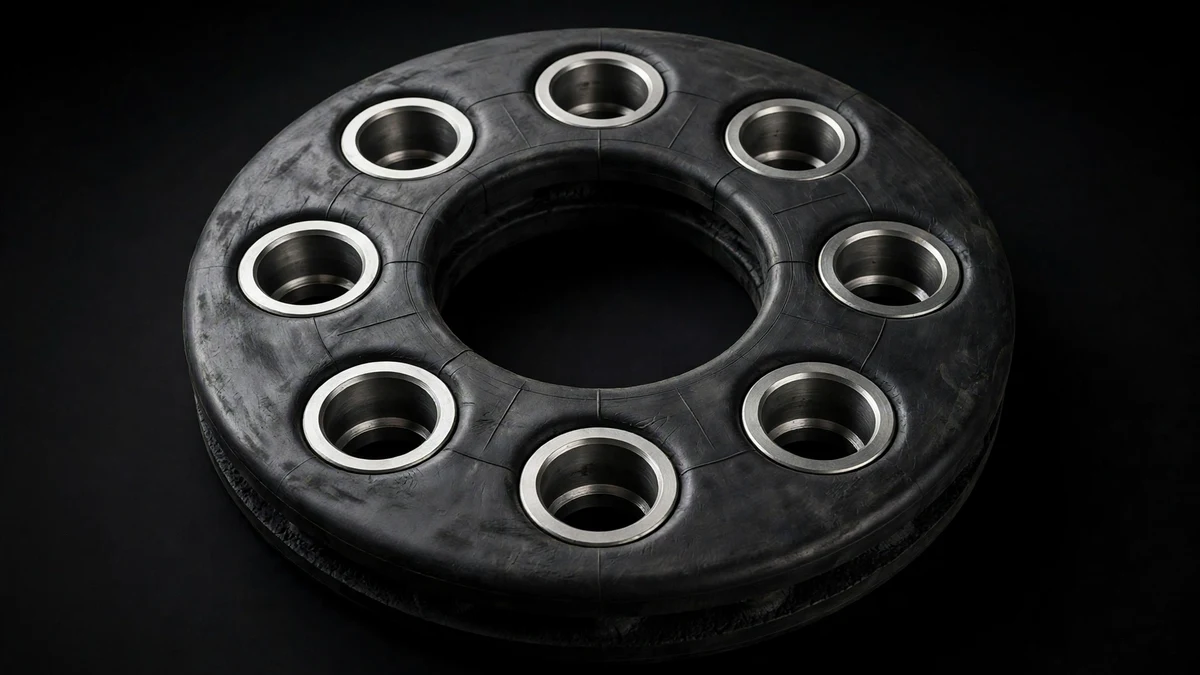
The guibo (flex disc) is a cord-reinforced rubber coupling that bolts the transmission output flange to the front of the driveshaft on RWD 3 Series cars — six bolts in, six bolts out, steel sleeves molded into the rubber. It transmits engine torque while absorbing torsional shock: every launch, shift, and throttle tip-in sends a pulse through it, and the rubber absorbs what would otherwise hammer the transmission output bearing. BMW uses rubber here rather than a U-joint because transmission and shaft sit nearly in line, so the joint needs twist absorption, not angle. The name is honest history: “giubo” blends giunto (joint) with Boschi, the Italian rubber-coupling maker that patented the design.
Inside, it is a sealed unit: rope-like reinforcing cords wound through the rubber, with molded steel bushings at each bolt hole. There is no service, no greasing, no adjustment. When the rubber tears, the cords carry the load until they don’t — and a guibo that separates completely leaves the driveshaft disconnected from the transmission, stranding the car with no warning light. Heat, ozone, oil contamination, and hard launches all accelerate the decline, and winter-salt regions see faster rubber deterioration.
| Generation | Years | Drivetrain layout | Guibo notes |
|---|---|---|---|
| E90 / E91 / E92 / E93 | 2006–2013 | RWD: guibo at transmission flange; xDrive adds front propshaft | The classic failure car — 15+ years old, originals past expected life |
| F30 / F31 / F34 | 2012–2019 | Same RWD arrangement; xDrive front coupling at transfer case | High-mileage examples (100k+) commonly show first cracks |
| G20 / G21 | 2019–present | Same basic architecture | Still young for rubber failure; inspection intervals still apply |
| xDrive (all gens) | — | Rear propshaft guibo plus front-propshaft coupling | Front coupling is guibo-style on many xDrive models — check by VIN |
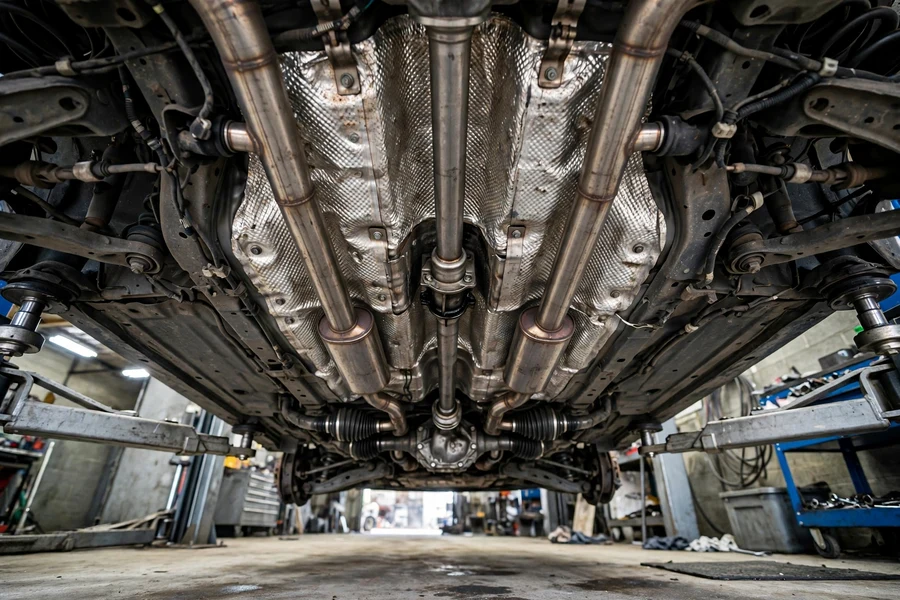
One point worth settling: the guibo is a transmission-to-driveshaft joint, not a differential or axle joint. Noises from the rear of the car, clicking in turns, or grease near the wheels belong to other components. The guibo lives at the front of the shaft, right behind the transmission, above the exhaust heat shielding — which is why the DIY requires lowering the exhaust.
The symptoms: what a failing guibo feels and sounds like
A torn guibo has a signature: torque arrives through the slack. On takeoff there is a clunk or thud from under the center of the car, sometimes a two-stage “clunk-clunk” as the driveline takes up slack in both directions. Lift off at speed and re-apply, and the thud returns. Hard shifts produce a thunk. As damage progresses, vibration under acceleration joins in, and in severe cases the floor pan buzzes at highway speed because the shaft is no longer running true.
| Symptom | When it appears | What it suggests | Likelihood it’s the guibo |
|---|---|---|---|
| Clunk or thud on takeoff | The instant torque arrives, from a stop | Driveline slack taken up — torn flex disc the classic cause | High |
| Thud on off/on throttle transitions | Lifting and re-applying power while cruising | Same slack, unloaded and reloaded — nearly diagnostic | High |
| Thunk during shifts | 1–2 shifts, hard downshifts, rushed manual shifts | Torque reversal hammering the torn coupling; check trans mounts too | Medium–high |
| Vibration under acceleration | Under load at speed, fades when coasting | Shaft no longer centered — guibo or center support bearing | Medium |
| Droning hum that follows speed, on or off throttle | Constant with speed | Wheel bearing or differential — not the guibo | Low |
| Clunk only over bumps, never on throttle changes | Bumps and potholes | Suspension or subframe bushings — not driveline | Low |
The pattern to memorize: guibo problems track torque events — takeoff, shifts, throttle transitions. Problems that track vehicle speed regardless of throttle (drones, hums, whines rising with the speedometer) belong to bearings and the differential. That distinction rules out half the wrong diagnoses. If your noise is a speed-following drone, the wheel bearing noise guide is the next step; a driveline vibration with a warning message belongs with the drivetrain malfunction guide.
Inspect it yourself before buying anything
This is the cheapest diagnosis on the car: the guibo is visible from underneath with a flashlight, and torn rubber is torn rubber. Raise the front on ramps or jack stands (see the safe jacking guide — the car must be level and rock-solid), slide under the transmission area, and look at the coupling between the transmission output flange and the driveshaft. A healthy guibo is matte black rubber with crisp edges; an aged one shows fine surface cracks between the bolt sleeves; a failed one has torn rubber, missing chunks, separated cords, or bolts that have chewed their holes oval.
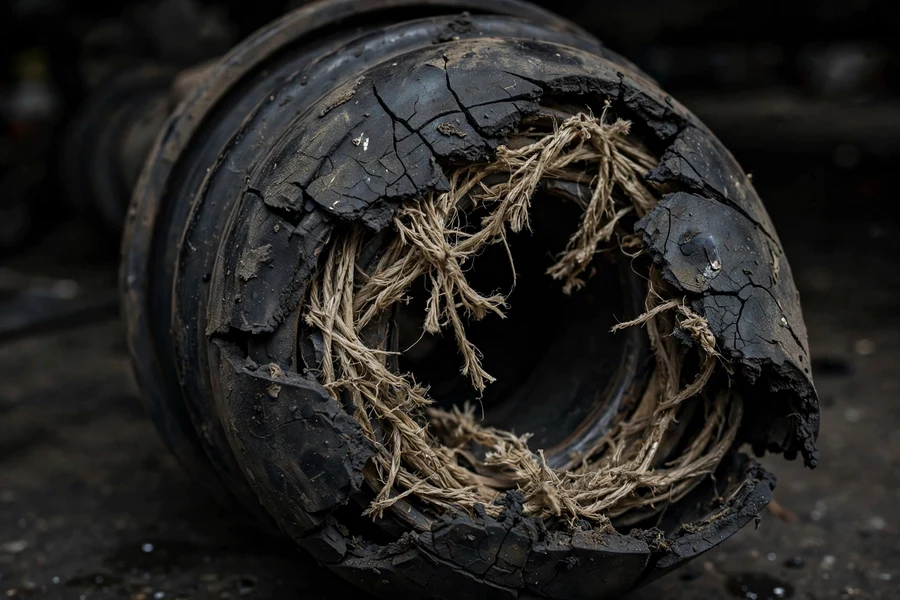
Check three things. First, the rubber between the bolt sleeves — squeeze it if you can reach; it should feel firm, not crumbly or oil-soft. Second, the bolt sleeves: torn guibos let the bolts hammer their holes oval, meaning the damage has been progressing a while. Third, wipe the rubber with a rag — grease means something above is leaking oil or fluid onto it, and oil kills rubber fast; fixing the leak is part of the repair. Inspect annually; every other oil change in salt-heavy states.
A note on what “bad enough” means: hairline surface cracks in otherwise firm rubber are aging — note it and re-check next service. Rubber that is torn through, chunking off, or showing cords is failure, and the job moves to the top of the list. A guibo does not heal. Driving on a visibly torn one gambles with the transmission output flange and center bearing — a broken disc slaps the tunnel and can crack the flange, turning a $100 DIY into a transmission-out repair.
Interactive: is it the guibo, the center bearing, or something else?
Guibo, center support bearing, rear CV joint, differential, and worn mounts all make noises from under the car, and guessing wrong costs money. Answer three questions and the picker narrows it to the likely component — the same logic a specialist applies in the first five minutes.
Driveline symptom checker — guibo vs. the lookalikes
If the checker pointed at the center support bearing, understand the relationship: guibo and center bearing are the two rubber components on the same shaft, they age on similar timelines, and a failed guibo’s flapping shaft accelerates bearing wear. That is why the cost section prices both jobs.
The DIY: honest difficulty, tools, and time
Guibo replacement is a genuine home-garage job — no special tools, no transmission removal, no software — but it is an under-the-car job, and that sets the real difficulty bar. You need the car high enough and stable enough to swing a breaker bar, the exhaust partially lowered (the bolts are above it), and the patience to work with six corroded fasteners in a tight tunnel. A competent DIYer with jack stands should expect 3–5 hours the first time; experienced owners report closer to 3. The single step you cannot skip: marking the driveshaft’s orientation before removal. Never attempt this on a scissor jack.
| Item | What to bring | Why |
|---|---|---|
| Access | Two jack stands or ramps, level concrete floor | You will be under the car for hours; rock-solid support is non-negotiable |
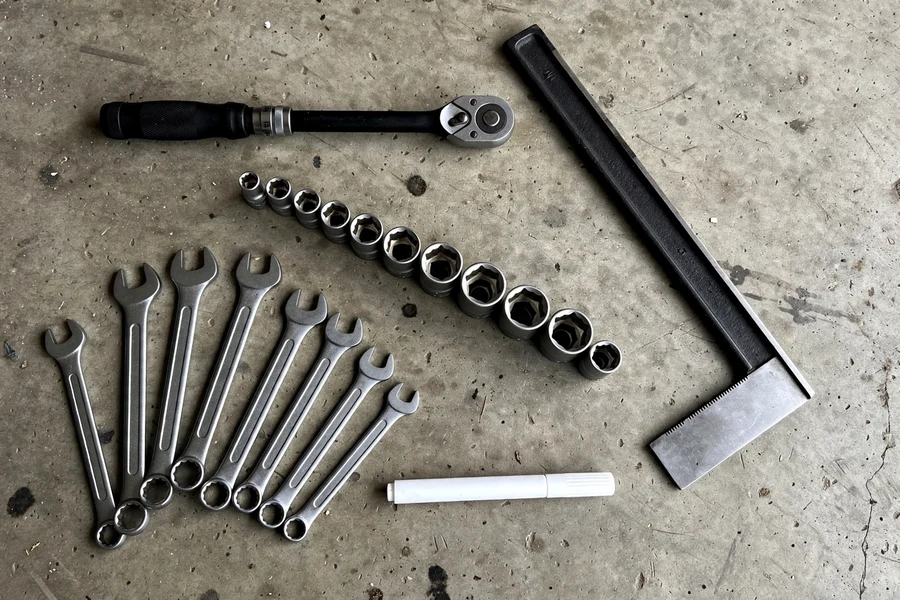
| Sockets | Metric socket set, 16/17/18 mm range, long extensions, swivel | Guibo bolts are typically in the 16–18 mm range depending on chassis; extensions reach the tight spots |
| Breaker bar | Long breaker bar (torque wrench is not for breaking bolts loose) | Corroded flange bolts need serious leverage — never break bolts with your torque wrench |
| Torque wrench | Rated to ~110 Nm | Final tightening must be to spec, not feel |
| Wrenches | Metric combination wrenches matching the bolt heads | You hold the bolt head and turn the nut on the flange side |
| Marker | White paint pen or correction fluid | Marking shaft-to-flange orientation before disassembly |
| Exhaust tools | Penetrating oil, exhaust gasket(s) for your chassis | Exhaust fasteners are always rusty; gaskets often don’t survive removal |
| Support | Mechanic’s wire or rope, second jack or transmission jack | The shaft must not hang by its own weight once unbolted |
| Safety | Safety glasses, gloves, cool engine | Hot exhaust and falling debris are the realistic hazards |
Step-by-step: replacing the flex disc
Work on a cold engine — the exhaust must come down, and hot exhaust is a burn waiting to happen. Raise the car evenly on stands, chock the rear wheels, and confirm it does not rock before you go under. The outline below follows the procedure as commonly documented for E90, F30, and G20 RWD cars; exhaust hanger counts vary by chassis.
- Step 1 — Soak the fasteners. Spray penetrating oil on every exhaust fastener and the six guibo bolts now. They get the whole job’s duration to work.
- Step 2 — Lower the exhaust. Support the exhaust, unbolt the rear sections and hangers, and lower enough of the system to expose the driveshaft tunnel. You rarely need it fully out — but budget for replacing at least one exhaust gasket.
- Step 3 — Remove the heat shields. The aluminum shields along the tunnel come off with a handful of small fasteners. They bend easily — handle them flat.
- Step 4 — MARK THE ORIENTATION. With the shaft still bolted up, draw a clear paint line across the driveshaft and the transmission output flange so the two go back in the exact same rotational position. Mark shaft halves relative to each other too if you separate them. The shaft is balanced as an assembly; reassembling it clocked differently can add a vibration that wasn’t there before.
- Step 5 — Remove the six guibo bolts. Hold each bolt head and turn the nut on the flange side — never twist through the rubber itself. The nuts are self-locking and single-use; break them loose with a breaker bar, never the torque wrench.
- Step 6 — Drop the shaft. Pry gently if it is stuck — modest force only. Support the shaft with wire or a second jack as it comes free; never let the front hang by the rear joint or the center bearing. Most cars slide rearward enough without removing the rear CV bolts; if you need more room, mark and remove those too.
- Step 7 — Fit the new disc. Note the molded arrows on the new flex disc: repair documentation specifies they point toward the flange arms. Fit the disc to the shaft first with new hardware finger-tight, bring the shaft up, align your paint marks exactly, and install the remaining hardware finger-tight.
- Step 8 — Torque correctly. Tighten in a star pattern with the marks aligned, holding each bolt head and turning the nut. Use the torque value from the repair documentation for your chassis and bolt grade — commonly cited manual figures are 64 Nm (47 ft-lb) for M10 10.9 and 100 Nm (74 ft-lb) for M12 10.9, lower for 8.8-grade. Do not guess: confirm for your VIN, because over-torquing distorts the rubber and under-torquing walks the nuts loose.
- Step 9 — Reassemble. Refit the shields, raise the exhaust with new gaskets, and double-check the paint marks before the car comes down.
- Step 10 — Road test. Several deliberate throttle transitions: the takeoff clunk should be gone. A new speed-specific vibration means the shaft went back misaligned — re-check the marks.
Two honest cautions. First, the exhaust: the fasteners you fight hardest are the exhaust bolts, and a snapped stud turns an afternoon into a weekend — penetrating oil and a cool engine are the prevention. Second, the torque step: “tight” is not a specification on a component that lives by absorbing torque pulses. The guibo bolts are not generally documented as torque-to-yield on these applications (no angle-tightening stage in the common repair documentation), but grades and chassis vary — verify in the repair manual for your car rather than taking any single number as universal.
xDrive differences: the front coupling
RWD 3 Series cars have one guibo, on the rear propshaft at the transmission flange. xDrive cars add a front propshaft from the transfer case to the front differential, with its own flexible coupling at the transfer case — guibo-style rubber disc on many xDrive models. Diagnostic logic is the same (torque-event clunks), but access and the part differ, so verify by VIN before ordering: front and rear couplings are different sizes and different parts.
One xDrive-specific warning: transfer-case and front-differential work is more expensive territory than a rear guibo. A clunk diagnosed as the front coupling should be confirmed by inspection — don’t let a shop roll a rear-guibo price into a front-coupling job or vice versa. Transfer case fluid is its own maintenance item; see the xDrive transfer case fluid guide if your car is due.
“While you’re in there”: the smart add-ons
The guibo job puts you under the car with the exhaust down and the shaft loose — the hardest part of three other jobs. Doing them now saves repeating the access labor later, but only if they actually need it:
- Center support bearing. The rubber-mounted bearing mid-shaft. Push the shaft up at the bearing: play, torn rubber, or grinding means it goes. The bearing and its mount are the natural companion to a guibo on high-mileage cars, and a wobbling shaft will chew up a new guibo. Some shafts require pressing the bearing off — a bearing separator and patience, or a shop’s hydraulic press.
- Transmission mounts. Worn mounts let the powertrain rock, producing a shift thunk that mimics the guibo — the checker’s alternative diagnosis. With the exhaust down, the mounts are right there; inspect for cracked or oil-softened rubber.
- Exhaust gaskets and hangers. Disturbed gaskets may not reseal; tired hangers are cheap insurance against a new rattle a week later.
- Rear CV joint (diff end of the shaft). Glance at the boot for slung grease on the tunnel above it. A failing rear CV is a different repair — don’t replace it speculatively, but don’t ignore a torn boot while staring at it.
- What NOT to do: don’t “upgrade” to a solid aluminum or polyurethane flex disc for a daily driver. Solid couplings eliminate the vibration absorption the guibo exists for, transmit NVH into the cabin, and can stress the transmission output bearing. Rubber is the engineering, not a compromise.
Cost bands: DIY, independent shop, dealer
Costs are bands, not quotes: parts prices are typical catalog figures; shop figures are owner- and specialist-reported. Your market and your car’s rust level move the labor number.
| Route | Guibo only | Guibo + center bearing | What drives the price |
|---|---|---|---|
| DIY | $90–$160 | $160–$260 | Flex disc ($60–$110), new bolt/nut kit ($25–$45), exhaust gasket(s). Your Saturday. |
| Independent BMW specialist | $400–$800 | $650–$1,100 | Owner-reported band. 2.5–4 hours labor at shop rates, plus the same parts at shop markup. |
| Dealer | $700–$1,200+ | $1,100–$1,700+ | Dealer labor rates roughly double the independent band; OEM-branded parts. |
The economics are straightforward: the center support bearing adds roughly $70–$100 in parts and, done while the exhaust is down, maybe an hour — versus paying the full access labor again later. Transmission mounts are similarly cheap in parts and nearly free in labor at that point. The one false economy: a guibo kit that reuses old self-locking nuts to save $30.
If you are deciding between fixing this car and buying the next one: a guibo is a wear-item repair on every high-mileage 3 Series, not evidence of a lemon. The maintenance schedule and real yearly costs guide puts driveline rubber in the full ownership picture.
How long guibos last and how to make yours last longer
There is no BMW-published replacement interval — it is an inspect-and-replace-on-condition part. In practice, experience clusters around 80,000–150,000 miles for the original disc on E90 and early F30 cars, with the wide range explained by the factors below. High-mileage G20 cars are only now entering this window. Condition, not mileage, decides.
| Factor | Effect on guibo life | What you can do |
|---|---|---|
| Heat and ozone | Rubber hardens and cracks faster in hot climates | Inspect annually regardless of mileage |
| Oil and fluid contamination | Oil softens rubber; a leaking seal above the disc shortens its life dramatically | Fix leaks onto the disc — a new guibo dies the same way |
| Hard launches and aggressive shifting | Each torque spike is a fatigue cycle | Nothing moral about it — just inspect sooner if you drive hard |
| Winter salt and road grime | Accelerated rubber deterioration and corroded bolt sleeves | Inspect at every other oil change in salt states |
| Neglected center bearing or mounts | A wobbling shaft or rocking powertrain overloads the disc | Replace the bearing/mounts with the guibo when they are worn |
The prevention list is short because the part is simple: inspect it on a schedule, keep oil off it, and replace worn mounts and bearings that force it to absorb abuse it wasn’t designed for. There is no fluid to change and no adjustment to make — once the rubber is torn, replacement is the only fix.
Frequently asked questions
Can I drive with a bad guibo?
Briefly, to reach a repair — not as a plan. A torn guibo can separate with no warning light, leaving the car without drive, and the flailing shaft can damage the output flange and center bearing. Avoid hard launches, keep speeds moderate, inspect within days. If the clunk turns into a bang, stop driving it.
How much does BMW guibo replacement cost?
DIY: roughly $90–$160 (disc plus new bolts and nuts, plus exhaust gaskets). Independent specialist: $400–$800 is the commonly owner-reported band for the guibo alone; add $250–$350 if the center support bearing goes in the same job. Dealer: $700–$1,200+ alone. The DIY savings are almost entirely labor — the part itself is inexpensive.
How long does a BMW guibo last?
Typically 80,000–150,000 miles on the original disc, by owner and specialist experience — BMW publishes no interval. Inspect it annually (every other oil change in salt states) and replace on condition: surface cracks are aging, torn rubber or exposed cords are failure. Oil and hard driving shorten the range.
Does the xDrive 3 Series have a guibo?
Yes — xDrive cars have the same rear-propshaft guibo as RWD cars, plus a separate front-propshaft flexible coupling at the transfer case (guibo-style rubber disc on many xDrive models). They are different sizes and different parts — verify by VIN before ordering. Front-coupling clunks follow the same torque-event pattern.
Do I need new bolts, or can I reuse the old guibo hardware?
Replace the self-locking nuts every time — repair documentation says they are single-use, and reusing them risks them walking loose under torque pulses. The bolts are not generally documented as torque-to-yield here, but they corrode into their sleeves and the kits are inexpensive ($25–$45), so replace them as well. Never reuse a nut that has been torqued once.