Worn BMW Sway Bar Links? Symptoms, Cost & Easy DIY Fix
A sharp clunk from the front corner over every speed bump. A rattle over broken pavement that sounds like something loose in the wheel well. On the BMW 3 Series, that noise has a usual suspect — one of the cheapest parts on the car: the sway bar end link.
Worn bmw sway bar end links are the most common source of low-speed clunking across the E90, F30, and G20 generations. They are sealed ball joints that live a hard life, and when they wear out they announce it loudly. The good news: diagnosis takes ten minutes with the car parked, a pair of links costs less than a tank of fuel, and replacement is one of the easiest DIY jobs on a 3 Series.
Short answer
BMW sway bar end links wear out and clunk over bumps — the classic sign is sharp knocking or rattling from the front (sometimes rear) at low speed over speed bumps, potholes, and driveway aprons. Expect roughly 60,000–100,000 miles from a set (community-reported; rough roads and salt shorten it). A quality pair costs roughly $50–$120 in parts, an independent shop typically charges $180–$320 to fit a pair on one axle, and dealers run $300–$500 — bands are approximate. DIY is a 2/10 job, 30–60 minutes per side, no alignment needed after. Replace links in pairs; if the links test tight but the bar moves in its mounts, suspect the sway bar bushings instead.
In this guide
- What sway bar end links actually do
- The 6 symptoms of worn end links, ranked
- How to confirm it’s the end links (10-minute checks)
- Interactive: clunk-source finder
- End links vs. sway bar bushings vs. the bar itself
- How long end links last and why they fail
- Replacement cost: DIY vs. independent vs. dealer
- The DIY replacement, step by step
- Which links to buy (and the pairs rule)
- When the clunk isn’t the end links
- Frequently asked questions
What sway bar end links actually do
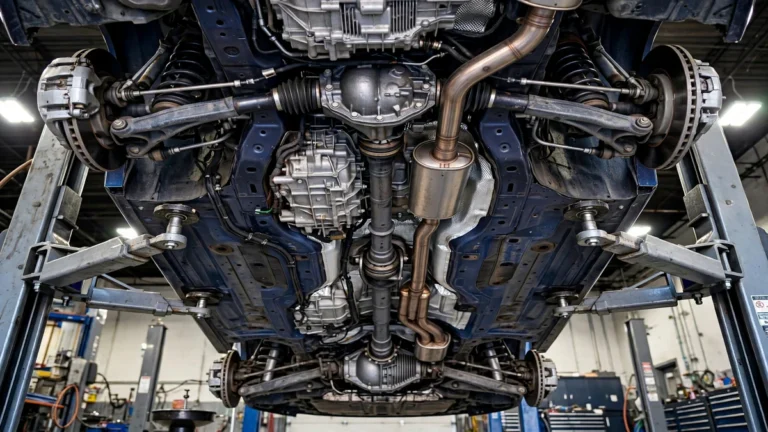
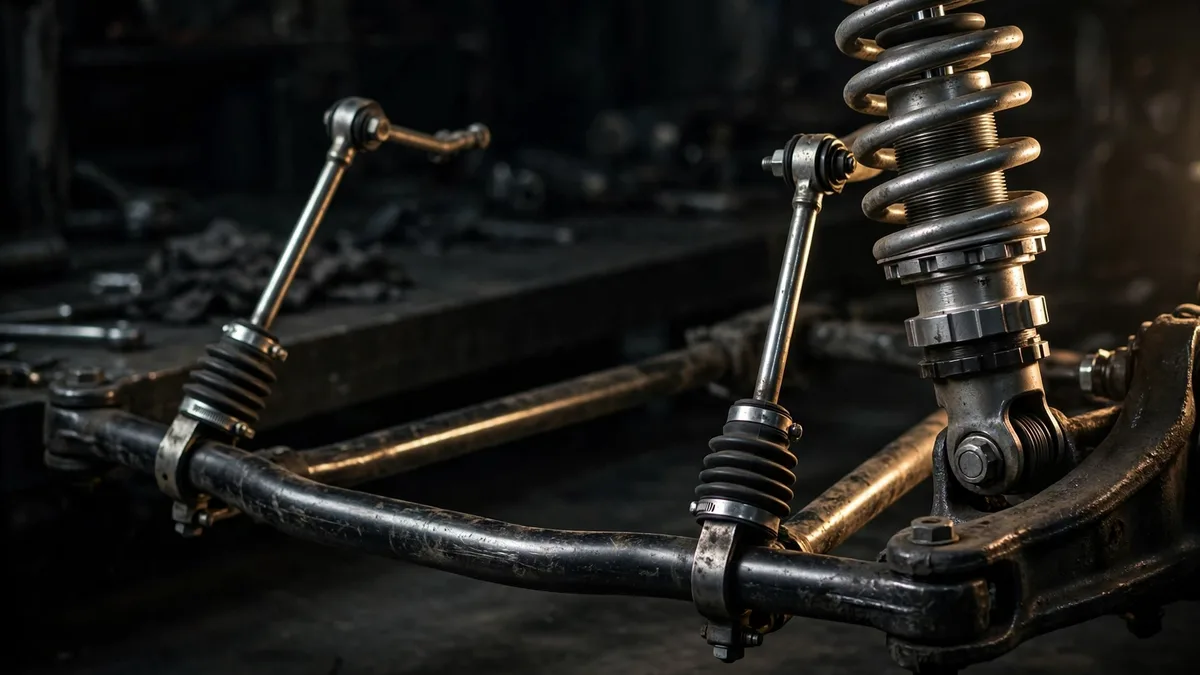
The sway bar — BMW calls it the stabilizer bar — is a U-shaped steel torsion bar mounted sideways across the car on two rubber bushings. Its job is to fight body roll: in a corner, the outside suspension compresses, the bar twists, and that twist pulls the inside suspension along, keeping the body flatter and the tires more evenly loaded.
The end links are what connect the bar to the moving suspension: short steel rods with a sealed ball joint at each end. On the E90, F30, and G20 3 Series, each front link runs from the bar end up to a bracket on the front strut, and each rear link connects the rear bar to the rear suspension. The ball joints let the link transmit the bar’s twisting force while the suspension travels and the wheels steer.
Every bump flexes those joints through a small arc — thousands of cycles per drive. Once the boot cracks or clearances open up with mileage, the stud rattles in its socket, and that tiny play becomes the sharp clunk you hear. One diagnostic gift: links do not locate the wheel (that is the control arms’ job), so a worn link makes noise without changing how the car drives. If the car feels fine but sounds broken over bumps, end links sit at the top of the suspect list — while a 50–60 mph shimmy points instead at worn control arm bushings.
The 6 symptoms of worn end links, ranked
Ranked by how often 3 Series owners report them.
| Rank | Symptom | How it presents | How specific |
|---|---|---|---|
| 1 | Clunking over speed bumps and potholes | Sharp knock from the front corners, loudest at parking-lot speeds | Very — the signature failure |
| 2 | Rattling over broken pavement | Loose, hollow rattle, like something unbolted in the wheel well | Very — check links first |
| 3 | Noise on one-sided bumps only | Clunks crossing a bump at an angle, but quiet going straight over | Strong — single-wheel movement is what twists the bar |
| 4 | Torn link boot (visible) | Cracked or split rubber, grease flung around the joint | Conclusive — the joint is living on borrowed time |
| 5 | Noticeably more body roll | Car leans more and feels less planted changing direction | Moderate — usually means a link has broken or detached |
| 6 | Clunk that started after suspension work | New noise right after strut, spring, or control-arm work | Moderate — often a link left loose or overtightened |
The bump clunk (1). Worst at low speed, where the suspension moves slowly enough for the loose joint to take up its slack and bang — one sharp report per bump. At highway speed it fades into road roar; it is not gone, just drowned out.
The broken-pavement rattle (2). Rapid small inputs make loose ball joints chatter — a toolbox-rolling-in-the-wheel-well sound over patched asphalt. A single worn bushing, by contrast, tends to produce one thud.
One-sided bumps (3). Cross a speed bump at an angle so one wheel rises before the other. Clunking at an angle but not straight-on implicates the sway bar system — one-sided wheel movement is exactly what twists the bar and works the links.
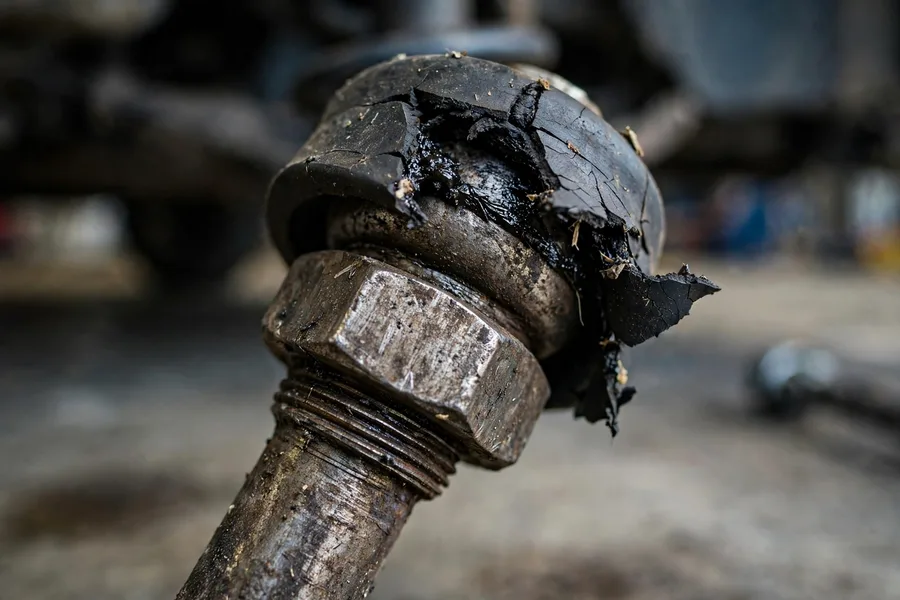
The visible boot (4). A failed boot is cracked, split, or weeping grease. It may not be clunking today, but grit is already inside and play will follow — catching it during brake or tire work and replacing the links preemptively means never hearing the clunk at all.
Extra body roll (5). Normal wear adds noise, not lean — the bar still works with sloppy joints. Suddenly wallowy cornering, or a car planted turning one way and loose the other, usually means a link has snapped or popped off. That is where the problem stops being merely acoustic: with one side disconnected, emergency-maneuver stability is reduced. Fix it promptly.
Noise after suspension work (6). Links are removed and refitted during strut, spring, and control-arm jobs, and they are a classic post-job clunk source: an under-tightened nut, an over-tightened nut that binds the joint, or a stud that spun while the nut was tightened (feels tight, leaves the joint loose). If a clunk appeared the day after front-end work, recheck the links first.
How to confirm it’s the end links (10-minute checks)
Three parked-car checks, in order — stop when you find play.
Check 1 — the hand test. Park on level ground, engine off. Reach behind the front wheel and find the link: a vertical rod roughly the length of your hand, running from the sway bar end up to the strut. Grip it and push, pull, and twist. A good link feels absolutely solid — zero play, zero clicking. A worn link clicks or shows visible movement at a ball joint. Compare left to right; the good side is your reference. The trap: the joints are supposed to pivot freely — you are feeling for slack, a knock before resistance.
Check 2 — the bounce test. Push down hard on the fender over the suspect corner and release. A worn link often reproduces its clunk right in the driveway. Have a helper bounce while you touch the link — you will feel the knock in your fingers at the exact joint that is worn.
Check 3 — the bar test. If the links feel tight but the clunk persists, suspect the sway bar bushings. With the car safely raised and supported — see our safe jacking guide — work the sway bar up and down near its chassis mount. It should be firmly held; visible movement or a knock at the mount points to worn bushings, not links.
The brake-pedal trick. Drive over the same bumpy stretch twice — once coasting, once with the brake pedal pressed lightly. If the clunk disappears under light braking, the noise is almost certainly brake hardware (a pad rattling in the caliper or worn anti-rattle clips), not the end links — a link joint cannot tell whether you are braking.
Interactive: clunk-source finder
End links share their symptoms with half the front end. Answer three questions and the finder narrows it to the most likely culprit and what to check first.
Clunk-source finder
Three questions. The finder scores end links against the other usual suspects — bar bushings, control arms, brake hardware, and bearings.
End links vs. sway bar bushings vs. the bar itself
Three parts share the sway bar’s name and fail in three different ways. Mixing them up is how owners replace the wrong part and keep the clunk.
| Part | What it connects | Failure mode | Typical sound | Replace when… |
|---|---|---|---|---|
| End links | Bar ends to the suspension (front: strut; rear: suspension arm) | Ball joints develop play; boots tear | Sharp clunk or rattle over bumps, worst at low speed | Any play at the joints, torn boots, or a broken/detached link |
| Sway bar bushings | Bar to the subframe (two mounts per bar) | Rubber hardens, cracks, or wallows out | Knock, creak, or squeak — sometimes worse when cold | Bar moves visibly in its mounts; bushings cracked or misshapen |
| Sway bar (the bar itself) | Spans the car laterally | Bent, cracked, or corroded through (rare) | Usually none of its own — mimics link/bushing failure | Only with visible damage; bars essentially never “wear out” |
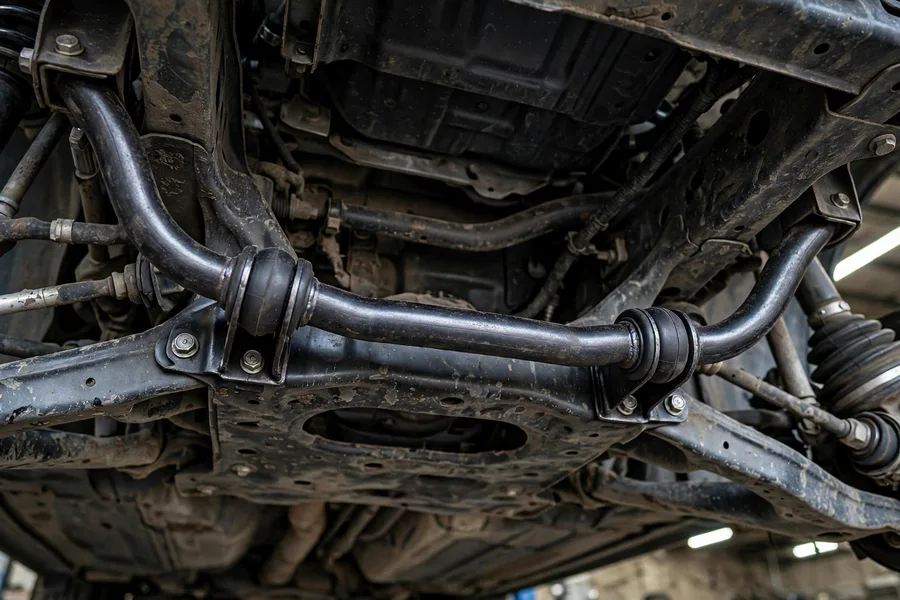
The decision rule: test the links first. Grip each link and feel for play at its joints. A loose joint or destroyed boot means the link is the problem — replace the pair on that axle and the clunk almost always leaves with them. If all four joints are tight, move to the bushings: with the car safely supported, work the bar up and down at each chassis mount. A healthy bushing grips firmly; a worn one lets the bar knock against the bracket.
One trap: a bar can seize inside its bushings when corrosion or hardened rubber locks it so it cannot rotate. The bar then acts as one rigid spring, the links take abnormal loads, and the car clunks over every bump. Owners who replace only the links here keep the noise — the links were never the root cause. If your links test tight with intact boots and the noise is a deeper knock from the car’s center, suspect the bushings.
And the bar itself? Replace it only for visible damage — a bend, a crack, or corrosion through the steel. If a shop recommends a new sway bar for a clunk with no visible bar damage, get a second opinion: the wear items are the links and bushings, at a fraction of the price.
How long end links last and why they fail
No factory interval exists — end links are “replace on condition.” Originals typically last roughly 60,000–100,000 miles (community-reported, not BMW-published), with the spread driven by environment more than mechanics:
- Road surface. Patched city streets and pothole country eat links far faster than highway cruising.
- Road salt and moisture. Salt attacks the boots first and the studs second — a rust-weakened stud can snap, and corrosion makes replacement harder.
- Driving style. Hard cornering works the bar and the links harder; track-day cars wear links faster than commuters.
- Rubber age. Even a garaged low-mileage car eventually loses its boots to aging rubber.
Front links fail more often: they handle steering inputs on top of suspension movement (the front link mounts to the steering strut), and the front axle takes the first hit from every pothole. But always check both axles.
Generation notes. The layout is consistent from E90 through G20: front links strut-mounted, rear links suspension-mounted. E90s (2006–2013) now mostly run on replacement links. F30s (2012–2019) are in the prime failure window, with originals dying of mileage and boot age right now. G20s (2019+) are mostly too young for link failure outside of hard pothole lives. xDrive and RWD share the link design, but bars differ by drivetrain and sport-package spec — order for your exact chassis. Lowered cars: a lower ride height changes the bar’s resting angle and can preload it, accelerating wear; adjustable-length links restore the neutral angle.
Inspect the links whenever the wheels are off for other work — brakes, tires, seasonal swaps. A two-minute hand test and a glance at the boots, folded into work you are already doing, catches failing links before they announce themselves. Our BMW 3 Series maintenance schedule covers what to check at each interval.
Replacement cost: DIY vs. independent vs. dealer
Approximate US bands from owner-reported invoices and current parts pricing — among the cheapest suspension repairs a 3 Series can need.
| Route | What you pay for | Typical band (one axle, pair of links) |
|---|---|---|
| DIY | Parts only | $50–$120 |
| Independent BMW/Euro shop | Parts + ~1 hour labor | $180–$320 |
| BMW dealer | OE parts + dealer labor rate | $300–$500 |
| Bushings instead (comparison) | $10–$30 per bushing + more labor than links | $150–$280 at an independent shop |
| Parts tier (per link) | Typical price | Notes |
|---|---|---|
| Budget aftermarket | $20–$35 | Cheapest; owners often report shorter service life |
| OE-supplier aftermarket | $35–$60 | The value sweet spot — original engineering without the markup |
| BMW OE (dealer counter) | $50–$100 | Maximum peace of mind, maximum price |
Labor is the swing factor, not parts. You are mostly paying for lift time, which is why the dealer band doubles the independent band for the same 45-minute job. Both sides of one axle is the standard quote — a single link is false economy when its twin has identical mileage. And no alignment is needed afterward: links set no alignment angle, so a bundled alignment is padding, not necessity.
The DIY replacement, step by step
Honest difficulty: 2 out of 10. If you can remove a wheel and turn a wrench, you can do this job: 30–60 minutes per side, no special BMW tools, no coding, no alignment afterward.
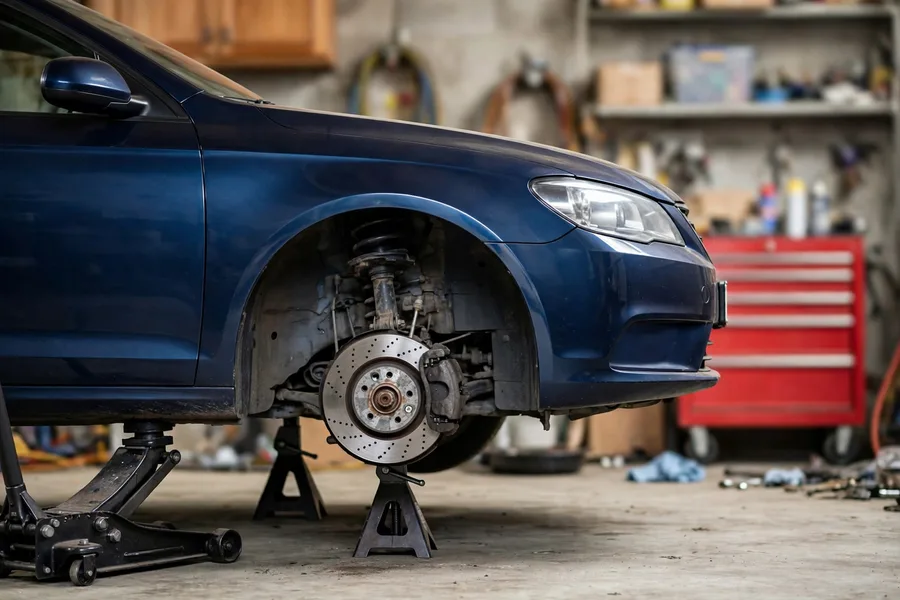
Tools and supplies
- Floor jack, two jack stands, and wheel chocks (see our safe jacking guide for the 3 Series)
- Lug wrench or 17 mm socket; 16/17/18 mm sockets and ratchet for the link nuts
- A thin open-end wrench or hex/Torx key for the ball-joint stud’s counterhold flats — the tool that makes or breaks the job
- Penetrating oil (apply the night before on winter-driven cars), a torque wrench, and the new link pair with their supplied fresh nuts
The procedure
- 1. Prepare. Flat, solid ground. Chock the opposite axle, crack the wheel bolts loose, then set the car firmly on two stands. Never work under a car on a jack alone.
- 2. Remove the wheel. The link runs vertically between the sway bar end and the strut (front) or suspension arm (rear).
- 3. Soak the hardware with penetrating oil — on salt-belt cars this is the difference between a 30-minute job and a fight.
- 4. Counterhold and remove. Hold the ball-joint stud still with the thin wrench or hex key on its counterhold flats while you turn the nut — without the counterhold, the stud spins and nothing loosens. Remove both nuts and wiggle the link free; a second jack under the suspension to near ride height takes the load off if the bar pushes the link sideways.
- 5. Compare old and new side by side: length and stud orientation must match, or the bar ends up preloaded.
- 6. Install the new link — lower joint to the bar first, then upper to the strut — threading the supplied new nuts on by hand.
- 7. Tighten with the counterhold, finishing with a torque wrench to your chassis’s published spec. Look it up for your exact E90/F30/G20 beforehand — it differs by link design, and over-tightening can bind the joint or crush the boot.
- 8. Repeat the other side — always the pair; the second side goes twice as fast.
- 9. Refit the wheel, lower the car, and test drive the same bumpy route. Silence is the confirmation.
The three gotchas that catch first-timers
- The spinning stud. Nine out of ten “stuck” link nuts are just a stud spinning inside the joint. Seat the counterhold fully before leaning on the wrench.
- Rust-welded nuts. More penetrating oil, heat if equipped, and as a last resort a cutoff wheel through the stud — you are replacing the link anyway. Protect nearby brake lines if you cut.
- Forgetting the pair. Replacing one link and leaving its equally-aged twin guarantees a return trip. Links are cheap; do both.
Safety is not optional: stands on solid ground, wheels chocked, parking brake set. If hardware will not cooperate and you are improvising with cheater bars under a car on a jack — stop, reassemble, and let a shop finish it. A $200 shop bill beats a crushed hand.
Which links to buy (and the pairs rule)
Parts choice is simple — a steel rod with two sealed ball joints, no performance voodoo. For a daily driver, the middle tier (OE-supplier aftermarket) is the consensus value pick: Lemförder is the OE supplier most associated with BMW chassis hardware, and Meyle’s heavy-duty line is another community favorite, both cited here by name rather than linked. The cheapest links will quiet the car today; owners who buy them twice tend to buy the middle tier the second time.
- Always replace in pairs per axle. Same miles, same roads, same weather — when one joint is done, the other is close behind, and the second side adds near-zero labor.
- Match the part to the chassis: generation (E90/F30/G20), drivetrain (RWD vs. xDrive), and suspension spec (standard vs. sport/M sport). Front and rear are different parts — different lengths and stud orientations.
- Lowered cars: consider adjustable links so the bar can sit at its neutral angle at ride height instead of preloaded.
- Use the supplied new nuts. The old nuts’ locking feature is spent; reusing them is how post-job clunks happen.
Do not buy a whole new sway bar “while you’re in there” — bars do not wear out, and a thicker bar is a handling modification, not maintenance.
When the clunk isn’t the end links
End links are the most common cause of bump-related clunking, not the only one. If your links hand-test tight with intact boots, work through this lineup before buying parts:
| Suspect | How it differs from link noise | Next step |
|---|---|---|
| Sway bar bushings | Deeper knock from the car’s center; creaks; sometimes worse cold | Inspect bushings for cracking; replace the pair on the noisy axle |
| Control arm bushings | Shimmy at 50–60 mph, worse under braking; dull clunk | See our control arm bushing symptoms guide |
| Wheel bearings | Growl rising with road speed, changing on gentle swerves | See our wheel bearing noise guide |
| Strut mounts | Clunk on large single impacts and when turning at parking speeds | Bounce test with the hood open, watching the mount |
| Brake hardware rattle | Rattle that disappears the moment you touch the brakes | Check pads, anti-rattle clips, and caliper guide pins |
| Loose undertray/liners | Flapping or buzzing at speed, not bump-triggered | Check belly pan and fender liner fasteners |
The discipline that saves money: confirm play before buying parts. A clunk plus a tight link means the link is innocent, no matter how much you want the cheap fix to be the answer. For the bigger picture, our complete BMW 3 Series guide ties the chassis, drivetrain, and service schedule together.
Frequently asked questions
Is it safe to drive with a bad sway bar end link?
A worn-but-attached link is mainly a noise problem — handling is essentially unchanged. But a broken or detached link reduces roll control in sudden evasive maneuvers. Treat a clunking link as a “fix within weeks” item and a broken one as “fix now.” It will not strand you, but do not ignore it for months.
Do I need an alignment after replacing sway bar end links?
No. Links set no alignment angle — camber, caster, and toe are established by the arms, struts, and tie rods. If a shop bundles an alignment into a link quote, that is padding, not necessity.
Should I replace sway bar end links in pairs?
Yes — both links on the affected axle, every time. They share identical mileage, roads, and weather, so the second is close behind when the first fails. The extra part costs little and the extra labor is near zero with the wheel already off.
How much does it cost to replace BMW sway bar end links?
Approximate US bands: about $50–$120 in parts for DIY, $180–$320 at an independent shop for a pair on one axle, $300–$500 at a BMW dealer. Per-link parts run $20–$35 budget, $35–$60 OE-supplier, $50–$100 BMW OE. Get two quotes before booking.
End links or sway bar bushings — how do I tell which one is clunking?
Test the links first: grip each one and push/pull it — play or clicking at the ball joints means bad links. If every joint is tight, check the bushings with the car safely supported: try to move the sway bar in its chassis mounts. Movement or knocking there means worn bushings. As a sound cue, links clunk or rattle sharply over bumps; bushings knock deeper and creak, sometimes worse when cold.