BMW 3 Series Brake Rotors Aren’t Warped. Here’s the Real Fix
Short answer
BMW 3 Series brake rotors are almost never truly warped. Pedal pulsation and steering-wheel shake under braking usually come from uneven pad deposits or disc thickness variation — less than a thousandth of an inch across the rotor face is enough to feel. Mild cases can often be cured by bedding; confirmed thickness problems call for measurement against the MIN TH stamp, then resurfacing or replacement.
In this guide
- The “warped rotor” myth, explained
- Symptom decoder: what your brakes are telling you
- How to diagnose brake pulsation properly
- Rotor types: blank vs drilled vs slotted
- Brake-feel diagnosis picker
- Replace, resurface, or re-bed?
- The bedding procedure that fixes mild pulsation
- DIY rotor replacement
- What new rotors cost
- Frequently asked questions
Every 3 Series owner eventually hears it from a shop: “your rotors are warped.” It is one of the most repeated phrases in brake work — and one of the least accurate. What feels like warping is usually a rotor whose thickness varies by a few ten-thousandths of an inch around its circumference, because pad material has been deposited unevenly on its face. That distinction decides the fix: deposit-type pulsation can sometimes be cured for free, while a rotor worn below its minimum thickness must be replaced, not machined.
This guide companions the brake pad replacement cost guide, which prices pad jobs by generation and shop channel. Here the focus is rotor science: why pulsation happens, how to separate rotor trouble from wheel, tire, or suspension trouble, how runout and thickness are measured, what the MIN TH stamp means, honest blank-vs-drilled-vs-slotted guidance, and what rotors cost — for the E90 (2006–2013), F30 (2012–2019), and G20 (2019–present) in the complete BMW 3 Series guide.
The “warped rotor” myth, explained
On a street-driven 3 Series, your brake rotors are almost certainly not warped. A modern ventilated cast-iron rotor is extremely stiff and thermally massive — the temperatures needed to permanently bend one would crack it or alter the iron’s metallurgy first. Brake engineers have said this for decades: street braking simply cannot generate warping heat (EngineerFix’s breakdown of the warped-rotor myth).
The real culprit is disc thickness variation (DTV). Brake pads are designed to transfer a thin, even film of friction material onto the rotor — that transfer film is part of how modern brakes grip. When it builds up unevenly, the rotor becomes measurably thicker in spots, and as little as 20 microns — less than one-thousandth of an inch — is enough to feel. Each revolution the pads ride over the thick spot and drop into the thin one; the pistons pump, fluid shuttles, and your foot reads it as pulsation.
The classic recipe is heat plus a stationary clamp: a hard stop from highway speed, then sitting at a light with your foot on the pedal, while the hot pad imprints friction material onto one section of the rotor. Skipping the bedding procedure on new hardware is another common trigger, as is grease or wheel-cleaner contamination. The pads then polish the rotor everywhere except the deposited patch, which hardens and grows — so a mild shimmy at 40,000 miles becomes a real shudder by 50,000.
The second pathway is lateral runout — side-to-side wobble as the rotor spins. Even a tiny amount means the pads kiss the high spot every revolution, foot off the brake. Each kiss shaves a whisper of iron (semi-metallic pads) or deposits a whisper of friction material (ceramic pads), wearing the rotor into thickness variation within a few thousand miles. Runout is almost always installation-related: corrosion on the hub face, uneven lug-bolt torque, or a rotor seated on a dirty flange. That is why a new rotor can pulsate within months if the hub was never cleaned to bare metal — the rotor was never the problem.
Symptom decoder: what your brakes are telling you
Not every shake, squeal, or grind is a rotor problem — misdiagnosis is how owners replace rotors that were fine. The most useful question is when the symptom appears. Check the table before spending anything.
| What you feel or hear | When it happens | Most likely cause | First move |
|---|---|---|---|
| Pulsing brake pedal, shaking steering wheel | Only while braking; worse from higher speeds | Uneven pad deposits / disc thickness variation | Use the diagnosis picker below; try re-bedding |
| Steering-wheel vibration | Constant at 50–70 mph, braking or not | Wheel balance, tires, or worn control arm bushings — not the rotors | Balance check; inspect front suspension |
| High-pitched squeal | Light braking, low speeds | Pad wear indicator or glazed pads | Check pad thickness; see the brake pad cost guide |
| Grinding or growling | While braking | Pads worn to the backing plate — metal on metal | Stop driving it; pads and rotors need replacement |
| Soft, long-travel pedal | Always | Air in the system or moisture-aged brake fluid | Brake fluid flush and reset |
The second row traps a lot of owners: vibration present at highway speed whether or not you brake cannot come from the rotors, which only work when the pads clamp them. Constant-speed vibration points at balance, a damaged tire, a bent wheel, or front-suspension wear — tired control arm bushings are a prime suspect on higher-mileage E90s and F30s. Chasing it with new rotors fixes nothing and costs hundreds.
Likewise, a soft pedal is hydraulic, not a rotor issue: brake fluid absorbs moisture over time, lowering its boiling point. The fix is a flush — see the brake fluid reset guide. New rotors will not firm up a soft pedal.
How to diagnose brake pulsation properly
Once pulsation is confirmed as braking-only, the next step is identifying which rotor problem you have — deposits, runout-induced DTV, and worn-below-minimum all feel similar but demand different fixes. Shops follow this same sequence; no shortcut skips measuring.
Step 1: the road test
On a quiet, straight road, brake firmly from about 60 mph down to 20 — not an emergency stop, just confident. Note where you feel it: pedal pulsation points to the rear rotors, steering-wheel shake to the fronts. Deposit-type pulsation often worsens as the brakes heat up, since the uneven film grips differently hot. If the shake appears only on the first stop of the day and fades, it is light surface rust wiping off — not a real problem.
Step 2: measure lateral runout with a dial indicator
This is the most-skipped, most-worthwhile measurement. Mount a dial indicator rigidly to the steering knuckle — never a control arm or tie rod, which flex — as detailed in Tire Review’s rotor servicing guide: with the wheel off, secure the rotor with lug bolts tightened evenly in a star pattern (a loose rotor reads falsely), set the tip perpendicular to the friction surface about half an inch from the outer edge, zero at the lowest reading, and rotate a full turn to find the highest. The difference is your runout.
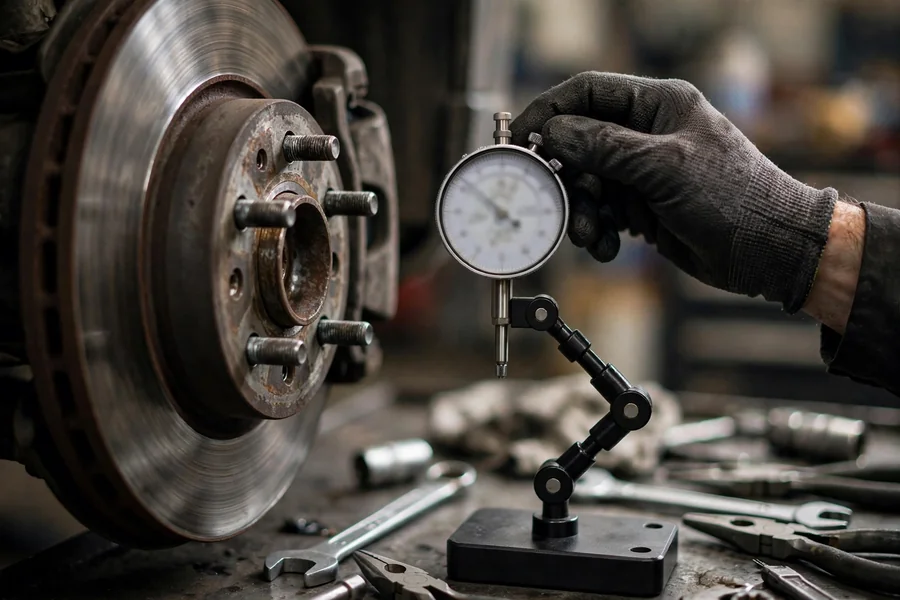
The typical passenger-car limit is 0.002 inches (0.05 mm) or less — a benchmark, not your car’s official spec. Above that, the rotor will wear itself into thickness variation. High runout on a new rotor usually indicts the installation: pull it, clean the hub to bare metal, check the flange, reseat, torque evenly, and measure again before condemning the part.
Step 3: measure thickness and read the MIN TH stamp
With a micrometer, measure thickness at four or more evenly spaced points, each about half an inch from the outer edge. The spread is your disc thickness variation; a commonly cited OE-style limit is around 0.025 mm (0.001 in). Compare the thinnest reading to the discard spec — stamped right on the rotor, usually on the hat or edge, marked “MIN TH” plus a millimeter figure. Clean off the rust and read it: that number, not a forum post, is the discard limit. At or below MIN TH, the rotor must be replaced — it can no longer safely shed heat, and it cannot be machined.
BMW service guidance follows this measurement-first logic: technicians are told not to replace rotors measuring at or above the stamped minimum with a serviceable surface. If a shop quotes new rotors, ask “what did they measure, and what is the MIN TH stamp?” — the fastest way to separate diagnosis from upsell. (Rotor pricing context lives in the brake pad replacement cost guide.)
Rotor types: blank vs drilled vs slotted
At replacement time you will face the style question: blank, drilled, slotted, or drilled-and-slotted. Marketing says more holes equal more performance; brake engineering is more nuanced — and for most 3 Series owners the honest answer is the plainest option.
| Rotor type | Pros | Cons | Best for |
|---|---|---|---|
| Blank (smooth) | Quietest; longest pad life; maximum thermal mass; lowest cost | Plain appearance; no pad-wiping action | Daily driving — the right choice for most 3 Series |
| Slotted | Slots wipe pad debris and glaze, keeping bite consistent | Some noise; faster pad wear; higher cost | Spirited street driving, autocross, track days |
| Drilled | Strong wet-weather bite; the classic performance look | Holes are stress risers — cracking risk under severe track heat | Street and light-duty use; appearance builds |
| Drilled + slotted | Both looks and bite in one rotor | Highest cost; least uninterrupted friction surface | Street builds prioritizing appearance |
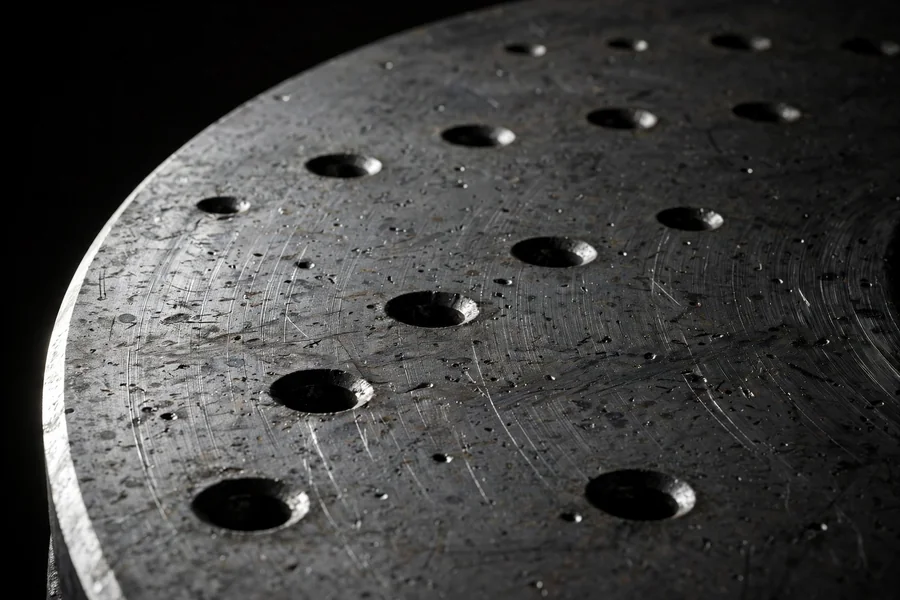
Two clarifications. First, “vented” is not a style choice — it describes the internal cooling vanes between the friction faces, and virtually every 3 Series front rotor is vented regardless of surface pattern. Vane design moves far more heat than any hole or slot pattern. Second, drilling was invented to vent gases from long-obsolete pad compounds; modern pads barely off-gas, so the holes’ original job no longer exists. What remains is looks and wet bite — at the price of stress concentrations around every hole.
The cracking risk is real but often overstated for street cars. Manufacturers draw the line at severity: drilled rotors are fine for street and occasional light track use, but for severe repeated high-heat use, slotted or blank rotors are recommended — holes can initiate cracks under extreme thermal cycling. Cheap aftermarket drilled rotors, machined from blanks never designed for holes, are the worst offenders. Note that many M Sport brake packages come with factory-drilled rotors: engineered castings designed with holes from the start, a different proposition from a bargain drilled blank.
For a daily-driven 3 Series, quality blanks — properly bedded — will out-brake, out-last, and out-quiet flashier alternatives on the street. Spend the difference on better pads and fresh fluid.
Brake-feel diagnosis picker
Use this picker to match what you feel to the likely cause and the correct next step — including the critical distinction between braking-only pulsation and constant vibration.
Brake-feel diagnosis picker
Select the symptom that best matches your 3 Series to get the likely cause and what to do next.
Your diagnosis will appear here.
Replace, resurface, or re-bed?
The decision tree is straightforward. Avoid both mistakes: defaulting to new rotors for every pulsation, and nursing along rotors that are genuinely finished. Match your situation to the row below.
| Your situation | Best fix | Why |
|---|---|---|
| Mild pulsation that started recently; rotors above MIN TH with healthy margin | Re-bed the pads | Free, and it often re-establishes an even transfer film before deposits harden |
| Pulsation persists after re-bedding; thickness above MIN TH, no cracks or deep scoring | Resurface (where offered) or replace | Machining trues the faces, but only if enough thickness remains above MIN TH afterward; fewer shops offer it now that new rotors are comparatively cheap |
| Rotor at or below the MIN TH stamp, deep scoring, heat cracks, or heavy rust | Replace | Below discard thickness the rotor cannot safely shed heat; structural damage cannot be machined away |
| Grinding / metal-on-metal | Replace pads + rotors | The backing plate has destroyed the rotor face |
| Pulsation appeared right after a brake job | Re-check installation | Usually installation-induced runout: clean the hub to bare metal, reseat, torque evenly in a star pattern before buying parts |
Two resurfacing caveats. First, the math must work: the post-cut thickness must sit comfortably above MIN TH — cutting to just above the stamp leaves no margin for the next pad change. Second, the economics have shifted: many shops no longer keep a brake lathe, and when a quality new rotor costs little more than the machining charge, replacement wins on price and longevity. Price both before deciding.
BMW service guidance instructs technicians to measure rather than assume — rotors at or above the stamped minimum with a serviceable surface do not need replacement. Any quote for new rotors should come with two numbers: the measured thickness and the MIN TH from your rotor hat. If the advisor cannot produce them, the recommendation is a guess, not a diagnosis.
The bedding procedure that fixes mild pulsation
Bedding — also called burnishing — is the controlled process of heating pads and rotors through a series of stops so the pads lay down a smooth, even transfer film. It is mandatory after installing new hardware, and it doubles as the free first fix for mild, recent pulsation: if deposits have not hardened into the rotor, a proper cycle scrubs the uneven film off and replaces it with a uniform one. Fleet operators have long used re-bedding as the first response to pulsation complaints, and it resolves a surprising share of them.
It cannot fix true thickness variation worn into the iron, hub runout, or a rotor at MIN TH — it is the right first attempt for mild, recent pulsation, not a cure for a year-old shudder.
The street bedding sequence
Follow your pad maker’s procedure first. The widely used street sequence, consistent with manufacturer burnishing guidance such as Raybestos’s brake pad burnishing bulletin (PDF), runs like this:
- Find a safe, low-traffic road where you can repeatedly slow from about 60 mph, in daylight with a clear view ahead.
- Make 8 to 10 firm stops from roughly 60 mph to about 10 mph, hard but below ABS activation. Accelerate normally between stops, leaving 30–60 seconds of rolling each time.
- Do not come to a complete stop during the sequence. Holding hot pads clamped on one rotor section imprints the uneven deposits you are trying to remove. If traffic forces a stop, creep forward slightly.
- After the last stop, drive 2–3 miles barely touching the brakes, letting everything cool with airflow.
- Park and let the brakes cool fully before hard use; some odor or light smoke during the harder stops is normal.
Evaluate over the next few days of normal driving. If the pulsation is gone or fading, deposits were the problem — avoid hot-stop-and-hold habits to keep it that way. If nothing changed, the issue is worn-in thickness variation, runout, or a rotor near its limit: time to measure, not to repeat the procedure endlessly.
DIY rotor replacement
Rotor replacement on a 3 Series is honest, moderate-difficulty DIY — mechanically simple, but the hardware is heavy, sometimes rust-seized, and safety-critical. Veterans of any brake job will find the E90, F30, and G20 familiar; first-timers should budget a full unhurried afternoon and read the whole procedure first. The brake pad cost guide covers the pads-and-sensor side; this section is the rotor-specific steps.
Tools and parts
- New rotors (axle pair — never one side), new pads, and a new wear sensor for the axle
- Floor jack, two jack stands, wheel chocks — never work under a jack-only car
- Torque wrench, breaker bar, socket set, hex-bit set
- Caliper piston compressor, brake cleaner, wire brush, high-temp brake lubricant
- Penetrating oil (night before, rust-belt cars) and a rubber mallet for stuck rotors
Step overview (per corner)
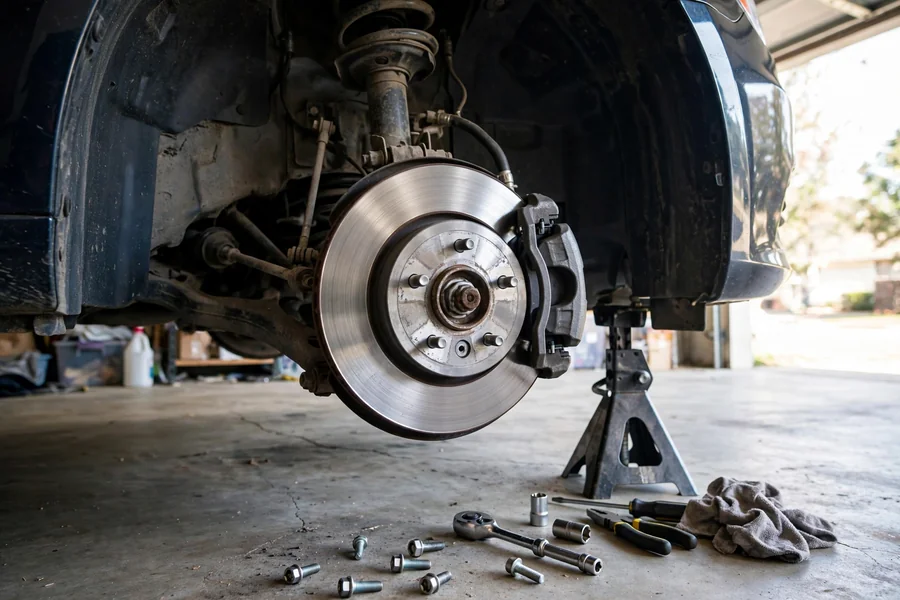
- Break the lug bolts loose on the ground, then lift the corner onto a jack stand and remove the wheel.
- Unbolt the caliper and hang it from the suspension — never let it dangle by the hose.
- Remove the caliper bracket to free the rotor. On rust-belt E90s these bolts can be fiercely seized — penetrating oil and a breaker bar help.
- Remove the rotor retaining screw and pull the rotor off. If rust-welded, alternating mallet taps around the hat break it free.
- Clean the hub face to bare metal with a wire brush — this prevents runout-induced pulsation. Skip it and the new rotor inherits the old one’s wobble.
- Fit the new rotor and retaining screw, then reassemble bracket and caliper with new pads, lubricating the slides.
- Refit the wheel; torque lug bolts in a star pattern to 120 Nm with a torque wrench, not an impact gun (confirm in your owner’s manual).
- Bed the new pads and rotors using the sequence above before any hard driving.
Three commonly missed items: replace the wear sensor with the pads (one-time-use — the warning will not clear without a new one); do not reset the brake-pad service reminder until the new hardware is installed; and consider the fluid — beyond two to three years, a flush alongside the job is cheap insurance (procedure in the brake fluid reset guide). System inspection intervals live in the 3 Series maintenance schedule.
What new rotors cost
This guide and the brake pad replacement cost guide divide the labor: that guide prices the complete job by channel; this section isolates the rotor line item. Bands are per pair of front rotors (quality aftermarket; genuine BMW runs higher), derived from the cost guide’s DIY bands (full-job parts minus pads-only parts). Rears typically run 10–15% less.
| Generation / brakes | Pair of front rotors (parts) | What drives the band |
|---|---|---|
| E90 325i/328i (2006–13) | $100–$180 | Smallest, cheapest hardware of the three generations |
| E90 330i/335i (2006–13) | $150–$260 | Larger front discs than the four-cylinder cars |
| F30 320i/328i (2012–19) | $140–$200 | High-volume parts; strong aftermarket competition |
| F30 335i/340i (2012–19) | $170–$260 | Bigger brakes than the four-cylinder F30 |
| F30 M Sport brakes | $250–$450 | Often drilled or two-piece; far fewer cheap options |
| G20 330i (2019+) | $240–$360 | Newer platform; aftermarket still catching up |
| G20 M340i / M Sport | $350–$640 | Large performance rotors; genuine parts steepest here |
Two realities: adding rotors roughly doubles a pad job — the rotor line item is the biggest lever on the invoice, which is why the measure-first discipline here pays for itself. And the jump is steepest on M Sport hardware, where one performance rotor can cost several times a standard blank — also where the cheapest drilled rotor is most tempting, and the cracking caveats matter most.
Frequently asked questions
Are my BMW brake rotors really warped?
Almost certainly not. What feels like warping is usually uneven pad deposits or disc thickness variation — thickness differing by less than a thousandth of an inch around the circumference. Street braking cannot generate the heat to permanently bend cast iron; the pulsation comes from pads riding over high and low spots, not a bent disc.
Can I fix brake pulsation without replacing the rotors?
Sometimes. If pulsation is mild and recent, bedding can scrub off uneven deposits and lay down a fresh transfer film — free to try. If it survives re-bedding, the deposits have worn into the iron as true thickness variation (or the cause is hub runout), and measurement decides between resurfacing and replacement.
Where do I find my rotor’s minimum thickness?
It is stamped on the rotor — look on the hat or edge for “MIN TH” plus a millimeter figure (clean off the rust to read it). Measure the thinnest point with a micrometer; at or below the stamped figure, the rotor must be replaced, not machined.
Should I resurface or replace my BMW rotors?
Replace at or below MIN TH, or when deeply scored, heat-cracked, or rust-damaged. Resurface only when post-cut thickness stays comfortably above MIN TH — and price it against new rotors first, since many shops no longer machine and replacements are often close in price.
How much does rotor replacement add to a brake job?
Roughly double: rotor parts alone run $100–$180 per front pair on a base E90, climbing to $350–$640 on G20 M Sport hardware, before labor. Full installed bands by generation are in the brake pad replacement cost guide.