BMW 3 Series A/C Not Blowing Cold? Causes, Checks & Costs
BMW 3 Series A/C not blowing cold? Short answer:
Low refrigerant from a slow leak is the most common cause on the E90, F30 and G20. Start with the 2-minute checks (snowflake button on, temperature dials to full cold, recirculation, cabin filter), then check whether the electric cooling fan spins with the A/C on. If those are fine, the usual suspects in order are: a refrigerant leak, a weak or failed compressor (many are clutchless variable-displacement units), a damaged condenser, or a stuck expansion valve. E90 and F30 use R134a; the G20 uses R1234yf — never mix them, and never vent refrigerant: it’s illegal.
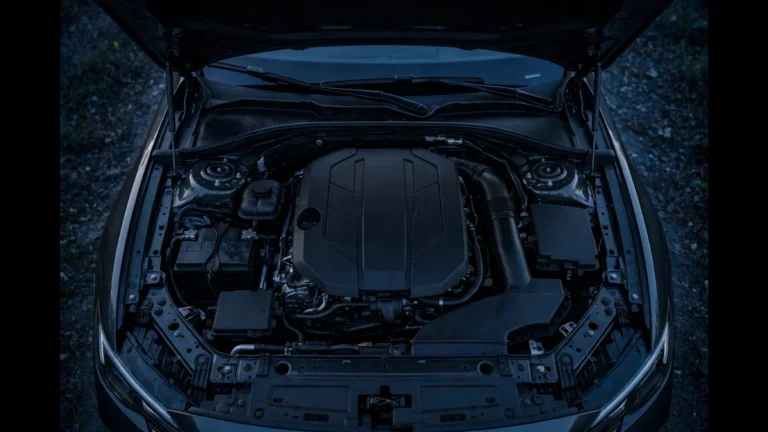
Warm air from the vents on a hot day is one of the most annoying faults a 3 Series can develop, and it’s rarely a single-cause problem. The air-conditioning loop on the E90, F30 and G20 is a sealed system with five main parts — compressor, condenser, expansion valve, evaporator and the electric cooling fan that pulls air through the condenser. When any one of them underperforms, vent temperature climbs. This guide walks you through the symptoms in order of likelihood, the checks you can do in the driveway, how to read manifold gauge pressures, and what each repair typically costs. If you’re evaluating a used car, run these same checks on the test drive — our used 3 Series buying guide covers the rest of the inspection.
In this guide
- A/C symptom checker (interactive)
- Symptom → likely cause tables
- Refrigerant type and charge by generation
- How the 3 Series A/C system works
- 10-minute checks before you spend money
- Reading manifold gauge pressures
- Compressor, condenser, evaporator and expansion valve failures
- Repair difficulty and typical cost bands
- Refrigerant handling: the legal bit
- A/C troubleshooting FAQ
A/C symptom checker
Pick the symptom that matches your car and the checker will point you at the most likely cause and the first test to run.
A/C symptom checker
Select what your 3 Series is doing:
Symptom → likely cause
Four symptom patterns cover almost every “A/C not cold” complaint on these cars. Find yours below — the causes are ordered by how often they show up in practice.
Blows warm all the time
| Likely cause | Why it happens | Clues |
|---|---|---|
| Low refrigerant (slow leak) | Seals and service valves weep a little every year; stone damage or corrosion opens bigger leaks. | System gradually got weaker over weeks or months; oily residue on A/C lines or condenser. |
| Failed compressor | Internal wear or a failed control valve means no pressure is built even with a full charge. | No cooling at all; sometimes a rattle or grinding from the compressor area. |
| Blown fuse / failed relay or pressure sensor | The controller won’t run the compressor without a valid pressure-sensor signal. | Snowflake button lights up but nothing changes; related fault codes stored. |
| Blocked cabin filter or iced evaporator | Restricted airflow feels like weak cooling even when the refrigeration side works. | Weak airflow from vents; musty smell; filter overdue per the maintenance schedule. |
Starts cold, then goes warm
| Likely cause | Why it happens | Clues |
|---|---|---|
| Moisture freezing at the expansion valve | Water in the system ices at the valve orifice, blocks flow, then melts when the car sits. | Cycles between cold and warm every 15–30 minutes; low side drops toward vacuum on gauges. |
| Compressor control valve failing | On clutchless variable-displacement compressors the control valve sticks, so displacement collapses under load. | Works when cold, fades as everything warms up; pressures look normal-ish but cooling fades. |
| High-pressure cut-out | A lazy cooling fan or blocked condenser drives high-side pressure up until the controller cuts the compressor to protect it. | Worse in traffic, better at highway speed; fan not running or running slowly. |
Cold one side only
| Likely cause | Why it happens | Clues |
|---|---|---|
| Low refrigerant charge | With a partial charge, the evaporator only gets cold across part of its core, and dual-zone ducting splits the difference. | Driver’s side cold, passenger side lukewarm (or vice versa); performance degrades over time. |
| Heater control valve stuck open | Hot coolant keeps flowing through the heater core on one side, reheating the cooled air. | One side blows properly hot-or-cold regardless of setting; heat works fine in winter. |
| Blend-door actuator fault | The flap that mixes hot and cold air stops in the wrong position. | Clicking or ticking behind the dash when changing temperature; one side unresponsive. |
Compressor won’t engage
| Likely cause | Why it happens | Clues |
|---|---|---|
| Low-pressure cut-out | Below a minimum pressure the controller refuses to run the compressor to protect it from oil starvation. | System empty or nearly empty; static pressure far below ambient-temperature norm. |
| Fuse, relay or wiring fault | No power or signal reaches the clutch coil or control valve. | Sudden failure; check the fuse box first — it’s the cheapest fix on this list. |
| Dead clutch coil (clutch-type compressors) | The electromagnetic clutch can’t pull in. | Clutch plate visibly not spinning while the pulley spins (early E90 cars with clutch-type units). |
| Failed control valve / no PWM signal (clutchless) | The compressor is mechanically fine but never told to build pressure. | Pulley always spins (normal for clutchless); gauges show no pressure split when A/C is switched on. |
| Faulty pressure sensor | The controller sees an implausible pressure and inhibits the compressor. | Fault codes for the refrigerant pressure sensor; check with a scan tool (see check engine light causes). |
Refrigerant type and charge by generation
Before buying anything — even a top-up can — check which refrigerant your car uses. The under-hood sticker states the type and charge weight: E90 and F30 cars use R134a, the G20 uses R1234yf. The two are not interchangeable, use different fittings, and need different compressor oil. Figures below are from NRF’s 2020 A/C filling chart; your under-hood label is the final word.
| Generation | Years | Refrigerant | Charge (typical) | Compressor oil |
|---|---|---|---|---|
| E90 / E91 / E92 / E93 | 2005–2011 | R134a | 590 g | PAG46 |
| E90 LCI | 2009–2013 | R134a | 620 g | PAG46 |
| F30 / F31 / F34 / F80 | 2012–2019 | R134a | 550 g | PAG46 |
| F30 ActiveHybrid 3 | 2012–2015 | R134a | 740 g | PAG46yf-type (SP-A2) |
| G20 | 2019–present | R1234yf | 550 g | PAG46yf (SP-A2) |
Two practical consequences follow from that table. First, an R1234yf recharge on a G20 costs noticeably more than an R134a service on an older car, because the refrigerant itself is far more expensive — budget accordingly. Second, the charge weight matters: A/C systems are filled by weight, not by “topping up until the gauge looks right.” Undercharging leaves you with weak cooling; overcharging drives high-side pressure up and can make cooling worse, not better.
How the 3 Series A/C system works
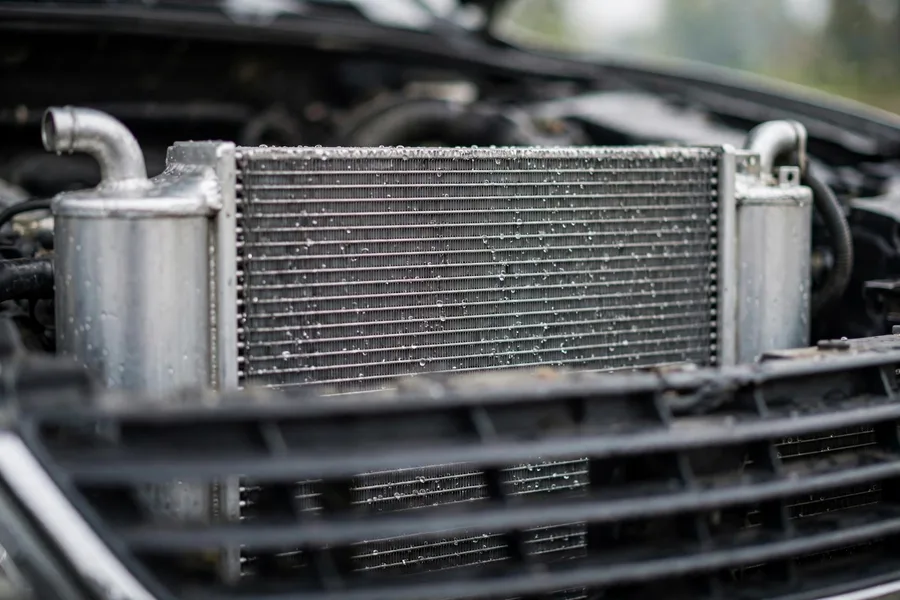
Understanding the loop makes every diagnosis below easier. Refrigerant circulates in a sealed circuit through four stages. The compressor, driven by the accessory belt, squeezes low-pressure gas into high-pressure gas. That hot, high-pressure gas flows to the condenser at the front of the car, where airflow (from driving speed plus the electric cooling fan) cools it into a liquid. The liquid passes through the expansion valve, which meters it into the evaporator inside the dash — the sudden pressure drop makes it boil and absorb heat, chilling the air the blower pushes over the evaporator fins. A refrigerant pressure sensor watches the high side and the climate controller (IHKA) decides how hard the compressor works.
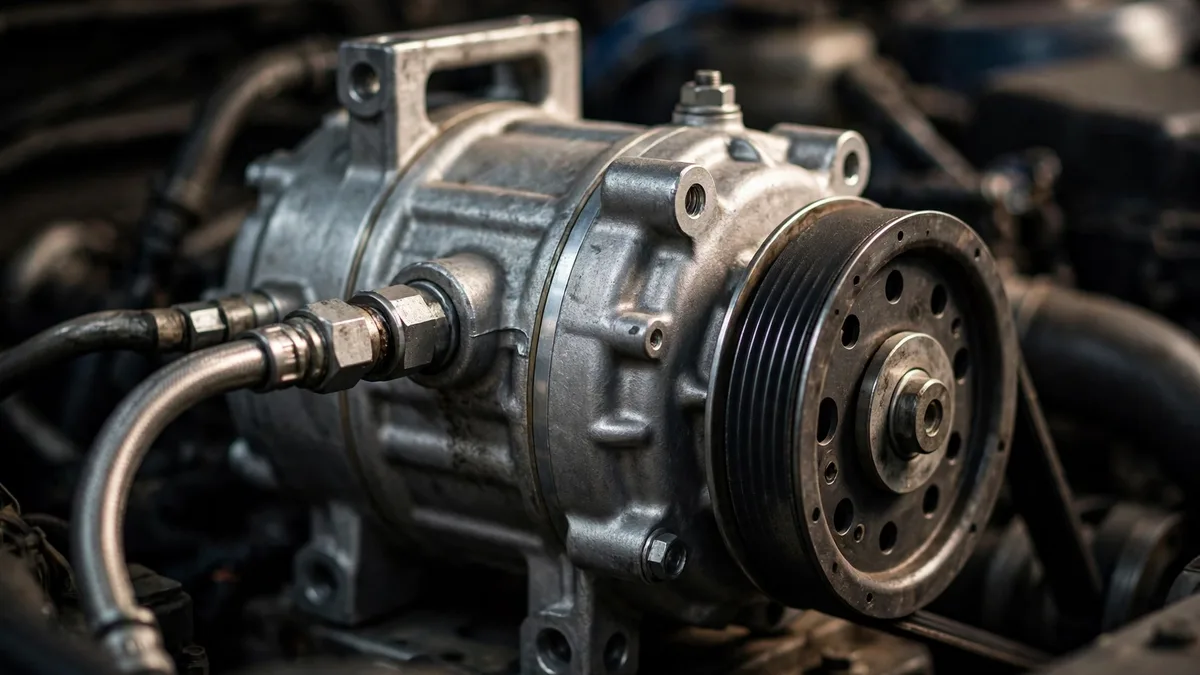
One BMW-specific detail changes how you diagnose these cars: most E90, F30 and G20 compressors are clutchless variable-displacement units (the Denso 7SEU family is common on the E90). There is no electromagnetic clutch clicking in and out. The pulley spins with the belt all the time, and the climate controller varies displacement — how much refrigerant is pumped per revolution — via a control valve and a PWM signal. Three consequences follow. First, you can’t diagnose by listening for a clutch click; watch for a pressure split on the gauges instead. Second, a failed control valve mimics a dead compressor, and the valve alone is far cheaper — always rule it out first. Third, some early E90 cars do have conventional clutch-type compressors (the Denso 7SBU family), so check which type is on your car before ordering parts.
The electric cooling fan deserves special attention because it causes a surprising share of “A/C works on the highway but not in traffic” complaints. It pulls air through the condenser (and the radiator) at idle and low speed. If it fails or runs slowly, high-side pressure climbs, cooling fades, and the controller may cut the compressor entirely to protect the system. On BMWs the engine computer can inhibit A/C operation when it detects a fan fault, so an A/C complaint plus a fan fault code is a strong lead — don’t overlook it.
10-minute checks before you spend money
Work through these in order. More than a few “dead A/C” complaints are resolved by step one or two.
- Confirm the basics. Snowflake button on (LED lit), both temperature dials or the iDrive setting to full cold, blower at a medium speed, and try recirculation mode. On cars with the red/blue temperature wheel, make sure it’s rolled fully to blue — the wheel can override the digital setting.
- Check the cabin (micro) filter. A clogged filter strangles airflow so badly it feels like weak cooling. If it’s overdue, replace it before anything else.
- Listen and look at idle. With the A/C on max, the electric cooling fan behind the radiator should be spinning. No fan, no condenser airflow, no cold air in traffic.
- Inspect the condenser. Look through the front grille for bent fins, plastic bags, leaves, or impact damage. Straighten gently with a fin comb and rinse with a low-pressure hose — never a pressure washer.
- Check fuses. The A/C clutch/control circuit, blower and fan each have fuses. A blown fuse is the cheapest possible fix; if it blows again immediately, there’s a short to find.
- Look for leak evidence. Oily, dirty residue on A/C lines, the condenser, or around service ports is refrigerant oil that escaped with the gas. UV dye from a previous service glows under a UV flashlight.
- Smell the vents. A sweet, chemical smell when the A/C first kicks on can indicate an evaporator leak; a musty smell points to a dirty evaporator or clogged drain instead.
- Verify the belt. The compressor is driven by the accessory belt — a slipping, glazed or missing belt affects the compressor along with everything else. See our serpentine belt guide for what to look for.
If everything above checks out and the air is still warm, it’s time for gauges. A manifold gauge set is the only way to see what the refrigeration side is actually doing — a low-side-only “recharge kit” gauge shows half the picture and can’t diagnose anything reliably.
Reading manifold gauge pressures
Connect the gauges with the engine off first, then start the engine, set the A/C to max cold with recirculation and the blower on high, and let it stabilize for a few minutes. Pressures move with ambient temperature, so the numbers below are typical ranges, not specifications.
| Condition | Low side (typical) | High side (typical) |
|---|---|---|
| Engine off, system settled (static) | Both gauges read the same — roughly 80–90 psi at 80°F ambient, rising with temperature | |
| A/C running, ~80°F ambient | 25–50 psi | 150–250 psi |
| A/C running, ~95°F ambient | 30–55 psi | 200–300 psi |
The static reading is a useful quick check: with the engine cold and off, both needles should sit at the same pressure, roughly matching ambient temperature on the gauge’s R134a temperature scale. If both read far lower than expected, the system is undercharged; far higher means overcharge or a heat-soaked car — recheck when cool.

With the system running, the relationship between the two readings points at the fault:
| Low side | High side | What it suggests |
|---|---|---|
| Low | Low | Undercharged system — leak is the prime suspect. Find and fix the leak; don’t just add refrigerant. |
| Normal | Low | Weak compressor or failed control valve — it’s circulating but not building pressure. |
| Low (near vacuum) | Low | Blockage — stuck expansion valve, or moisture frozen at the valve orifice. The dryer/desiccant is likely saturated. |
| High | High | Overcharged, or poor condenser airflow (dead fan, blocked fins), or air/moisture contamination. |
| Low side cycling normal ↔ vacuum | Fluctuating | Moisture in the system freezing and thawing at the expansion valve — matches “cold then warm” symptoms. |
One warning: on clutchless compressors, pressures respond to the control valve, not just charge level — a perfect charge can read oddly if the valve is stuck.
Compressor, condenser, evaporator and expansion valve failures
Once the cheap checks and gauge readings have narrowed it down, here’s how each major component fails on these cars and what gives it away.
Compressor
The compressor is the heart of the system and the most expensive single part in it. On most E90, F30 and G20 cars it’s a clutchless variable-displacement unit, which fails in two ways. Mechanical failure — worn pistons or bearings — shows up as a rattle or grinding that changes with engine speed, metal debris in the system, and no pressure split on the gauges. Control valve failure is sneakier: the compressor is mechanically fine but the valve regulating displacement sticks, so cooling fades as the car warms up or never develops. The valve can sometimes be replaced separately for a fraction of a new compressor’s price — rule it out before condemning the unit.
Early E90 cars with conventional clutch-type compressors add a third failure mode: the electromagnetic clutch coil burns out or the clutch gap grows too wide, so the clutch never pulls in. You can see it — the pulley spins with the belt but the clutch plate in front doesn’t. On any compressor replacement, the receiver-dryer (or desiccant bag, which lives in the condenser on many of these cars) must be replaced, and the system flushed if there’s any sign of metal debris — otherwise the new compressor inherits the old one’s contamination and fails early.
Condenser
The condenser sits at the very front of the car, ahead of the radiator, making it the most exposed component in the system. Stone strikes punch pinholes in the thin tubes; road salt corrodes the joints; fine fins clog with bugs and debris. A leaking condenser shows the classic oily residue at the damage point and a system needing recharge every few weeks. A blocked condenser is subtler: cooling is acceptable at highway speed but collapses in traffic, and the high-side gauge reads high. Modern parallel micro-tube condensers can’t be flushed effectively once contaminated — replacement is the fix, and it conveniently renews the integrated desiccant bag at the same time.
Evaporator
The evaporator lives inside the dashboard, making it the most labor-intensive part to replace — the dash usually has to come out. Evaporators fail by corroding and leaking, and the signature symptom is a faint sweet chemical smell from the vents when the A/C first starts, sometimes with an oily film on the inside of the windshield. Because the leak is buried, evaporator leaks are often diagnosed by elimination: the system is sound everywhere accessible but loses charge over weeks. A clogged evaporator drain is a different, cheaper problem — water drips onto the passenger footwell with a musty smell. Rule out the drain before assuming the evaporator itself has failed.
Expansion valve
The expansion valve meters liquid refrigerant into the evaporator. When it sticks shut, the low side pulls toward vacuum while the high side stays low — and you may see frost on the valve or the line right at it. When moisture freezes at the orifice, you get the classic intermittent pattern: cold for 15–30 minutes, then warm, then cold again after a rest. A saturated receiver-dryer is usually the root cause, so the dryer is replaced with any expansion valve work, followed by a long, deep vacuum to boil off residual moisture before recharging.
Repair difficulty and typical cost bands
Costs below are typical US bands from owner-reported invoices and parts pricing — your quote will vary with region, shop rate and parts choice. Every repair that opens the system needs a professional vacuum and recharge at the end, which is baked into the shop figures.
| Repair | DIY difficulty | Typical cost band |
|---|---|---|
| Evacuate + recharge (R134a) | Moderate — a top-up can is easy, but a proper evac/recharge needs a vacuum pump and scale | DIY $30–$60 / Shop $150–$300 |
| Evacuate + recharge (R1234yf, G20) | Not recommended — refrigerant is expensive and mildly flammable | Shop $250–$500 |
| Compressor replacement | Moderate mechanical job, but the system must be professionally evacuated and recharged | DIY $400–$800 / Indy $900–$1,300 / Dealer $1,400–$2,000 |
| Condenser replacement | Moderate — bumper/grille area access, then pro evac/recharge | DIY $180–$350 / Indy $500–$850 / Dealer $800–$1,200 |
| Expansion valve + dryer | Pro recommended — buried location plus deep vacuum required | Indy $400–$700 / Dealer $700–$1,100 |
| Evaporator replacement | Pro only — dashboard removal | Indy $1,500–$2,500 / Dealer $2,200–$3,500 |
The chart below visualizes the shop-price bands above on a common scale — the difference between a recharge and an evaporator is an order of magnitude, which is why diagnosis comes before parts.
Typical shop cost bands
Scale $0 – $3,500 · typical US bands, not quotes
Every figure above is a typical band from the table, labeled in dollars. DIY bands are parts only and still require a professional evac/recharge.
A word on DIY: a compressor or condenser swap is mechanically straightforward for an experienced home mechanic, but the system must be professionally recovered before you open it and vacuumed and charged by weight afterward. Factor a shop visit into every DIY A/C repair — and never crack a line on a charged system to “let it out.”
Refrigerant handling: the legal bit
In the US, Section 608 of the Clean Air Act prohibits intentionally venting refrigerant — including HFC substitutes like R134a and R1234yf — while servicing motor vehicle A/C systems. The EPA’s regulatory requirements for MVAC system servicing spell out the venting prohibition and the recovery rules that apply. Practically, this means any repair that opens the refrigerant circuit must start with professional recovery into proper equipment.
A few related cautions. R1234yf (G20) is mildly flammable, so it demands extra care and dedicated equipment — another reason G20 A/C work belongs at a shop. The two refrigerants use different service fittings precisely to prevent cross-contamination, and their compressor oils are not interchangeable. And “leak sealer in a can” products are a gamble: they can clog the expansion valve and contaminate a shop’s recovery equipment, turning a simple leak repair into a much bigger bill.
A/C troubleshooting FAQ
Why is my BMW 3 Series A/C not blowing cold all of a sudden?
A sudden total loss of cooling usually means an electrical or control issue — a blown fuse, a failed relay, a faulty refrigerant pressure sensor, or a large leak that tripped the low-pressure cut-out. Gradual fade over weeks points to a slow leak instead. Check fuses and the snowflake button first, then have the system’s static pressure tested.
Can I recharge my BMW 3 Series A/C myself?
On R134a cars (E90, F30) a DIY top-up can is physically possible, but it’s a bandage: low refrigerant means it escaped somewhere, and the leak still needs finding. A proper service evacuates, vacuum-tests, leak-checks and charges by weight. On G20 cars with R1234yf, leave it to a shop — the refrigerant is costly and mildly flammable.
What refrigerant does my 3 Series use?
E90 (2005–2013) and F30 (2012–2019) use R134a; the G20 (2019 and newer) uses R1234yf. The under-hood label states your car’s exact type and charge weight. Never mix refrigerants or oils — the service fittings are deliberately different to prevent it.
Why does my A/C work on the highway but not in traffic?
At speed, ram air flows through the condenser; in traffic, the electric cooling fan has to do that job. If the fan is dead or slow, high-side pressure climbs and cooling collapses at idle. Check that the fan spins with the A/C on max, and inspect the condenser fins for debris.
How do I know if it’s the compressor or just low refrigerant?
Manifold gauges tell the story: low pressure on both sides means an undercharged system (find the leak). Normal low-side with low high-side pressure — or no pressure split at all when the A/C switches on — points to a weak compressor or a failed control valve on clutchless units. Noise from the compressor area and metal debris confirm mechanical failure.
Diagnose in order — controls and airflow first, then charge level, then components — and you’ll rarely pay for a part you didn’t need. Next up: the complete 3 Series guide, and our battery discharge warning guide — low voltage causes its own share of climate-control weirdness.